
Sign in to a computer managed by Intune
This manual describes the process of logging in to a Windows computer that is client-managed with Intune. What you should consider and what choices you can make. Note that this only applies to personal computers.
Step 1 – Start the computer
The first thing you should think about is that your computer is connected to the internet via a network cable if you are on Campus, this can be directly via a network cable, via a dock, via an adapter or via a monitor with docking function. It is also important that you have your phone or your MFA token with you as MFA is required to log in.
When you start up a personal computer client managed with Intune, you will first be asked to make choices when it comes to language.
When you then reach a page that shows the Umeå University logo and a prompt to log in, proceed to Step 2.
Step 2 – Log in
When you see the image below, log in with Umu-id@ad.umu.se (e.g. abcd0001@ad.umu.se) and click Next.
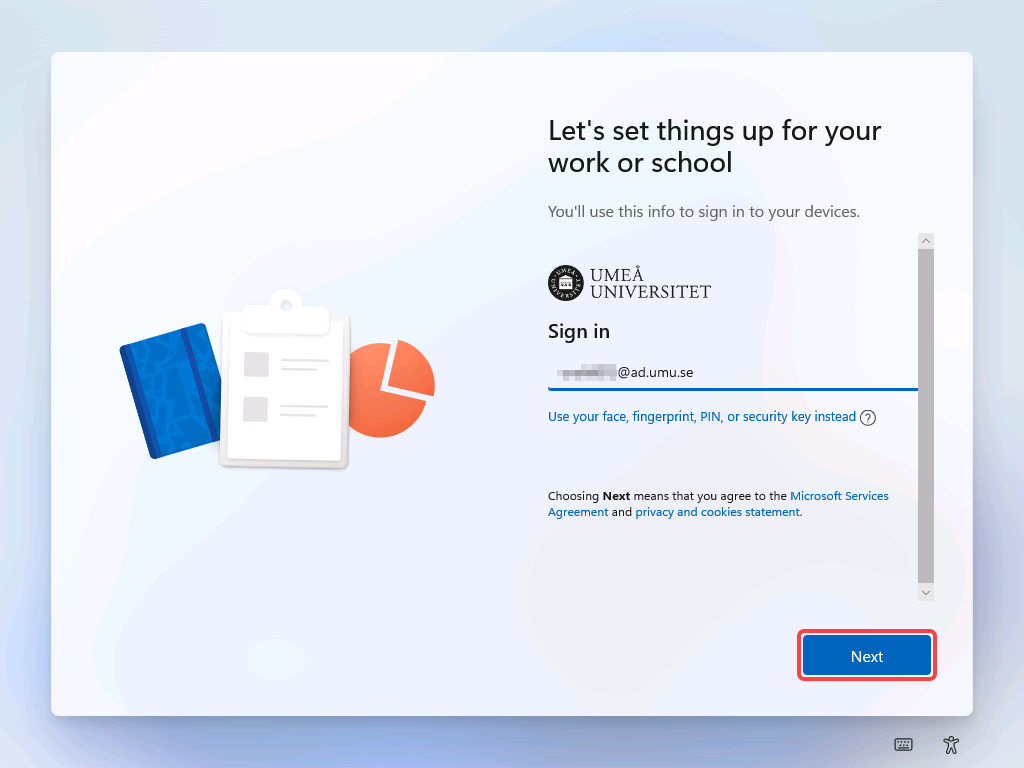
Then follow the on-screen instructions to complete the login and wait for any configuration or update.
When you get to a screen asking if you want to restore a backup, proceed to Step 3.
If you are a new user at Umeå University, proceed to Step 4.
Step 3 – Restore Backup
This only applies to you who previously had a client-managed computer at Umeå University. It is important to remember that Windows Backup for Organisations is NOT a backup of files.
See the list below of what is included in the backup.
- Your Windows settings
E.g. appearance (theme, background), language, accessibility settings, and some system preferences.
- List of apps from Microsoft Store
Which apps you have installed are saved, so they can be easily restored on a new or restored PC.
- Start menu and app layout (to some extent)
Your pinned apps and basic layout can be restored for a recognisable work environment.
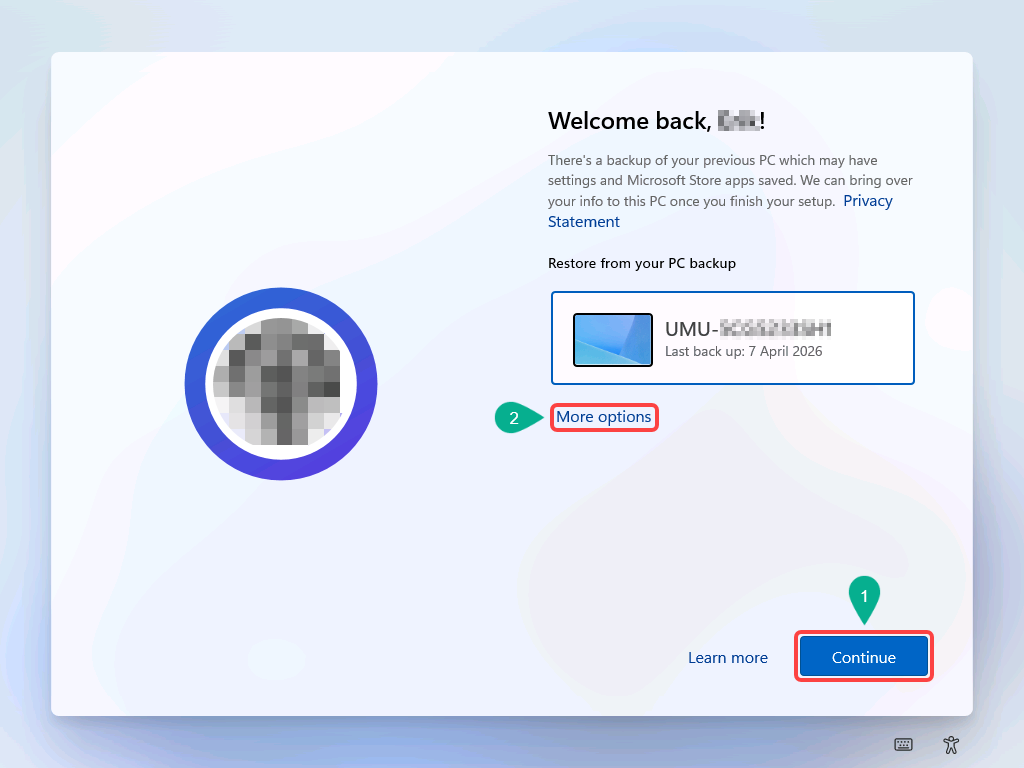
If you have a backup enabled for a previous computer, you will be greeted by the image below. Select the computer you want to use if you see multiple, then click Continue 1️⃣ and follow the on-screen instructions.
Then proceed to Step 4.
If you do NOT want to use backup, click More options 2️⃣.
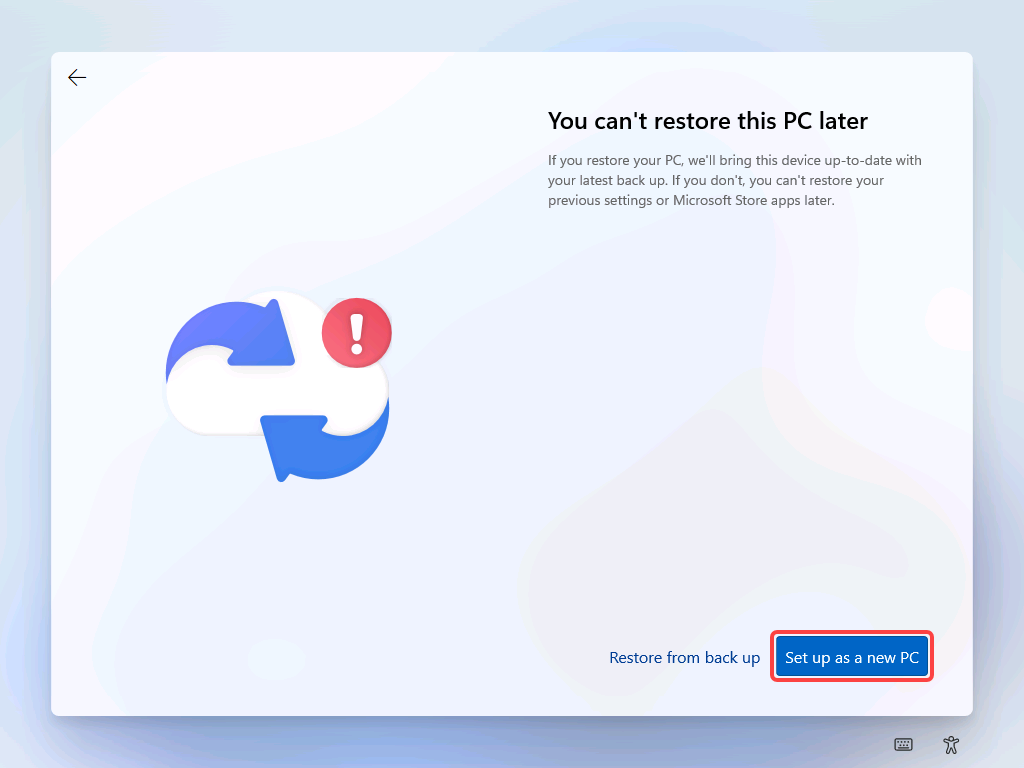
If you have chosen not to use the backup, you will be greeted by the image below after clicking More options.
Then click on Set up as a new PC and follow the instructions on the screen.
If you changed your mind, click Restore from back up and you will return to the previous selection.
Step 4 – Log in again
After you have made the selections above, or you are a new user at UMU, you will need to log in again and you will be greeted by the login screen shown below.
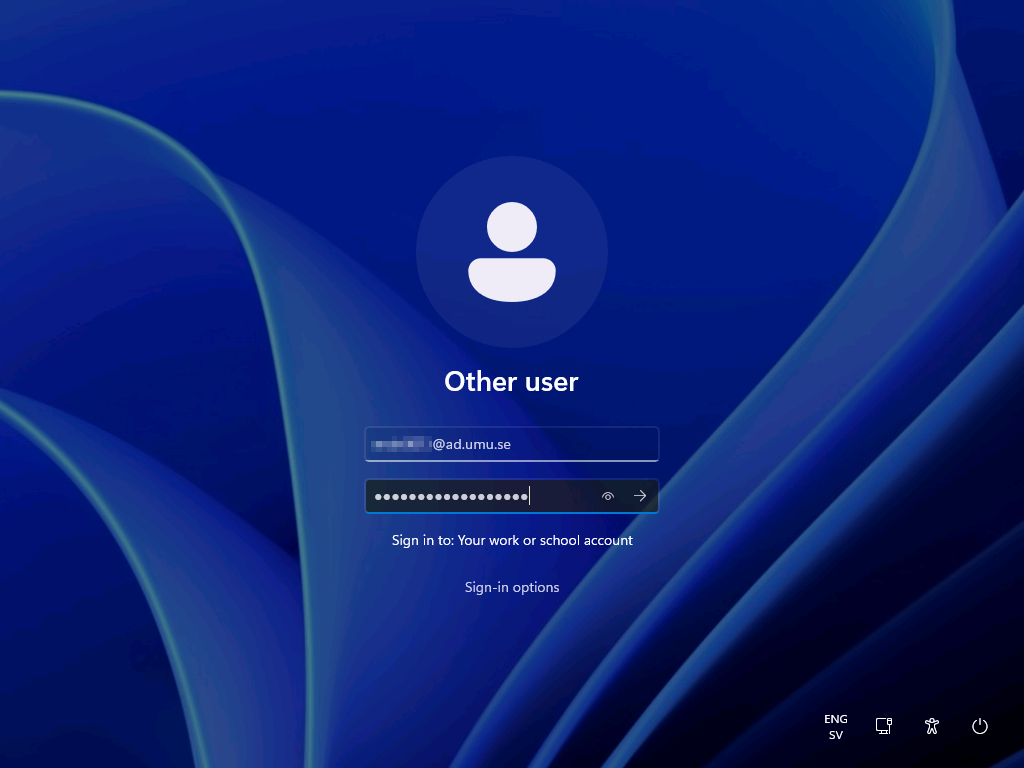
Here it is important that you log in again with Umu-id@ad.umu.se (e.g. abcd0001@ad.umu.se), but this time you should also write the password immediately afterwards.
Finish by pressing the Enter key or by clicking the Arrow in the password field.
Then follow the on-screen instructions. You will need to confirm the login via MFA, among other things.
Then wait for the configuration to complete, see the image below on how it might look.
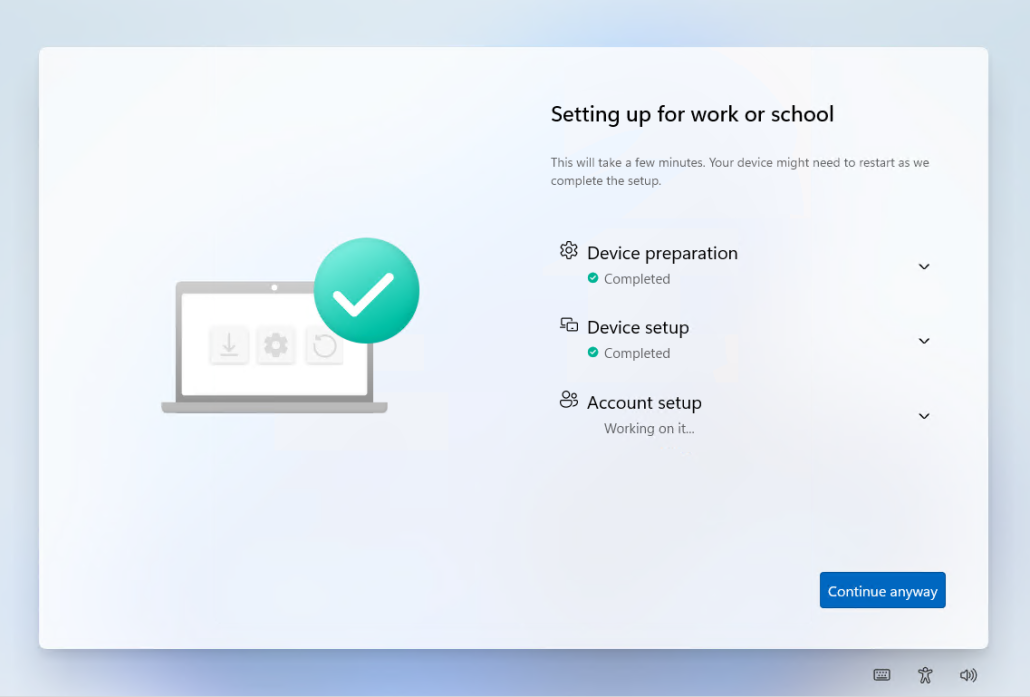
Depending on whether the computer is prepared by an IT technician or not, this process can take varying amounts of time.
When you are prompted to enable Windows Hello, see Step 5.
Step 5 – Enable Windows Hello
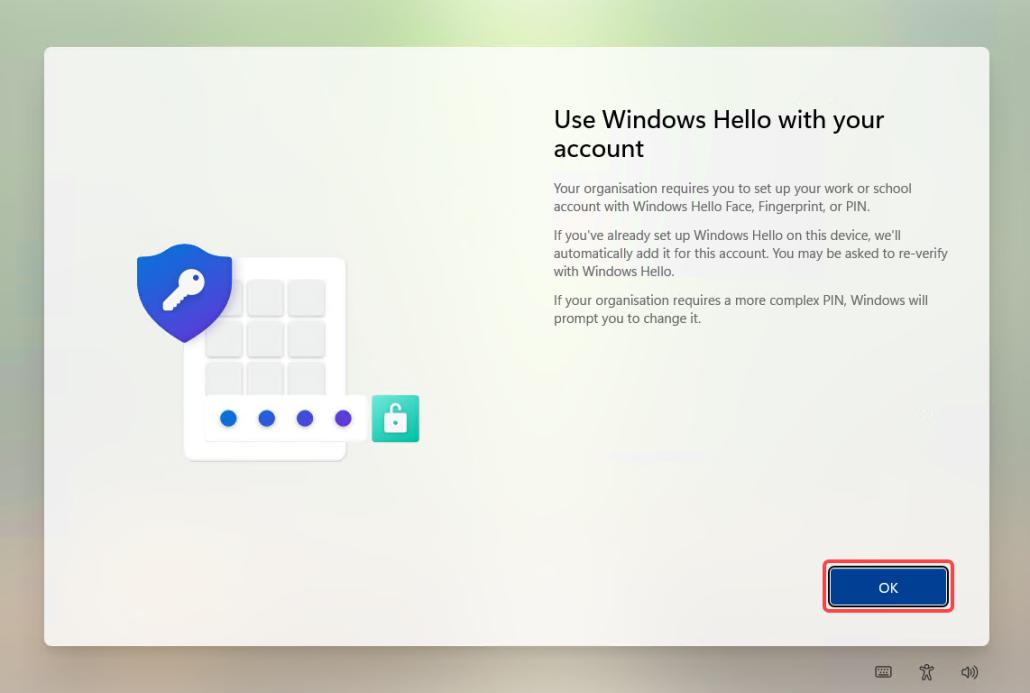
Once setup is complete, you will be prompted to enable Windows Hello. This is a requirement and cannot be skipped.
However, there are different choices you can make depending on whether or not your computer is equipped with a webcam that supports Windows Hello or a fingerprint reader.
If you don’t want to use it, you can skip it, but you will need to choose a PIN code. The PIN code needs to consist of at least 6 digits, but you can also make choices there, see the information on the screen.
The image below shows what it looks like when you have to choose a PIN code. Click OK to proceed.
Once you’re done activating Windows Hello, the Windows desktop should appear and you’re ready to start using your computer.