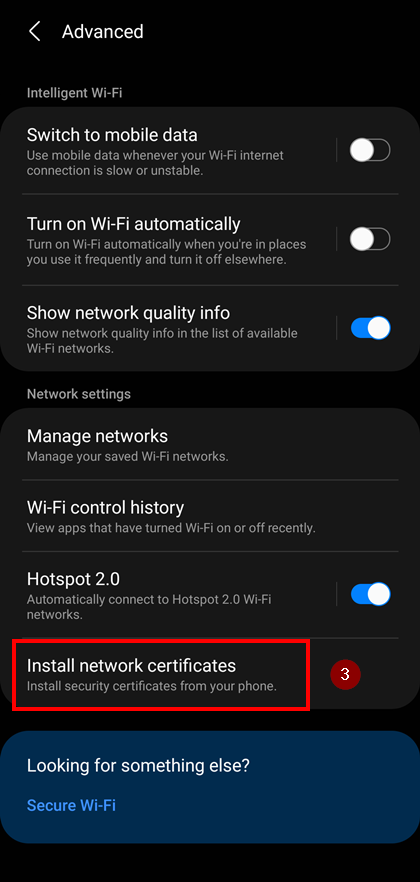
Install eduroam manually
Should the “automatic” method of installing eduroam on your device not work, there are manuals below for how to do it via a more manual approach.
Mobile menu:
Windows | macOS | Android | iOS / iPadOS | Chromebook | Ubuntu
This guide is written for manual installation of the certificates needed to connect to the eduroam wireless network on a PC running Windows.
NOTE: This manual is written with the help of a Windows PC running Windows 11 using the 22H2 update and the Edge browser but it should work for earlier versions of Windows 11 and Windows 10 and other browsers but some of the images might not look the same for you if you are using a different version of Windows or another browser. Also note that Window 8.1 and earlier is not compatible with this guide.
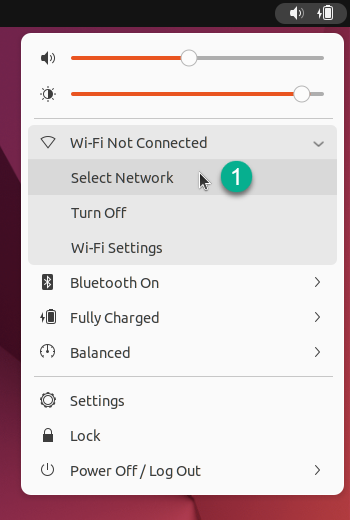
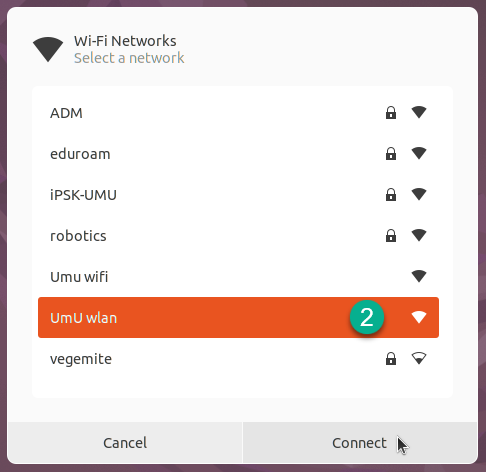
Step 1
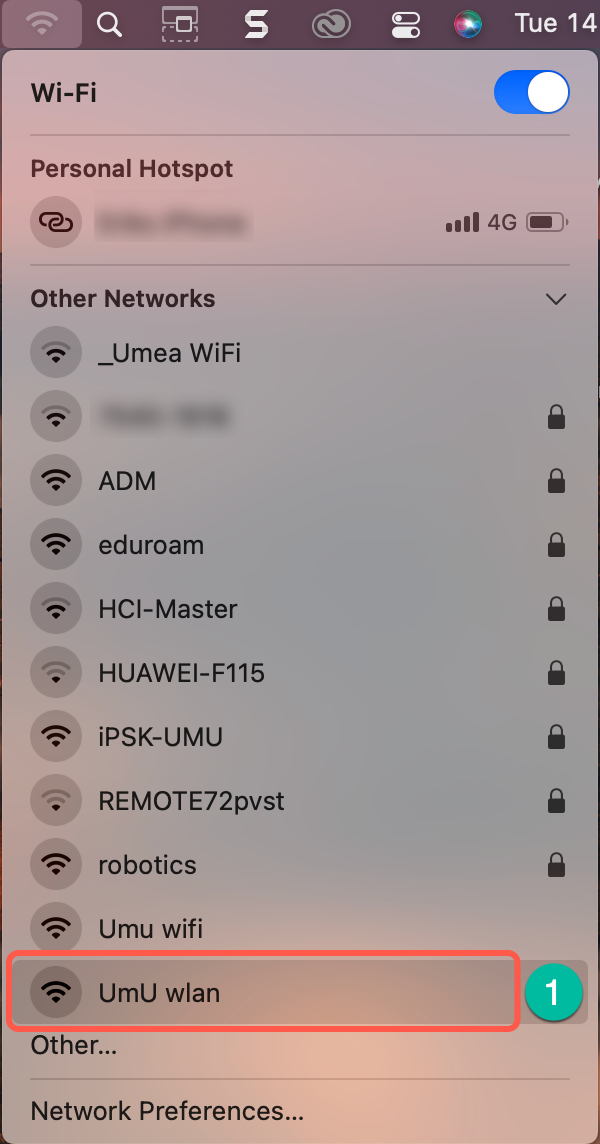
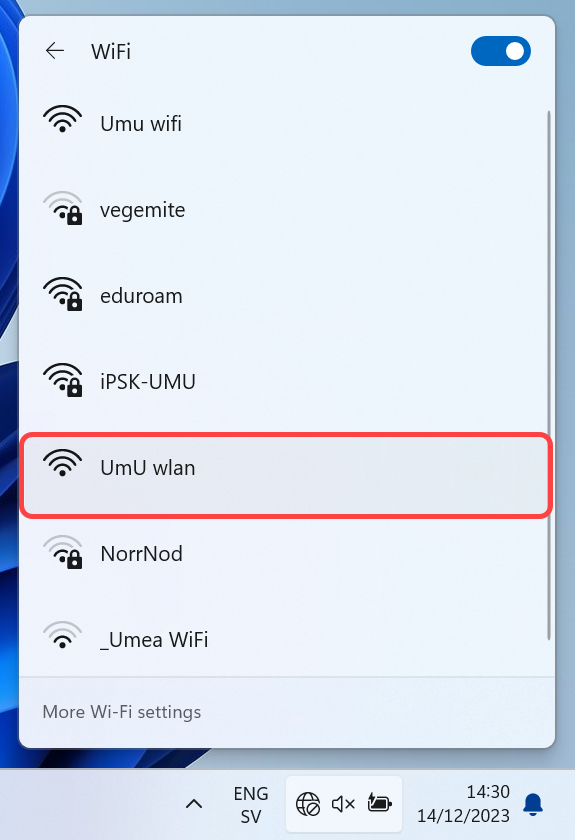
To download the certificates, you need to be connected to the internet. Our recommendation is that you connect to the network called UmU wlan. Select UmU wlan in the network list and follow the on-screen instructions.
If nothing happens after connecting, please refer to Access to wireless guest network at Umeå University.
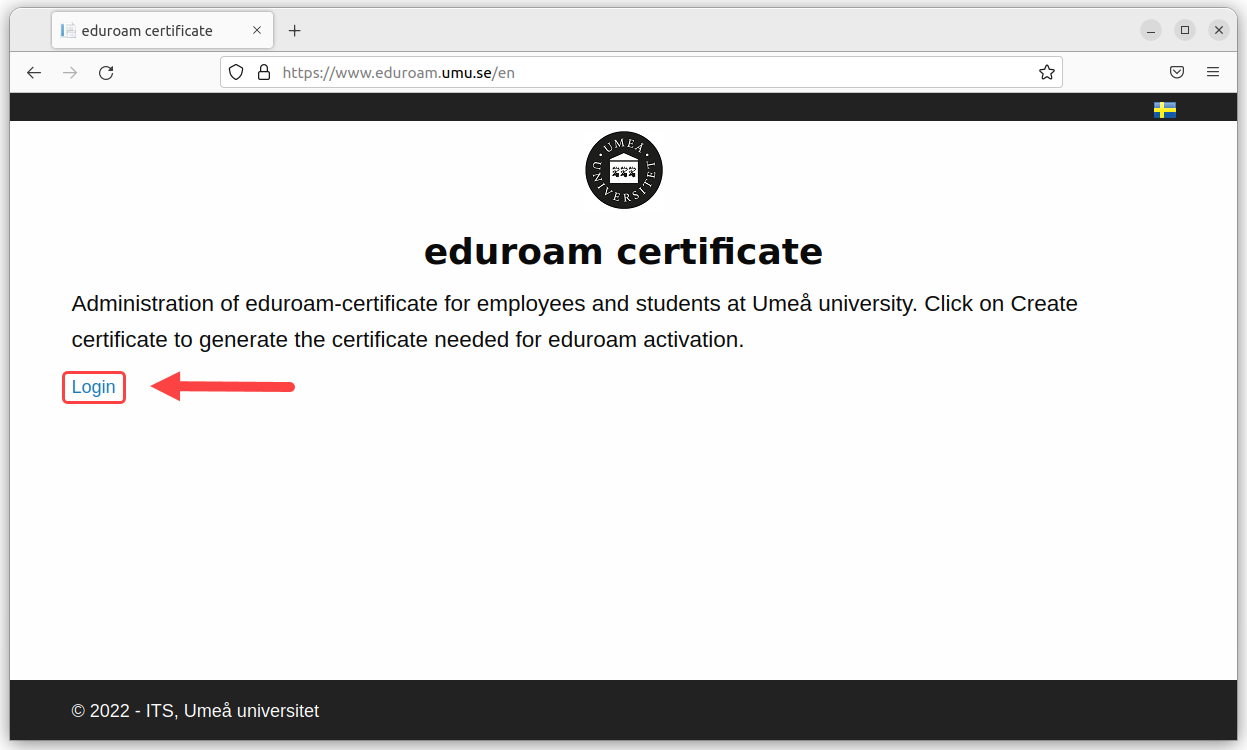
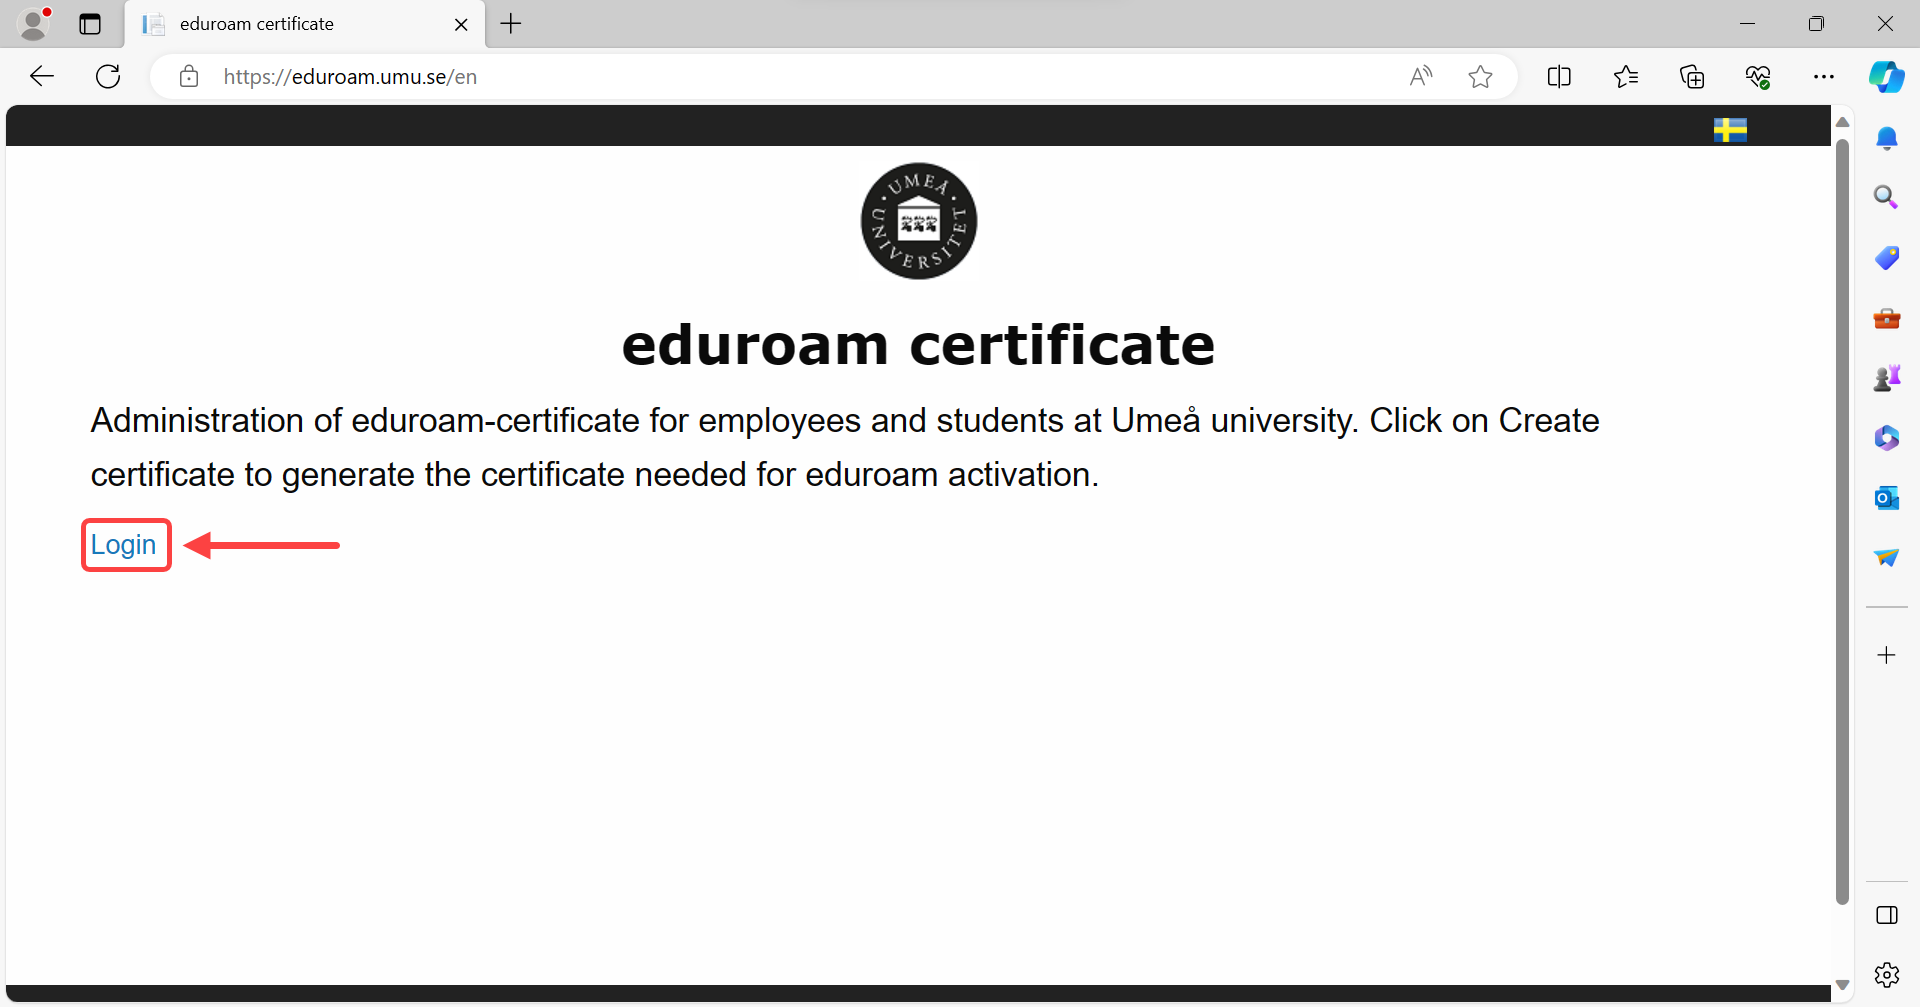
Step 2
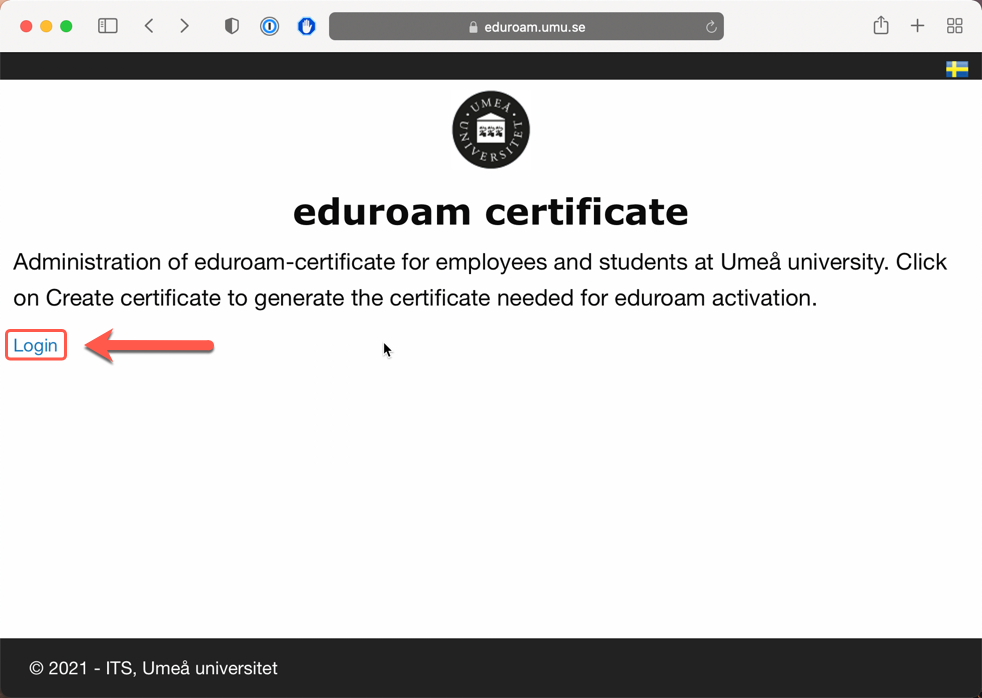
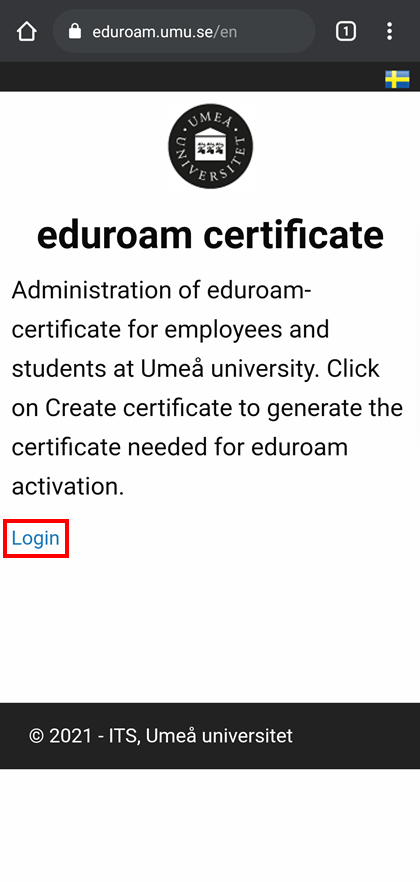
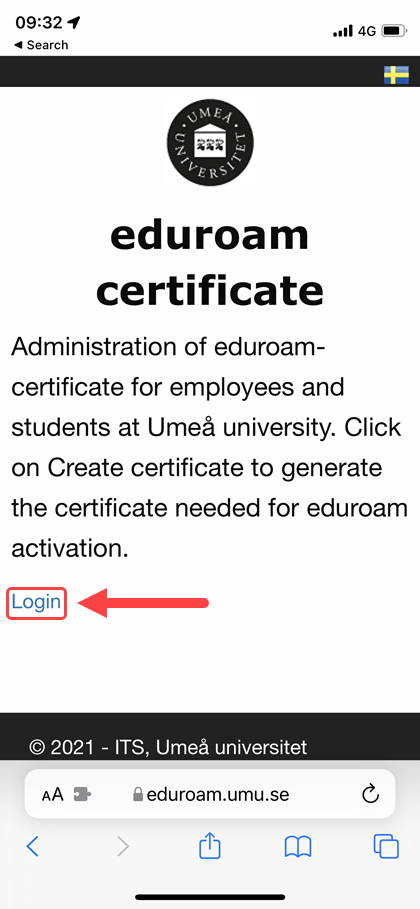
Start Edge and go to http://www.eduroam.umu.se
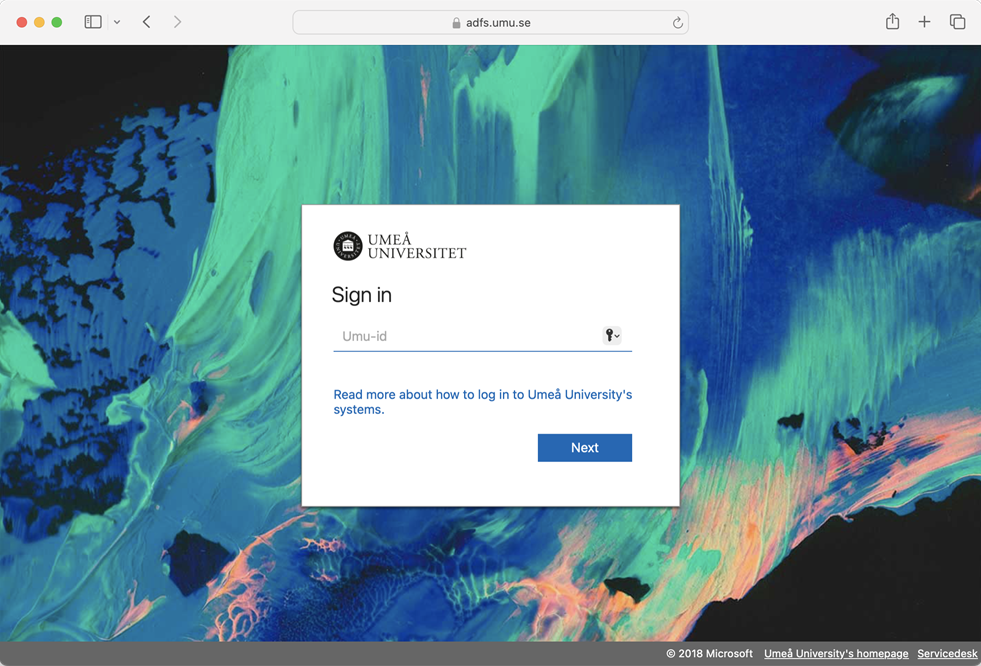
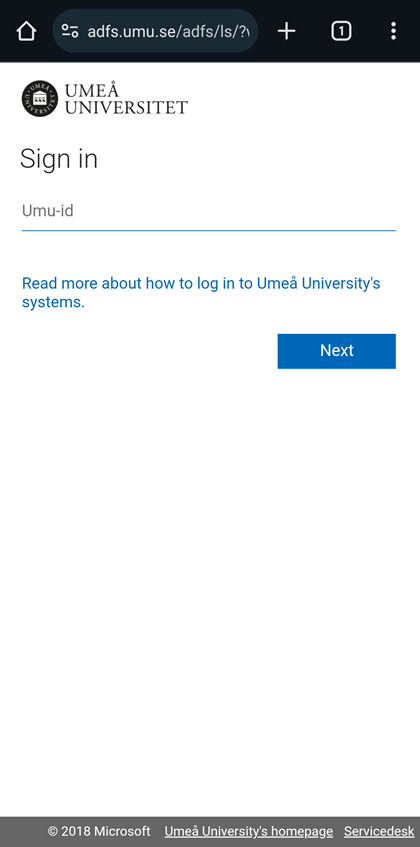
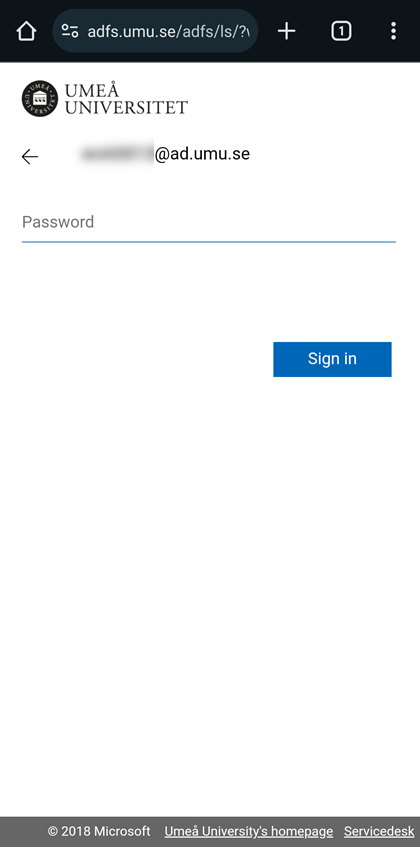
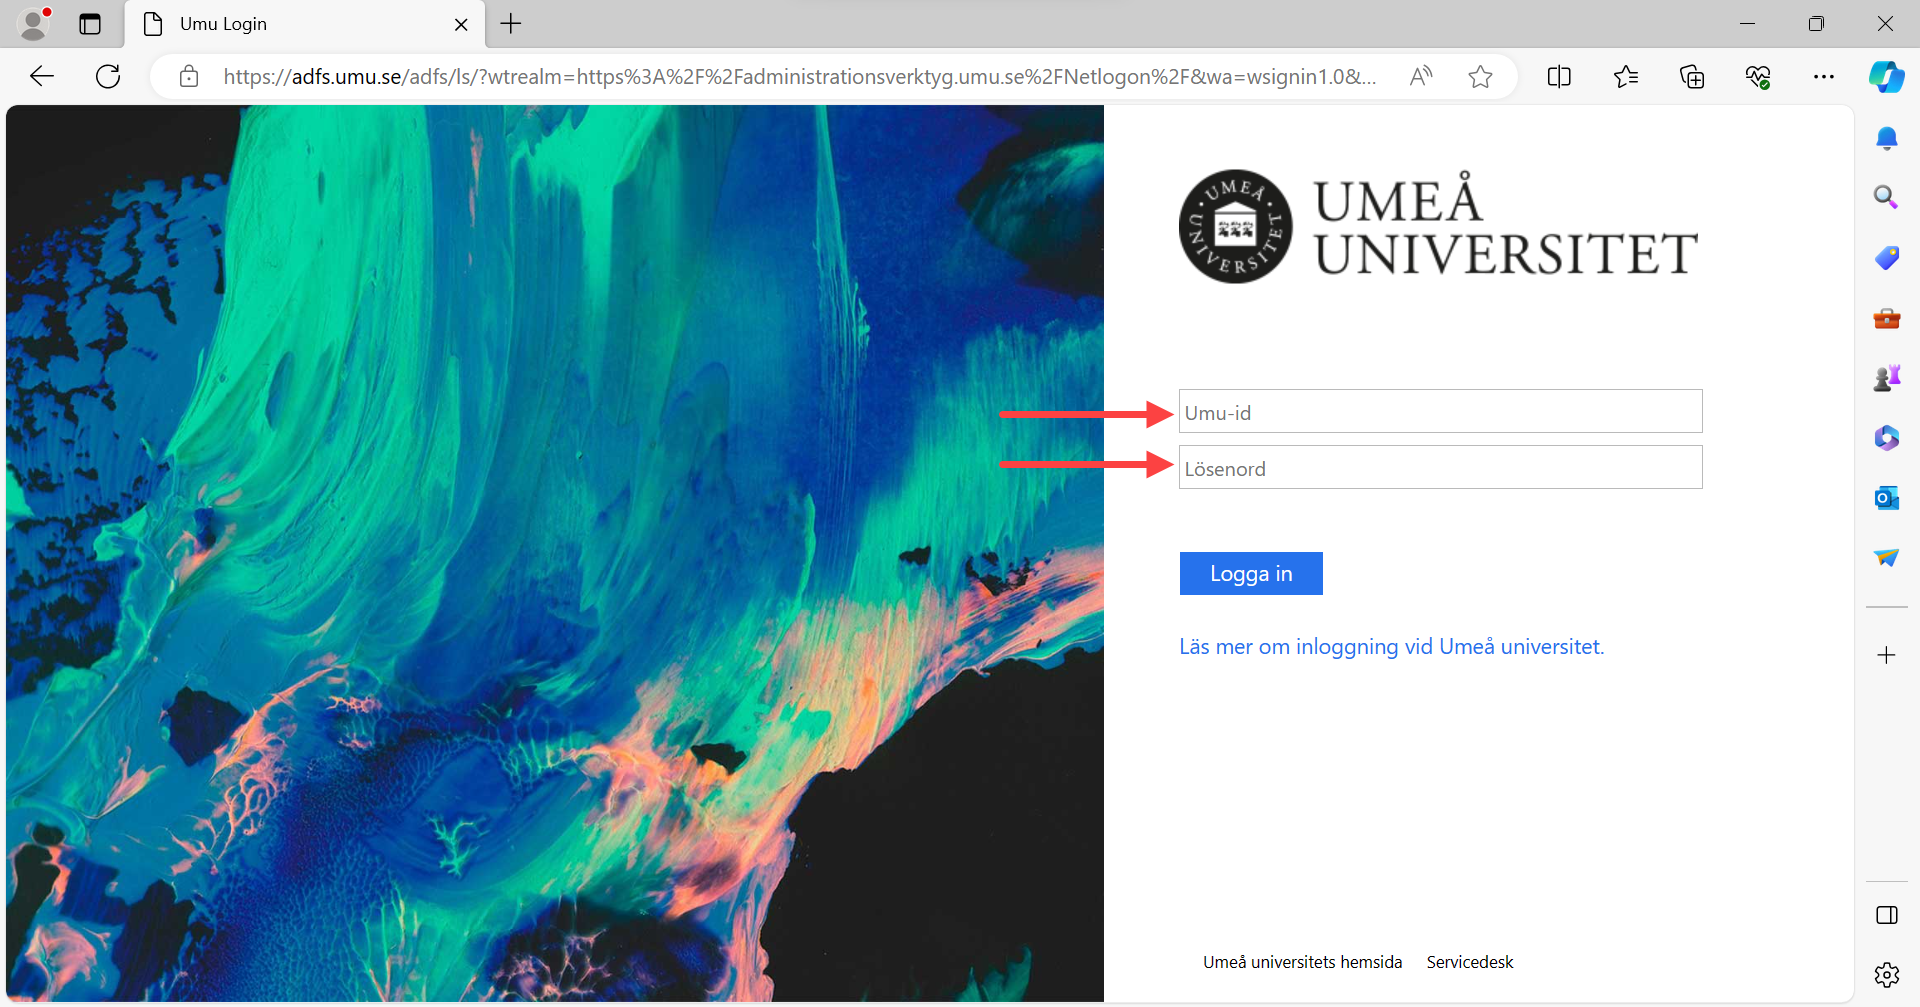
Log in with your Umu-id and password.
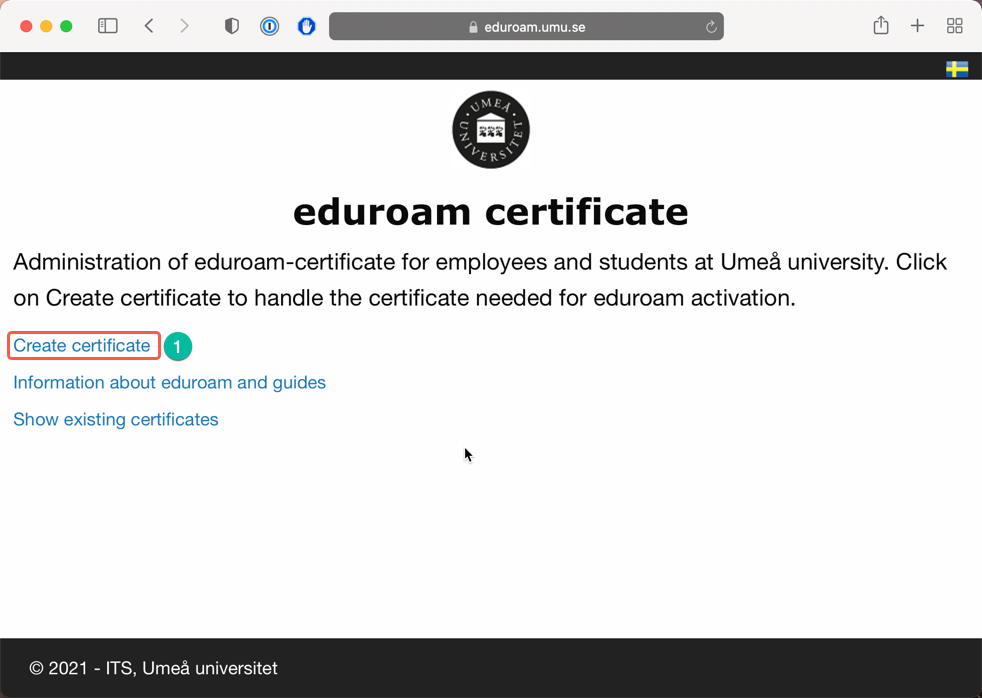
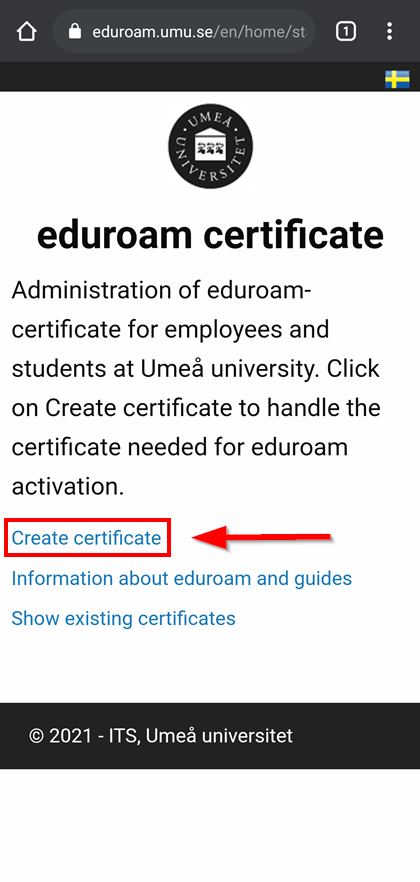
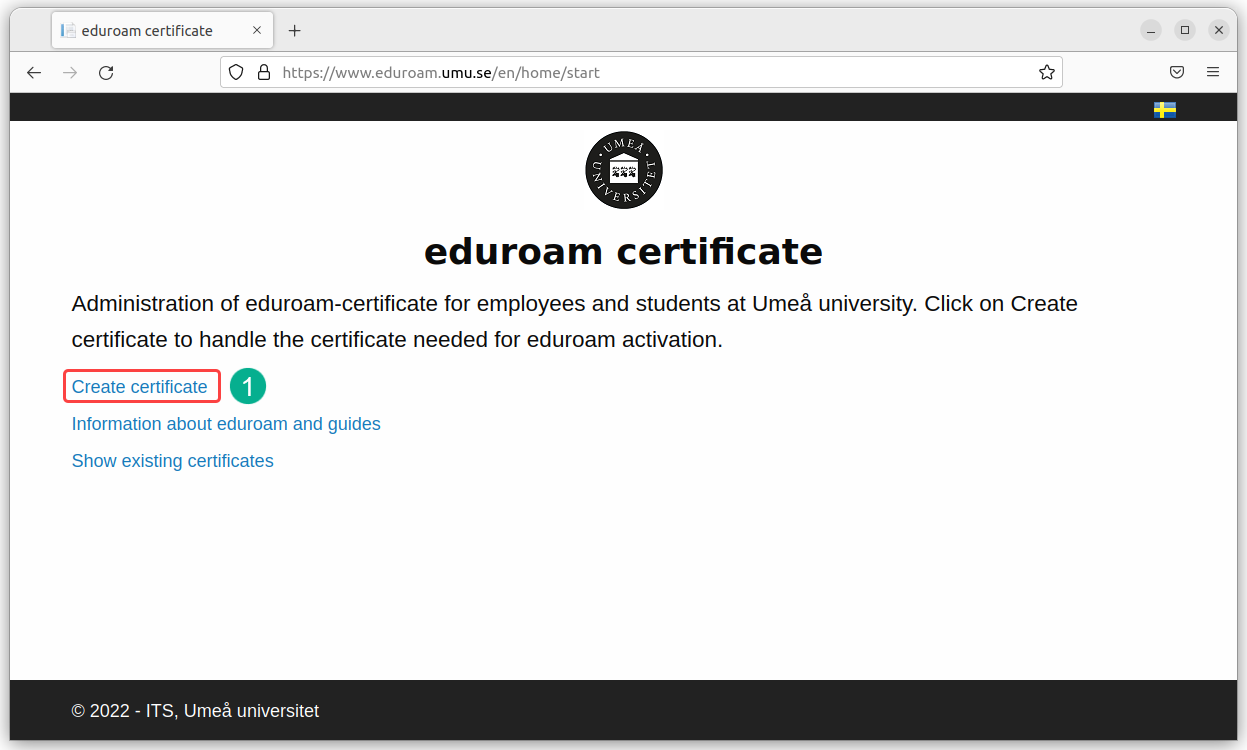
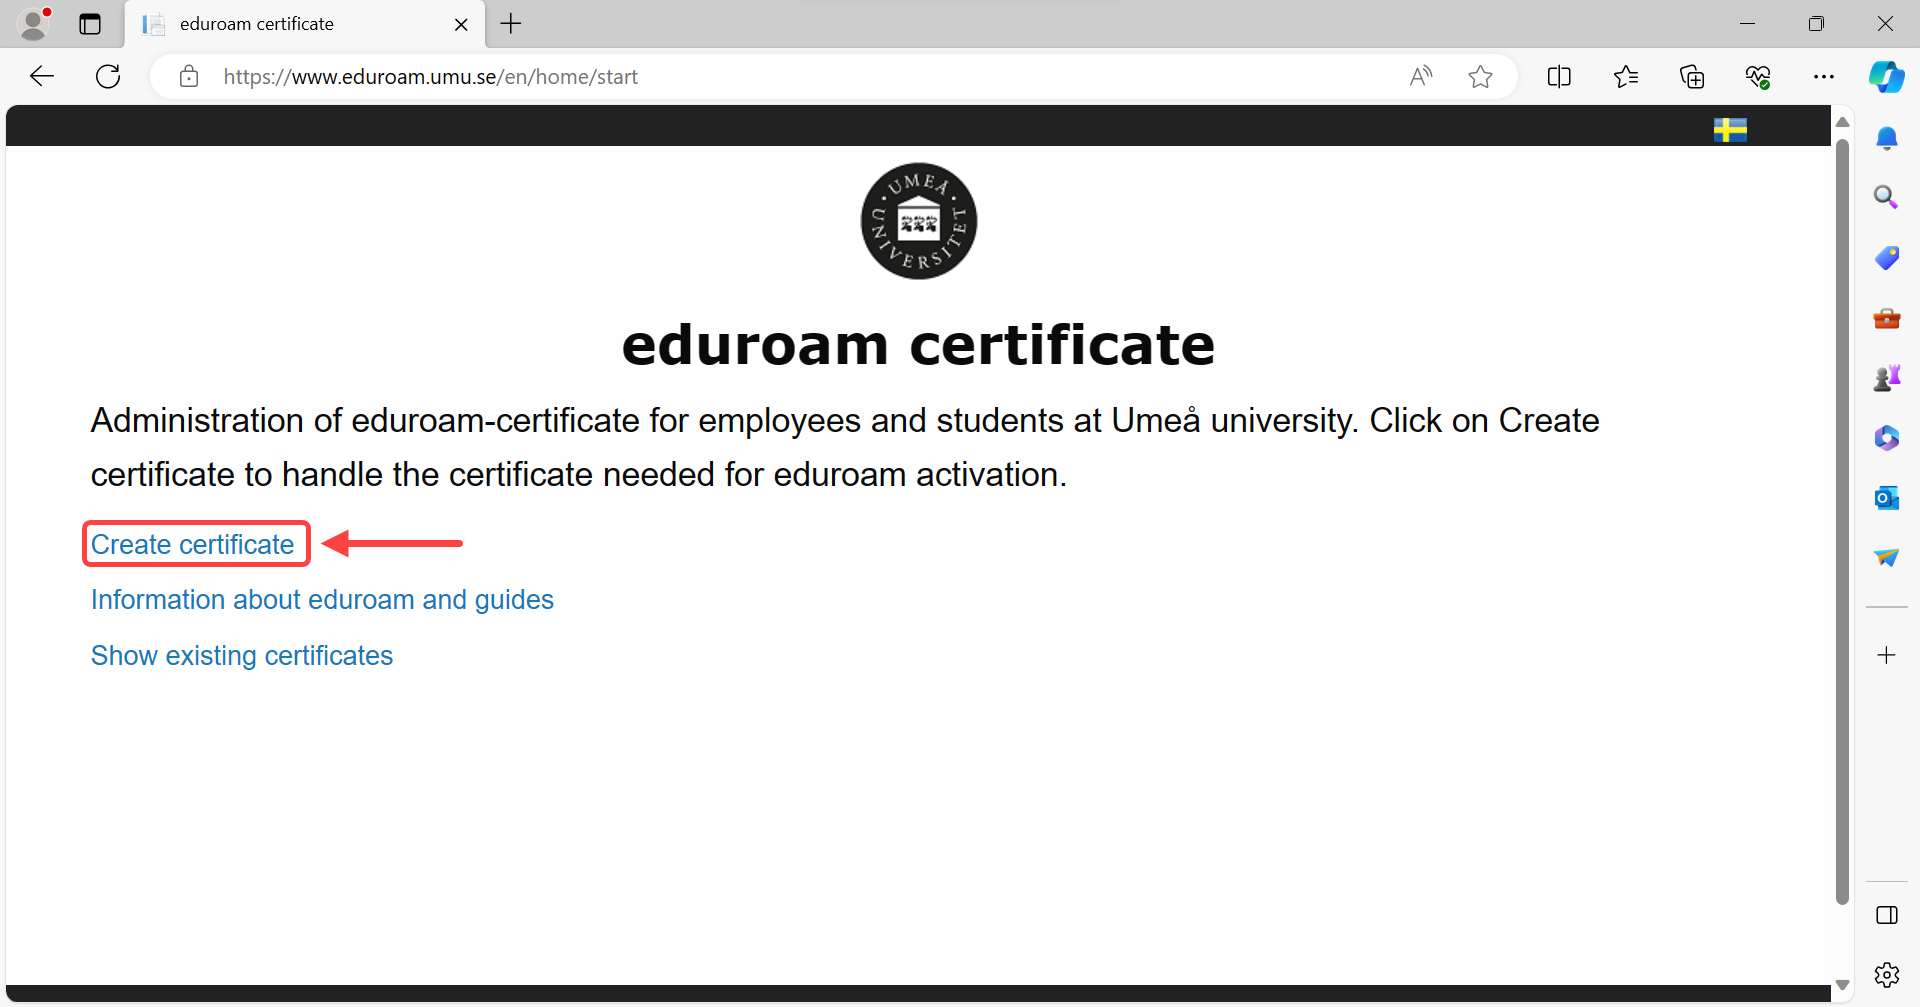
Step 3 – Create Certificate
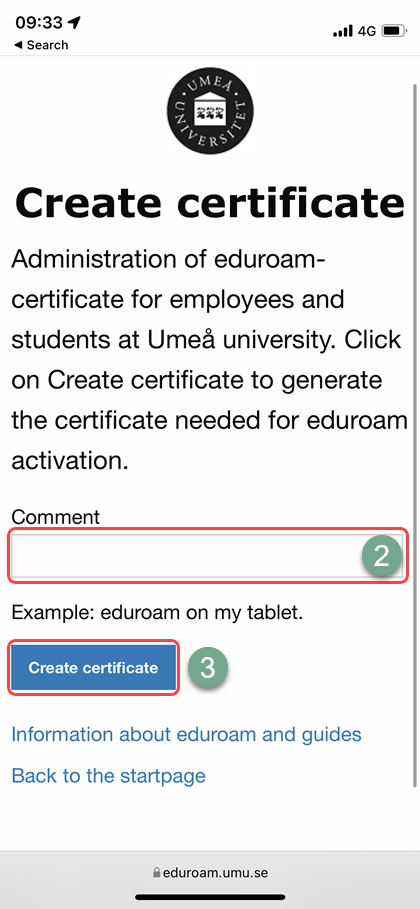
Once logged in, you will need to create your certificate. Click Create Certificate.
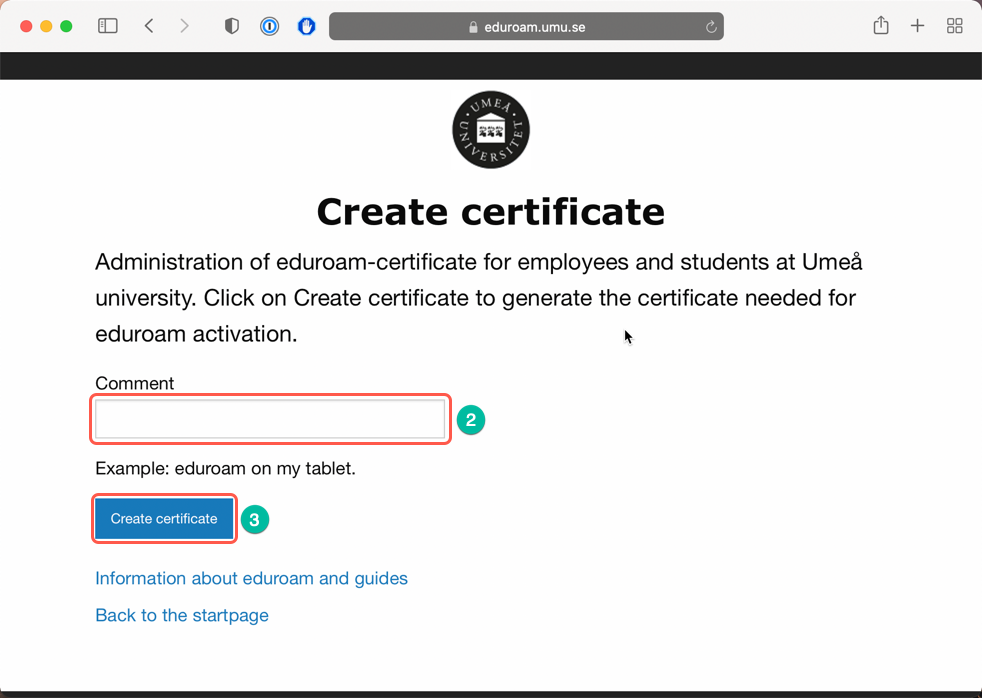
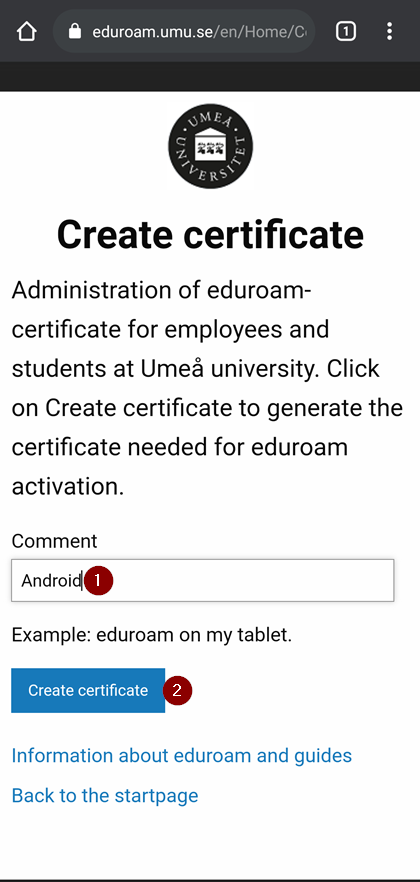
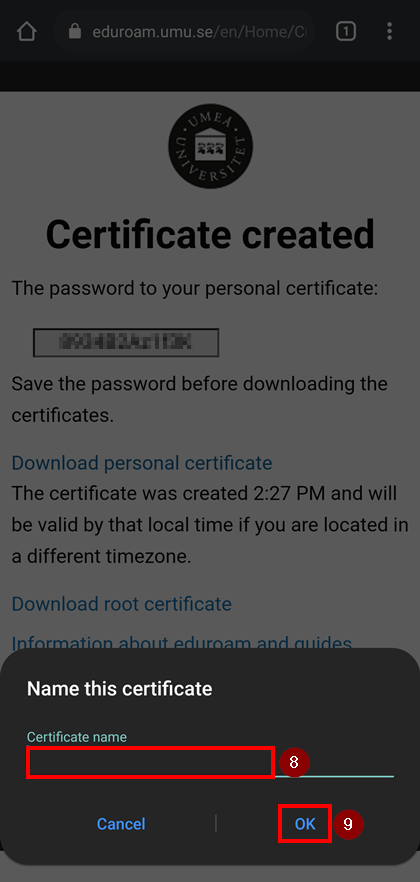
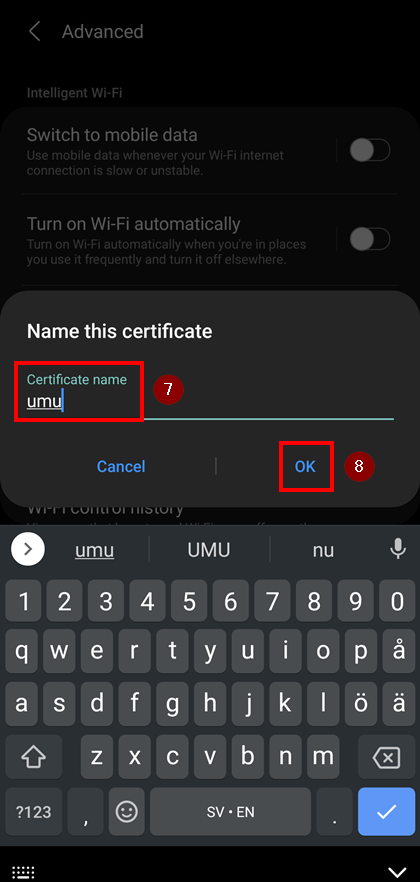
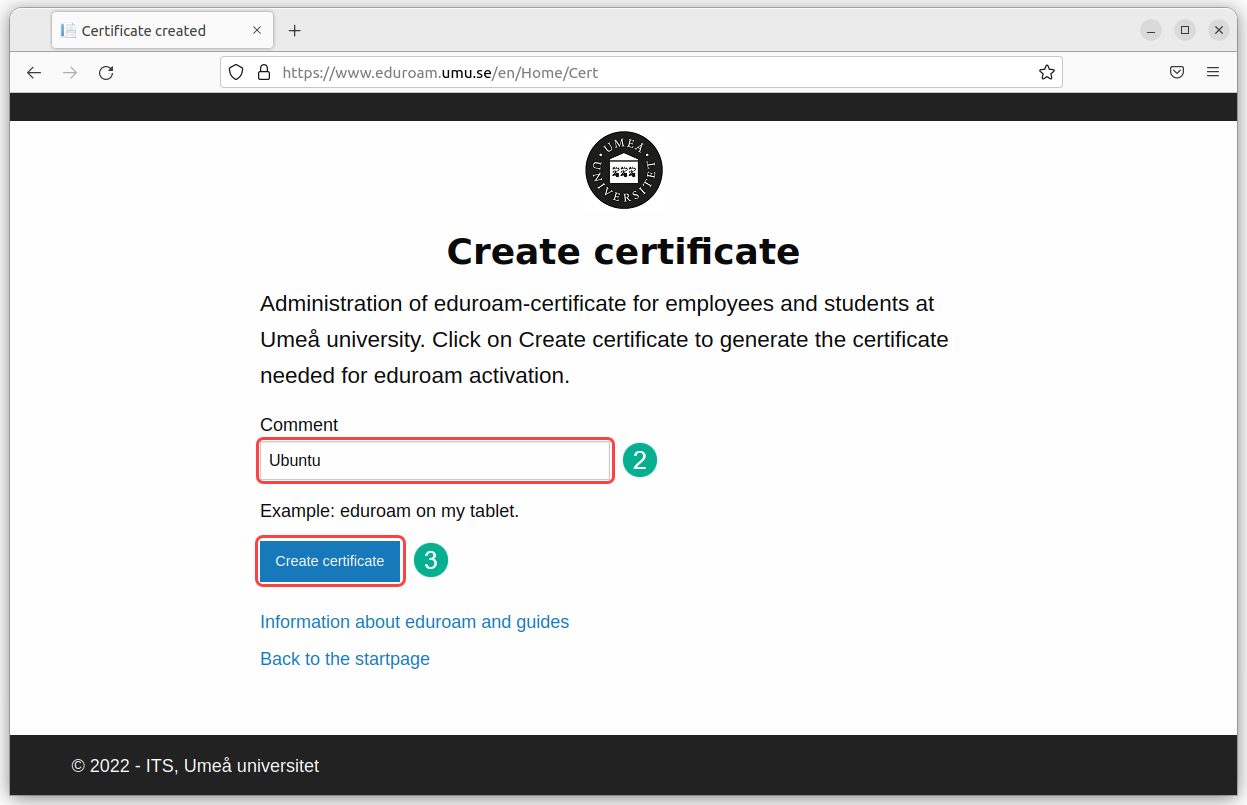
On the next page, you need to give the certificate a “name”,
then click on the blue Create Certificate button.
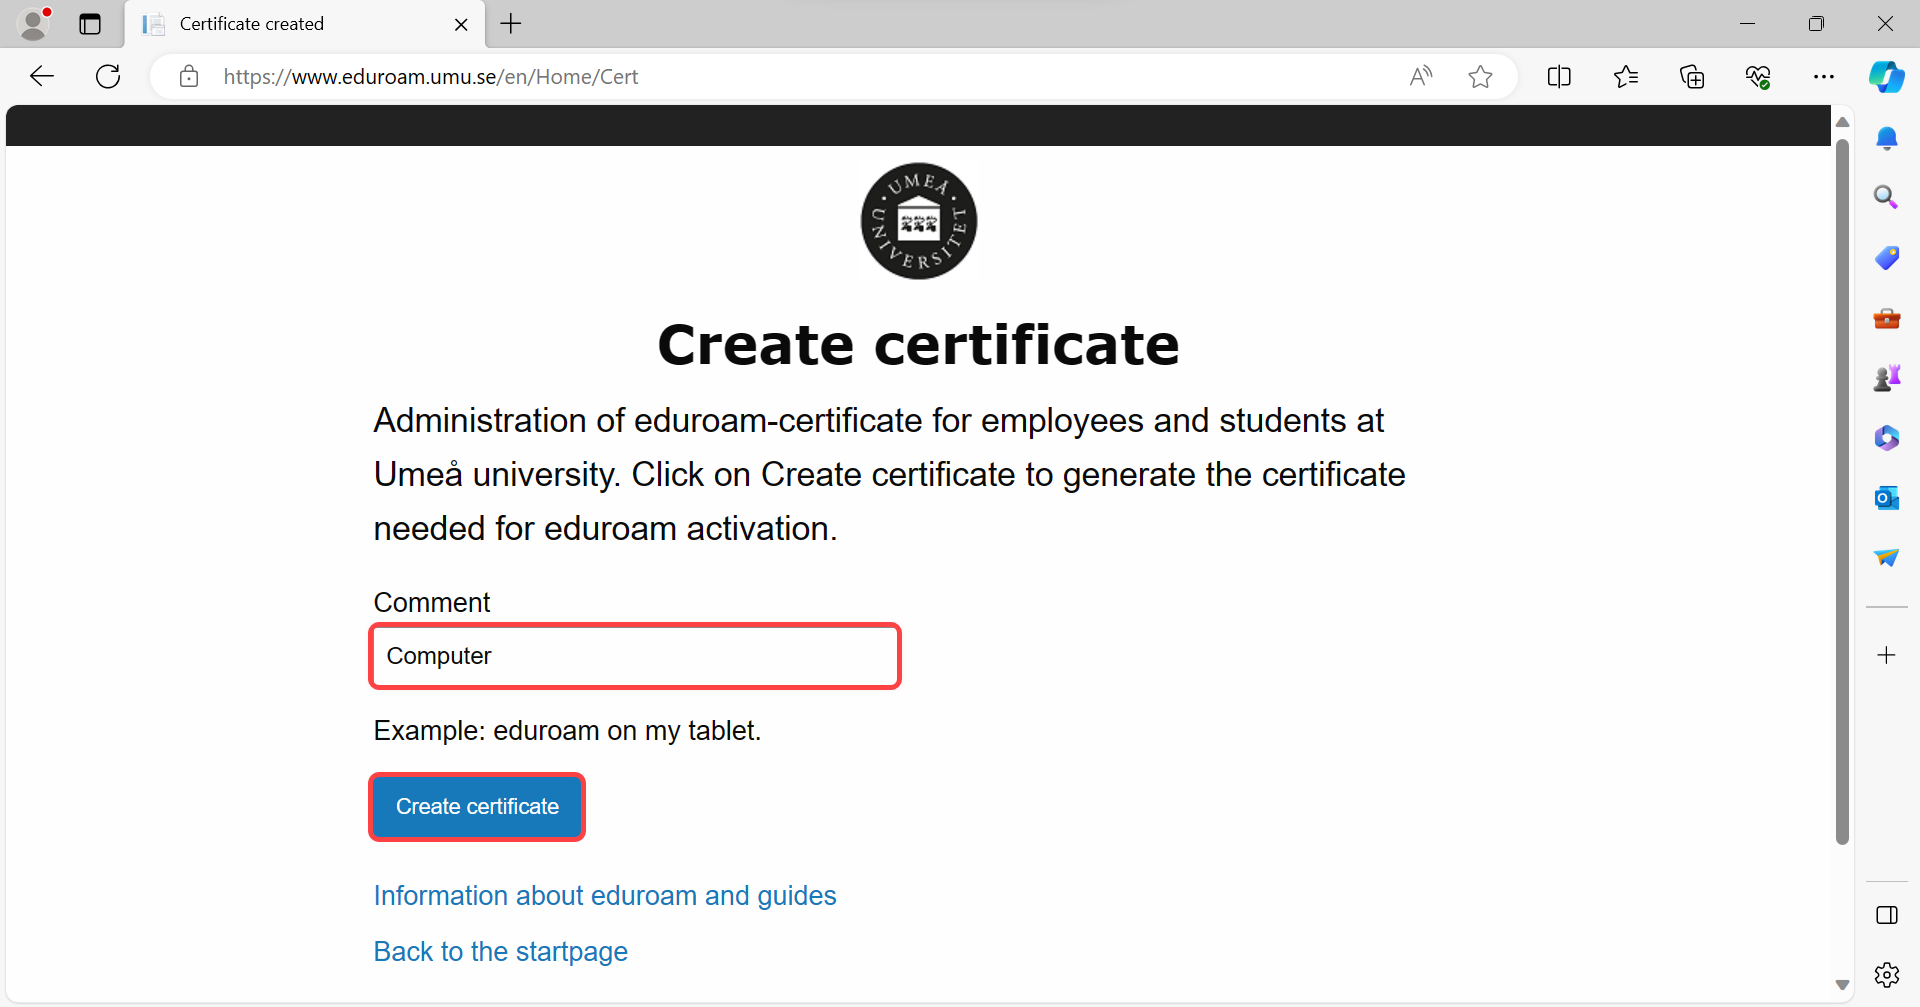
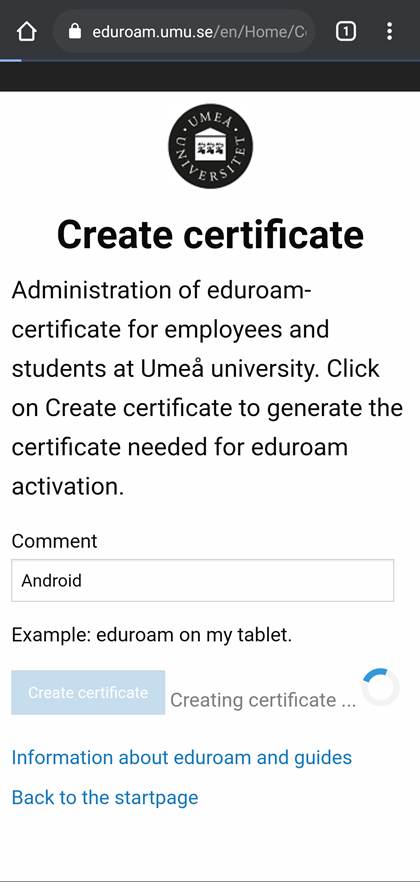
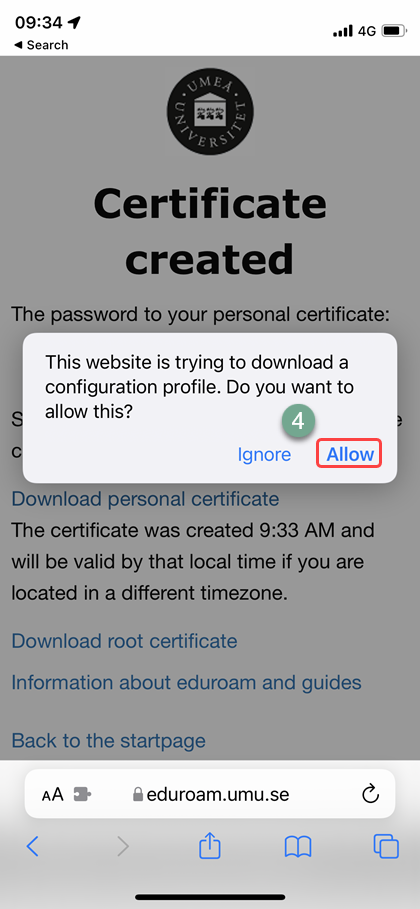
It may take a while but eventually you will come to a new page.
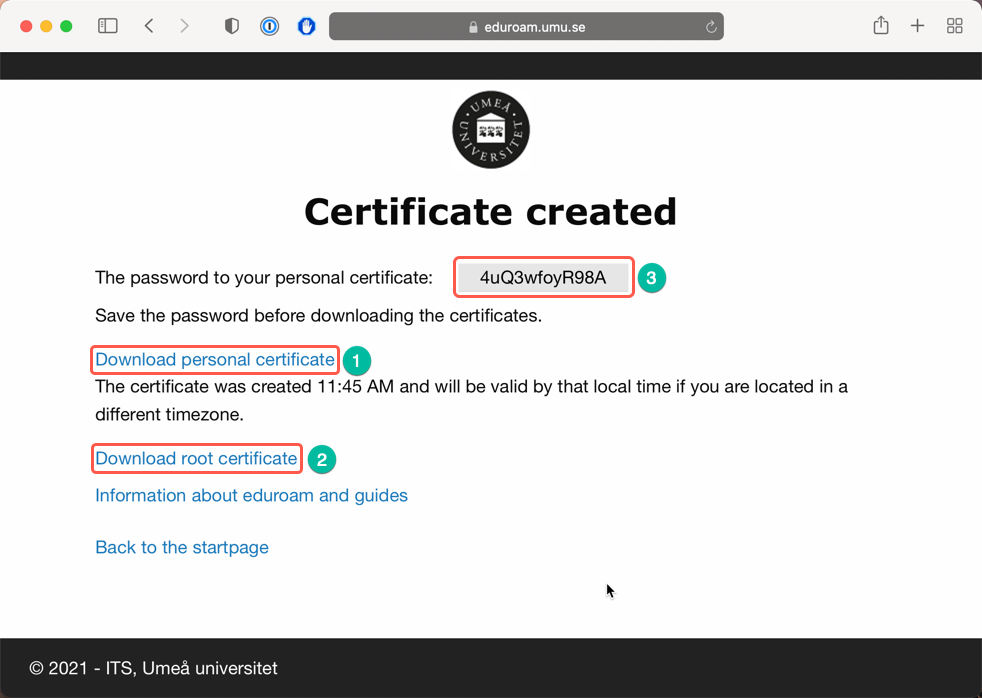
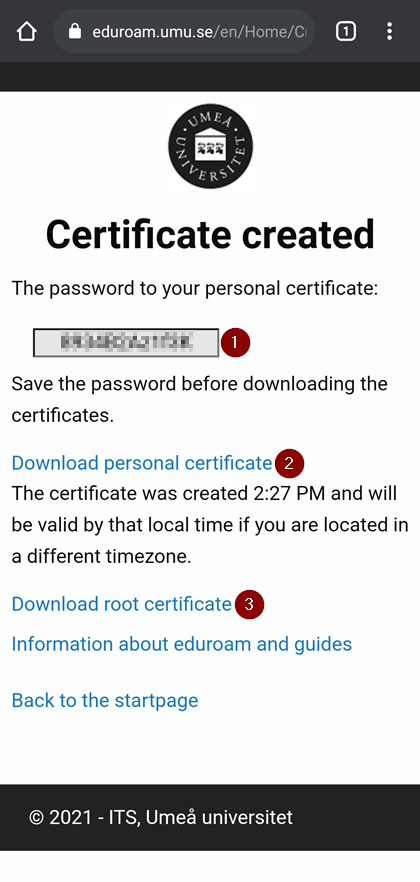
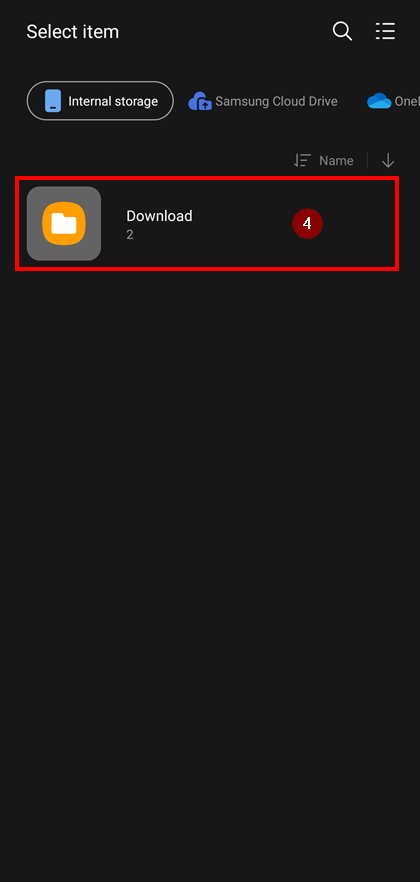
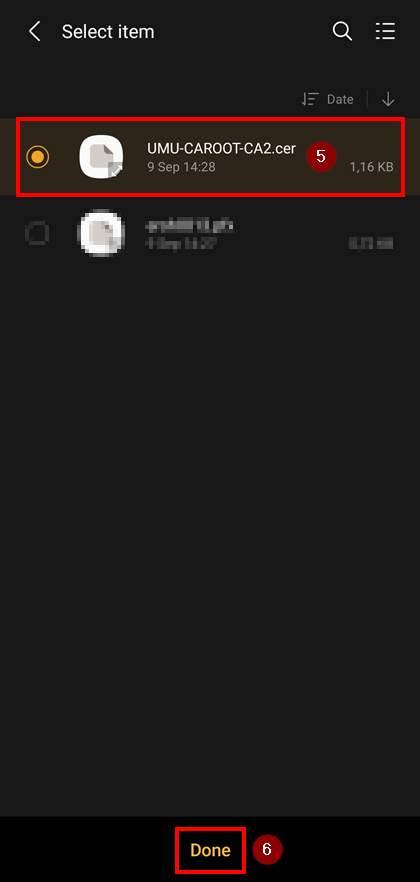
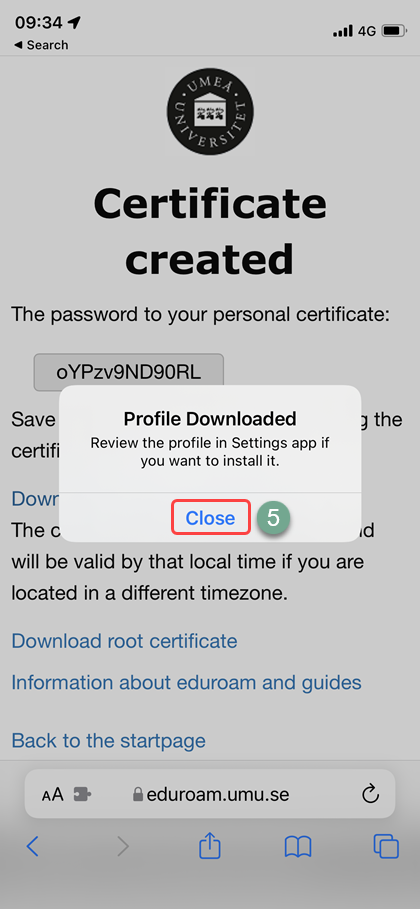
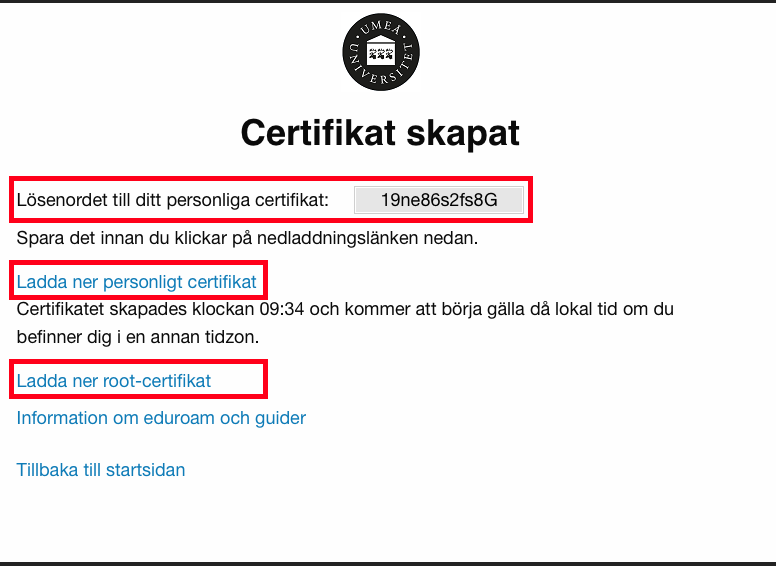
Step 4 – Download the certificates
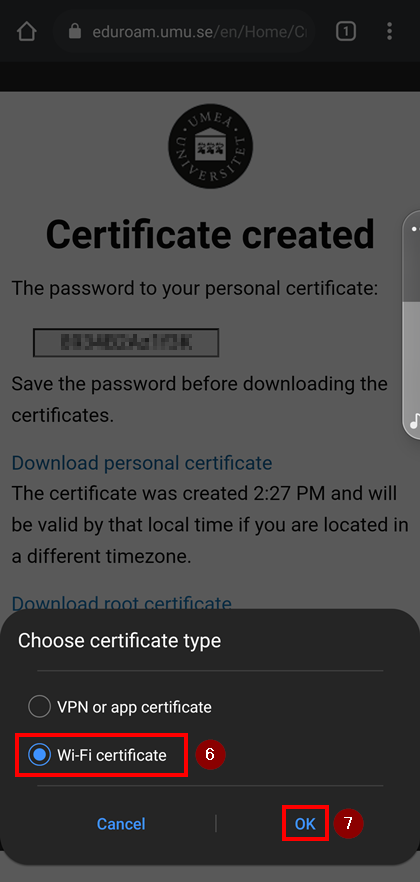
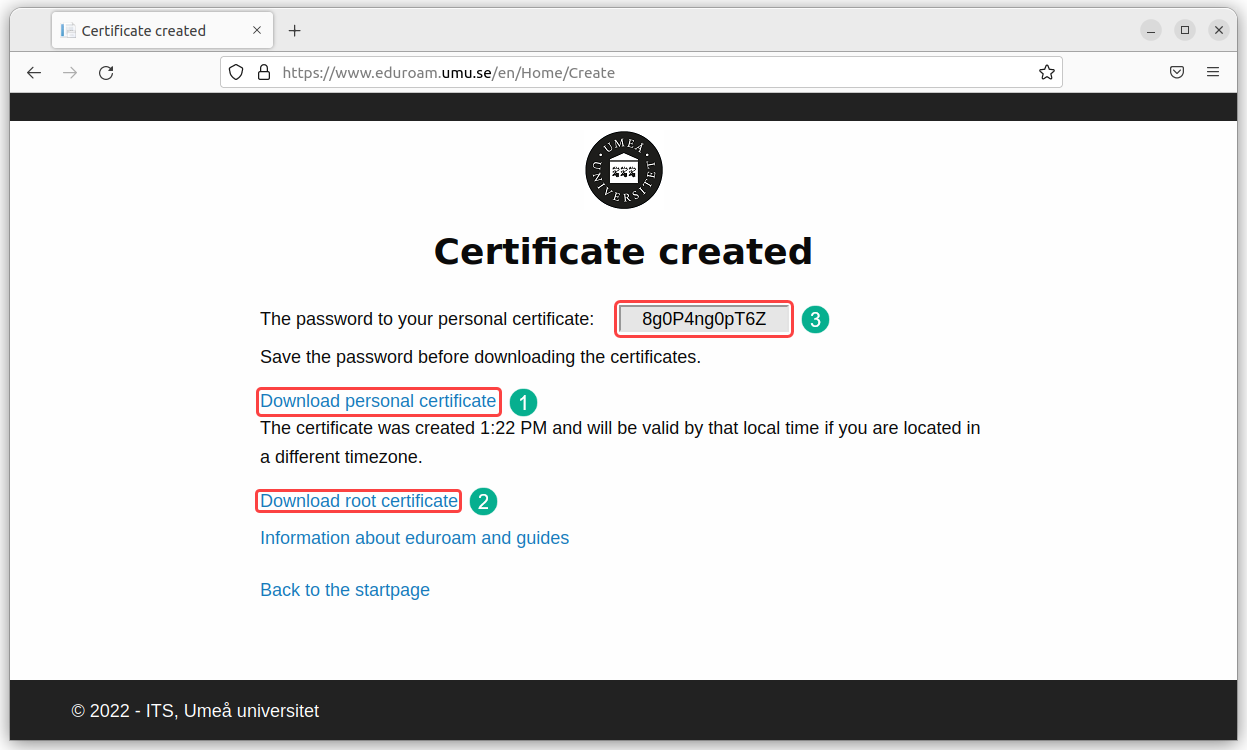
Once the certificates have been created, they need to be downloaded.
In addition to a personal certificate , you also need to download a so-called ROOT certificate.
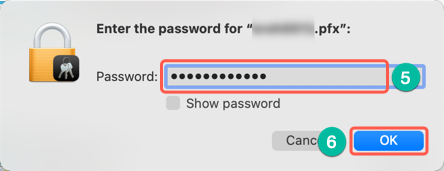
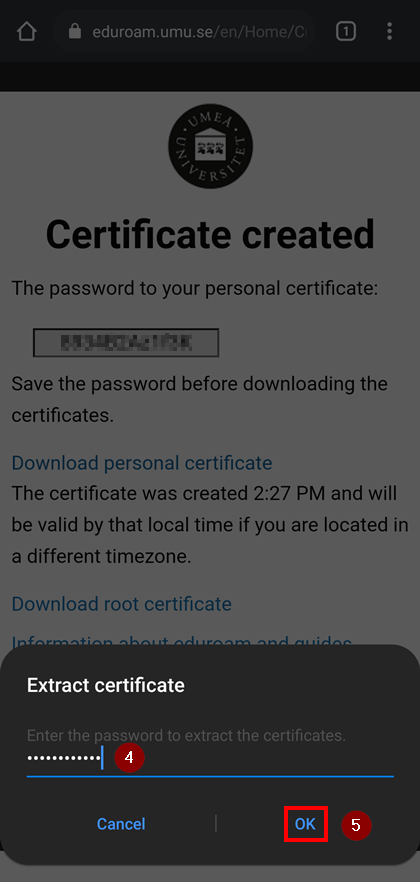
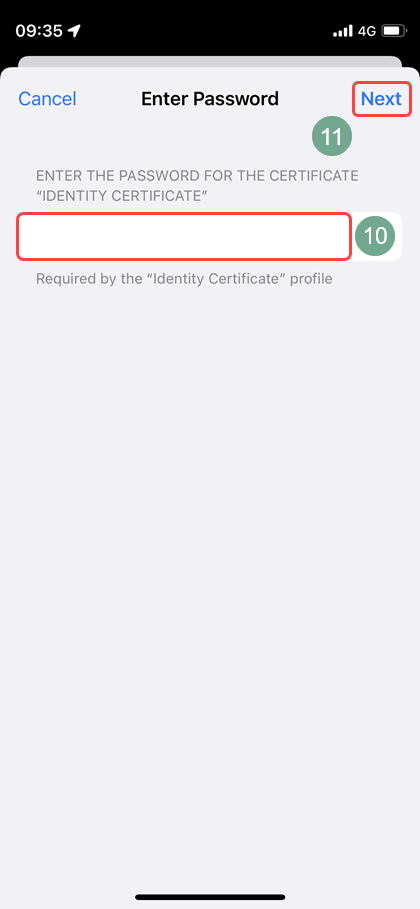
The personal certificate has also been given a password.
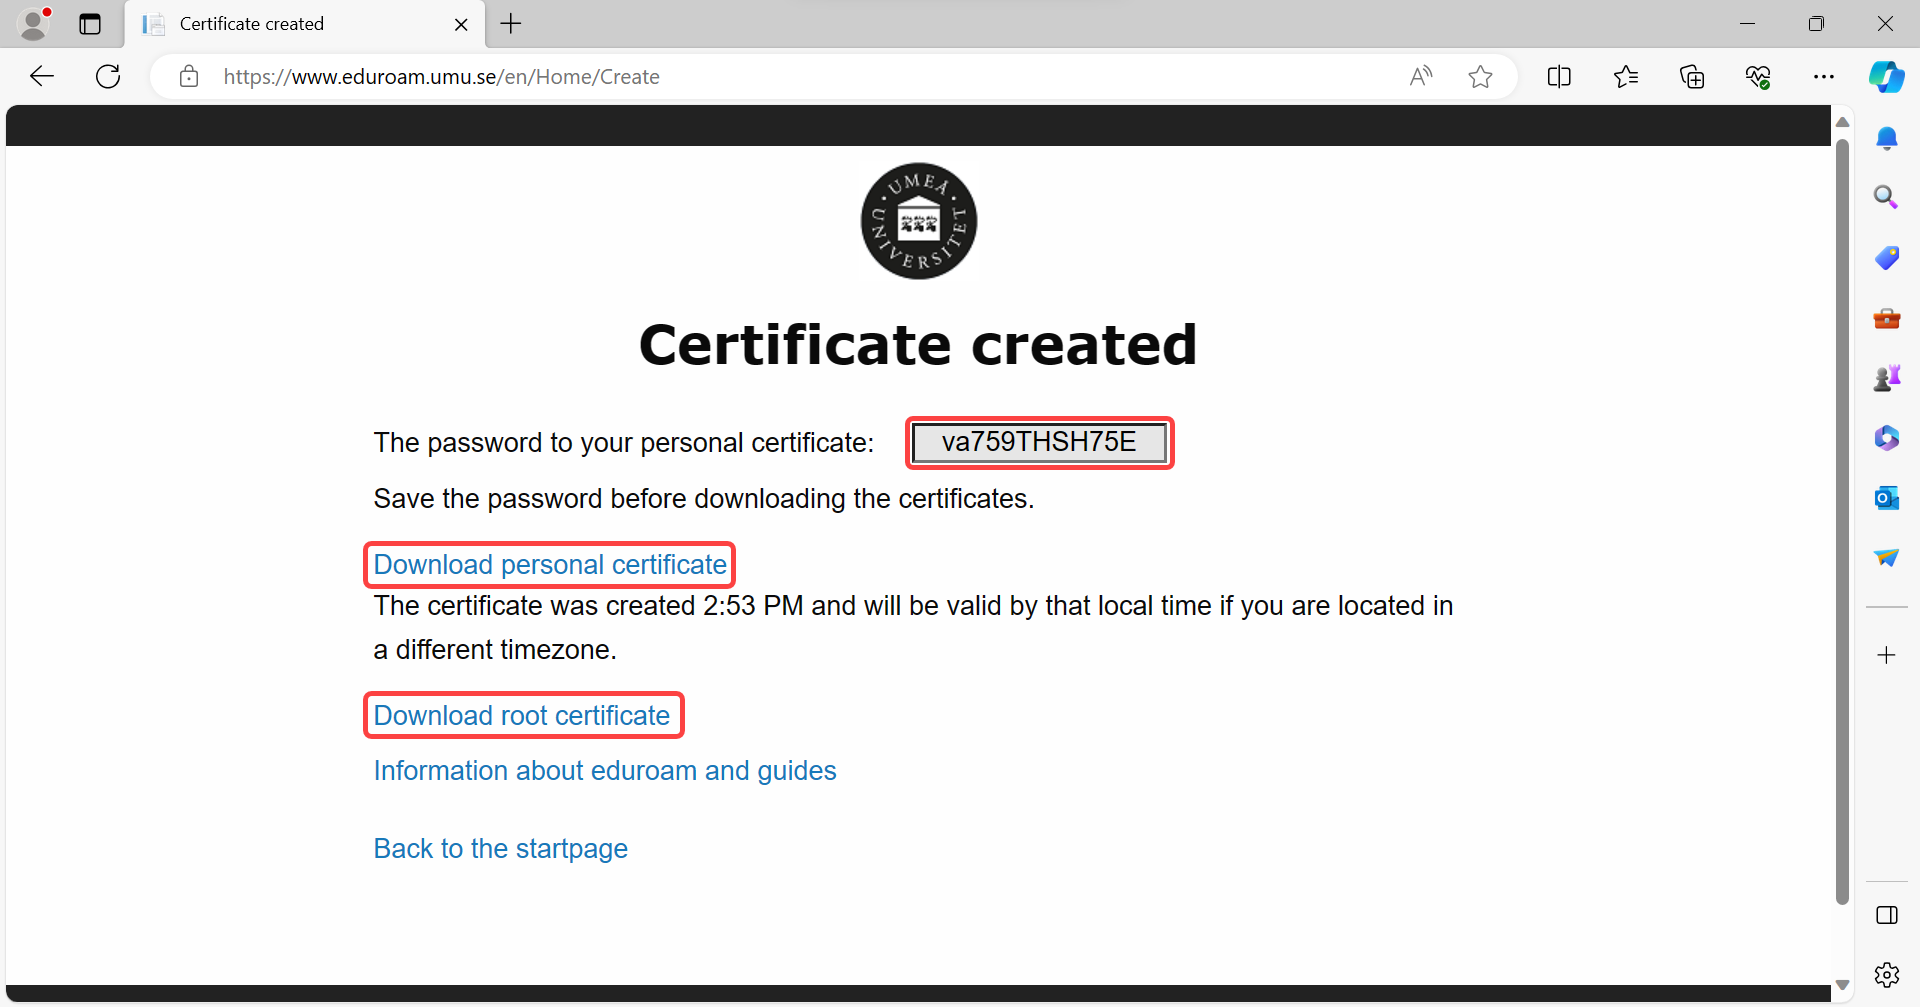
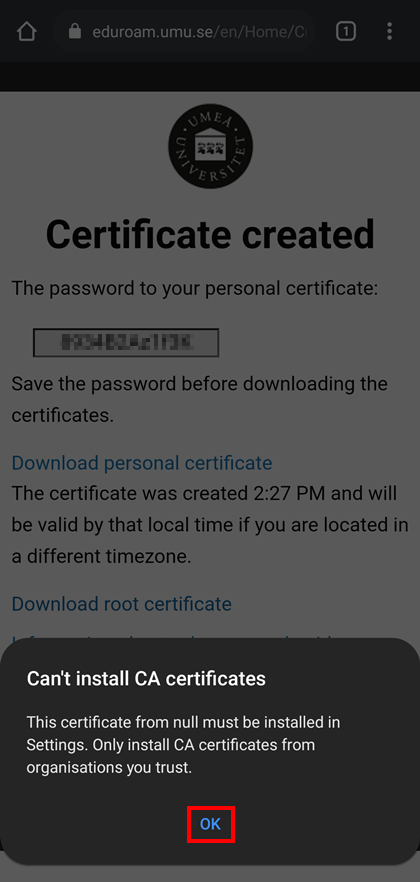
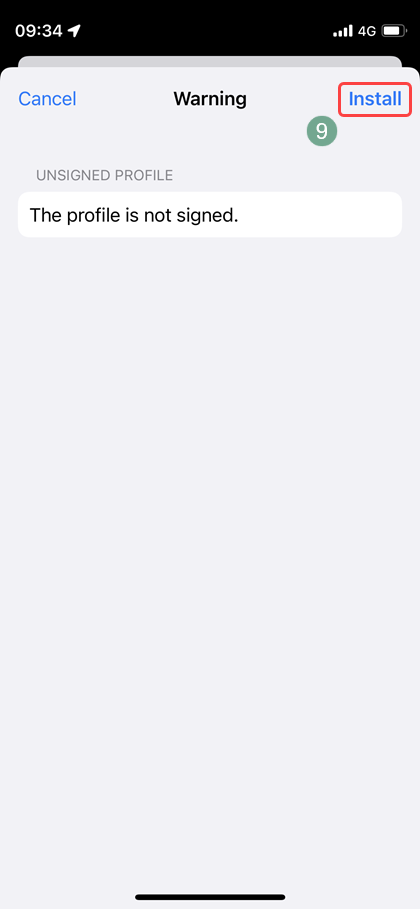
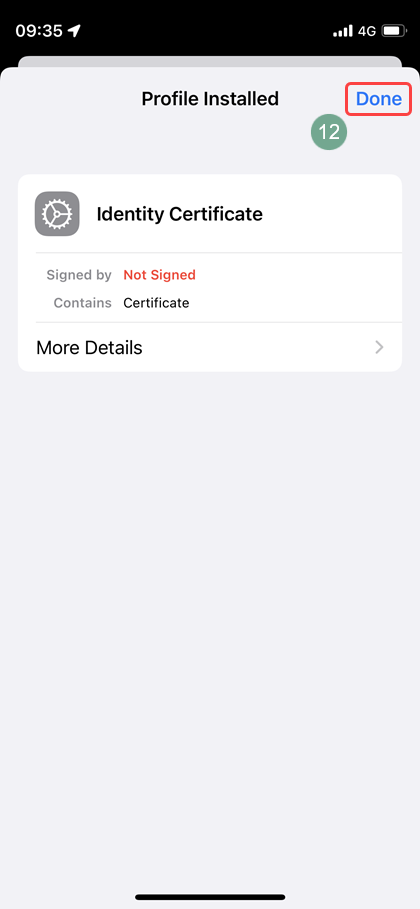
Start by copying the password for the personal certificate. Then click Download Personal Certificate. Then click Download Root Certificate. You will probably then be met by a warning, if so click on Keep.
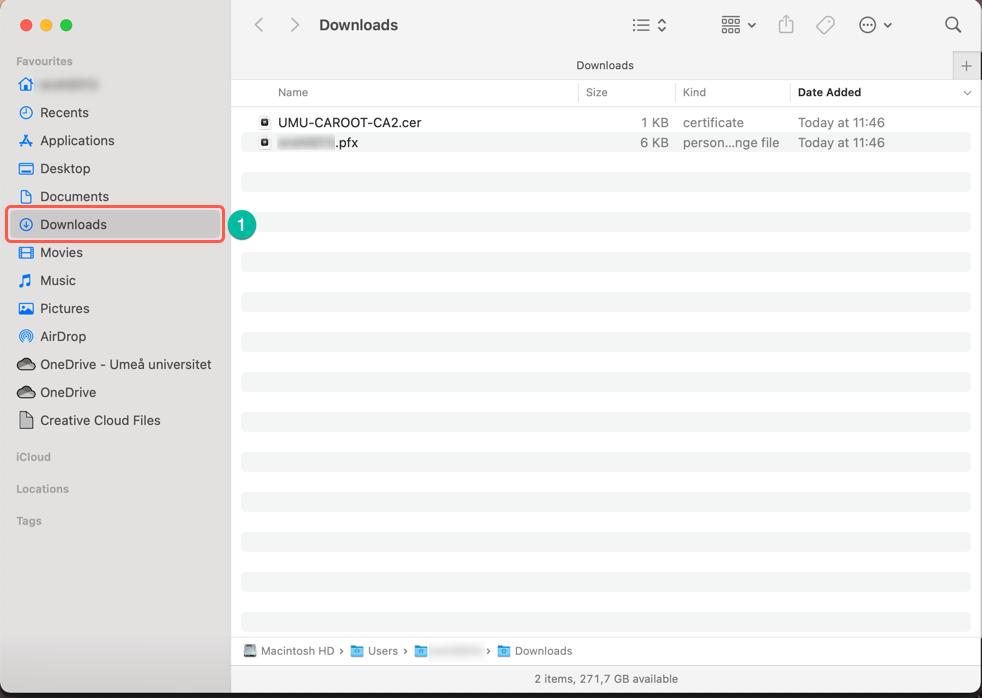
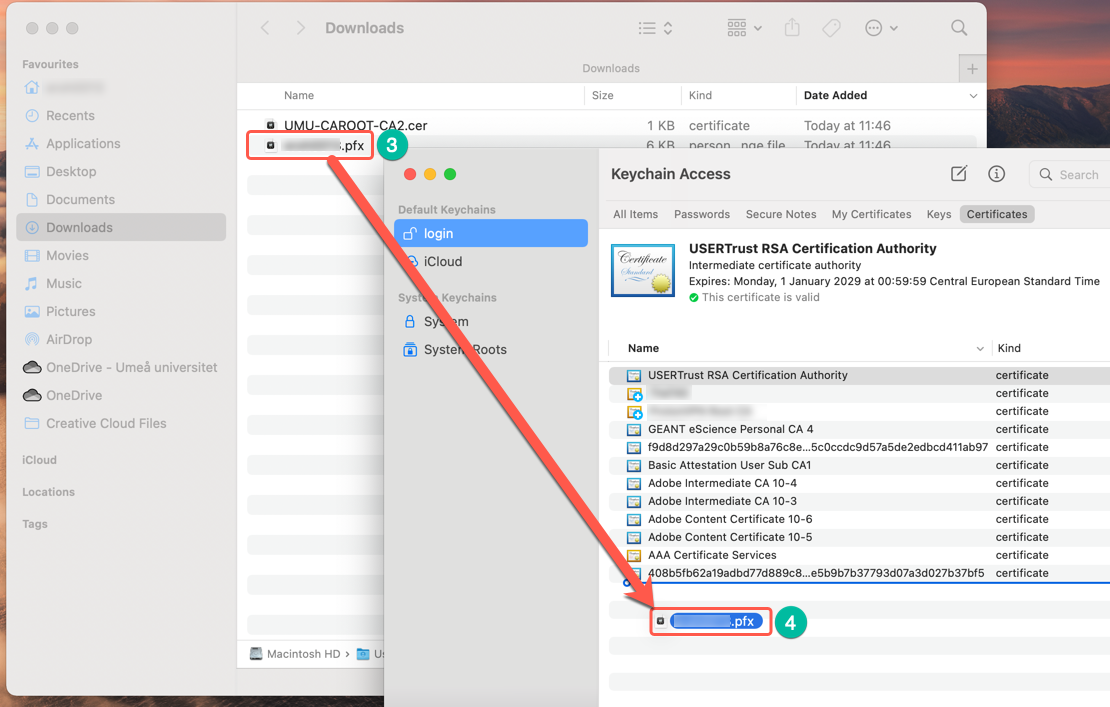
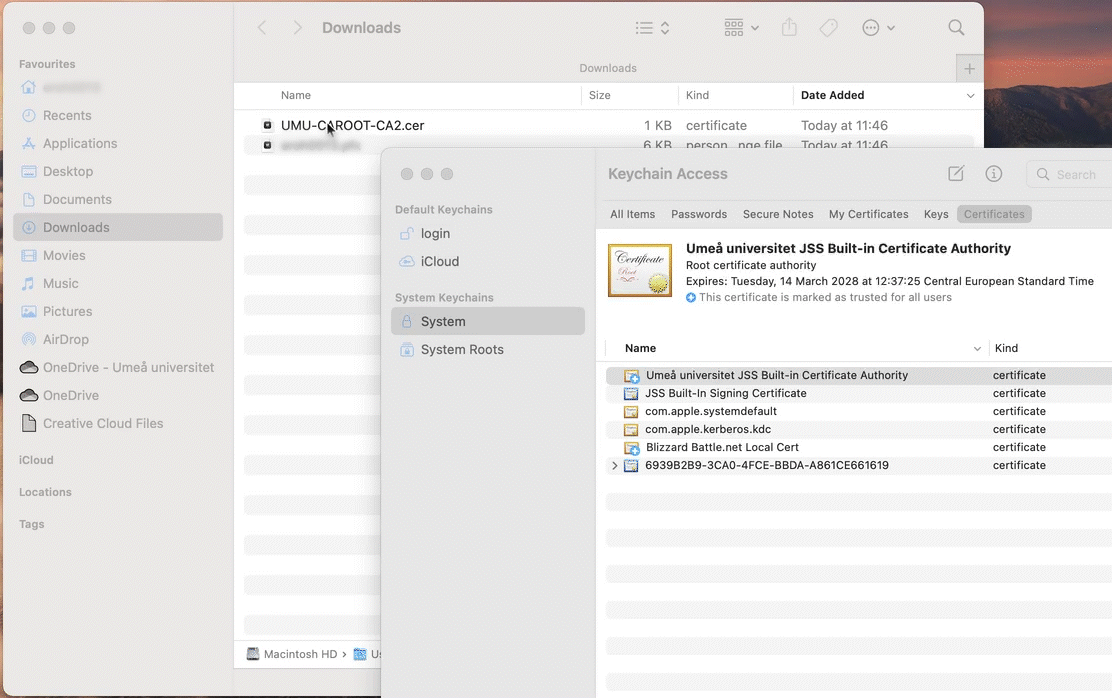
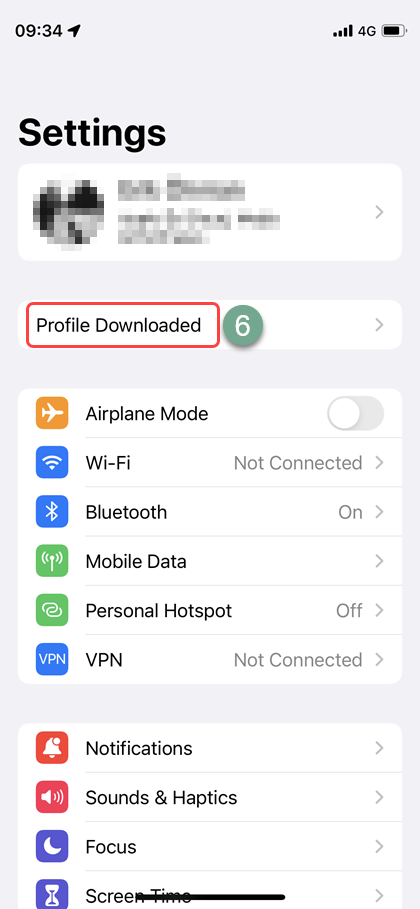
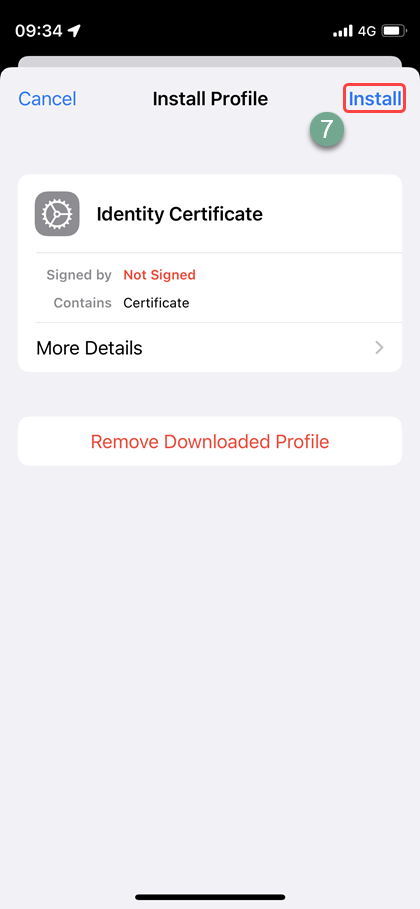
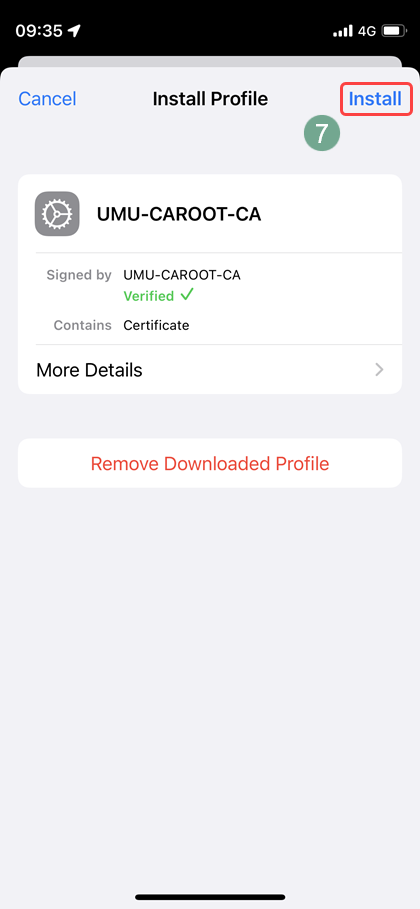
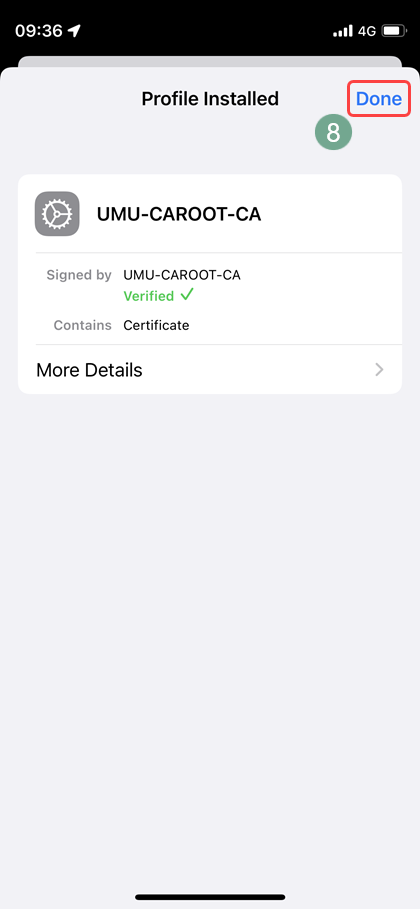
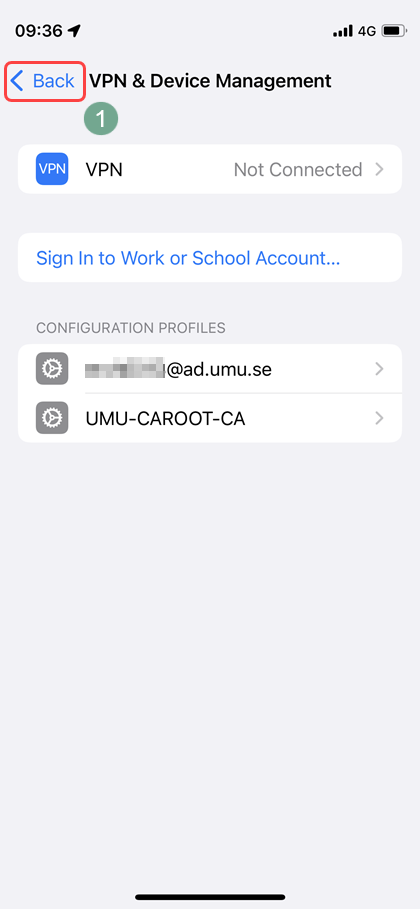
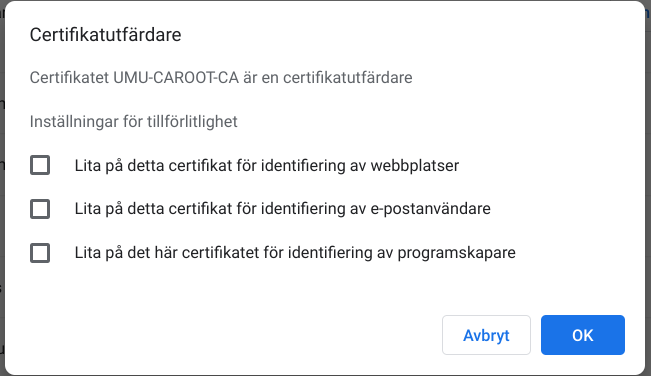
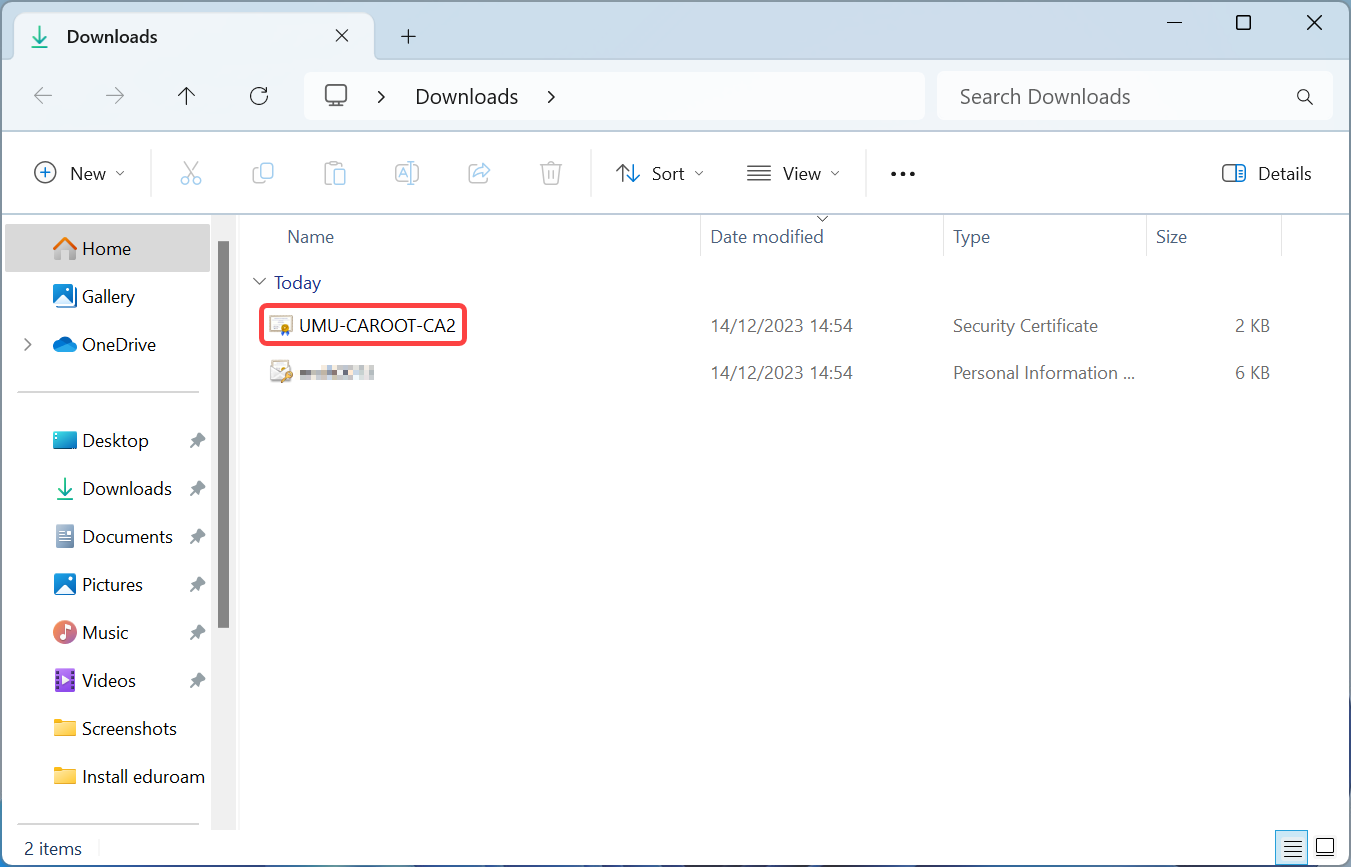
Step 5 – Install Root Certificate
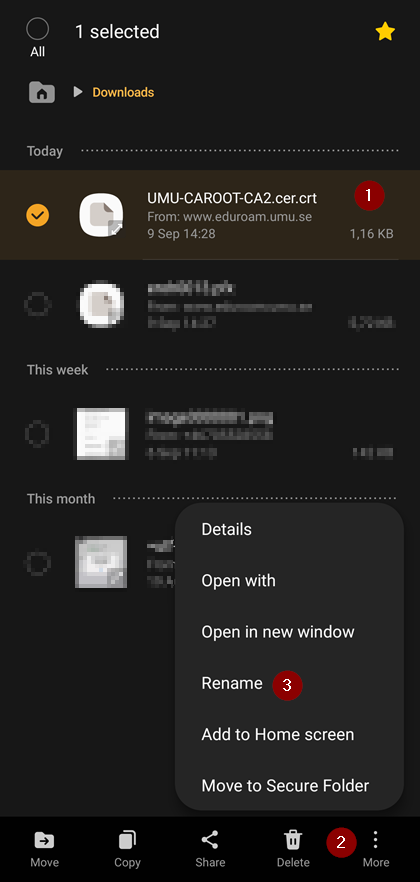
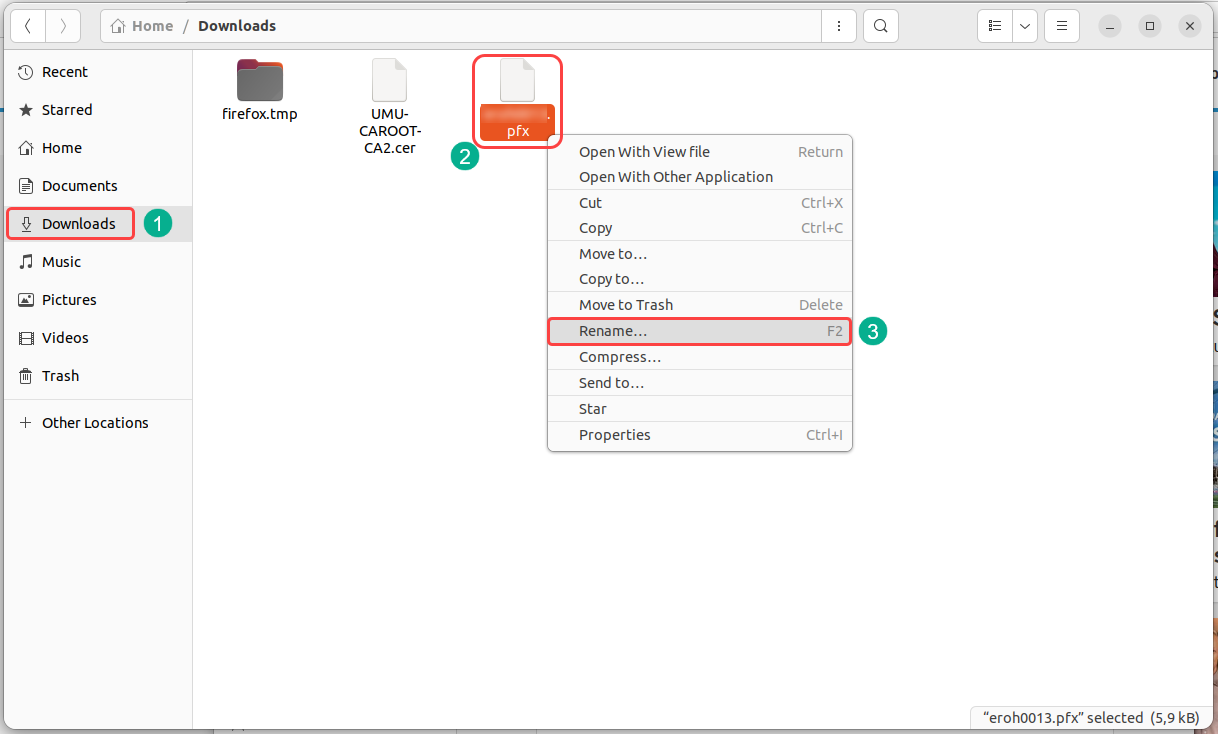
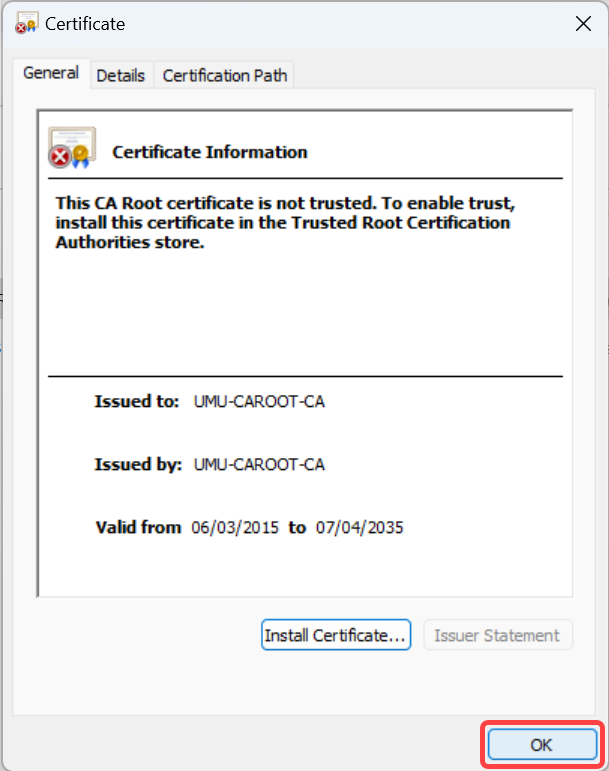
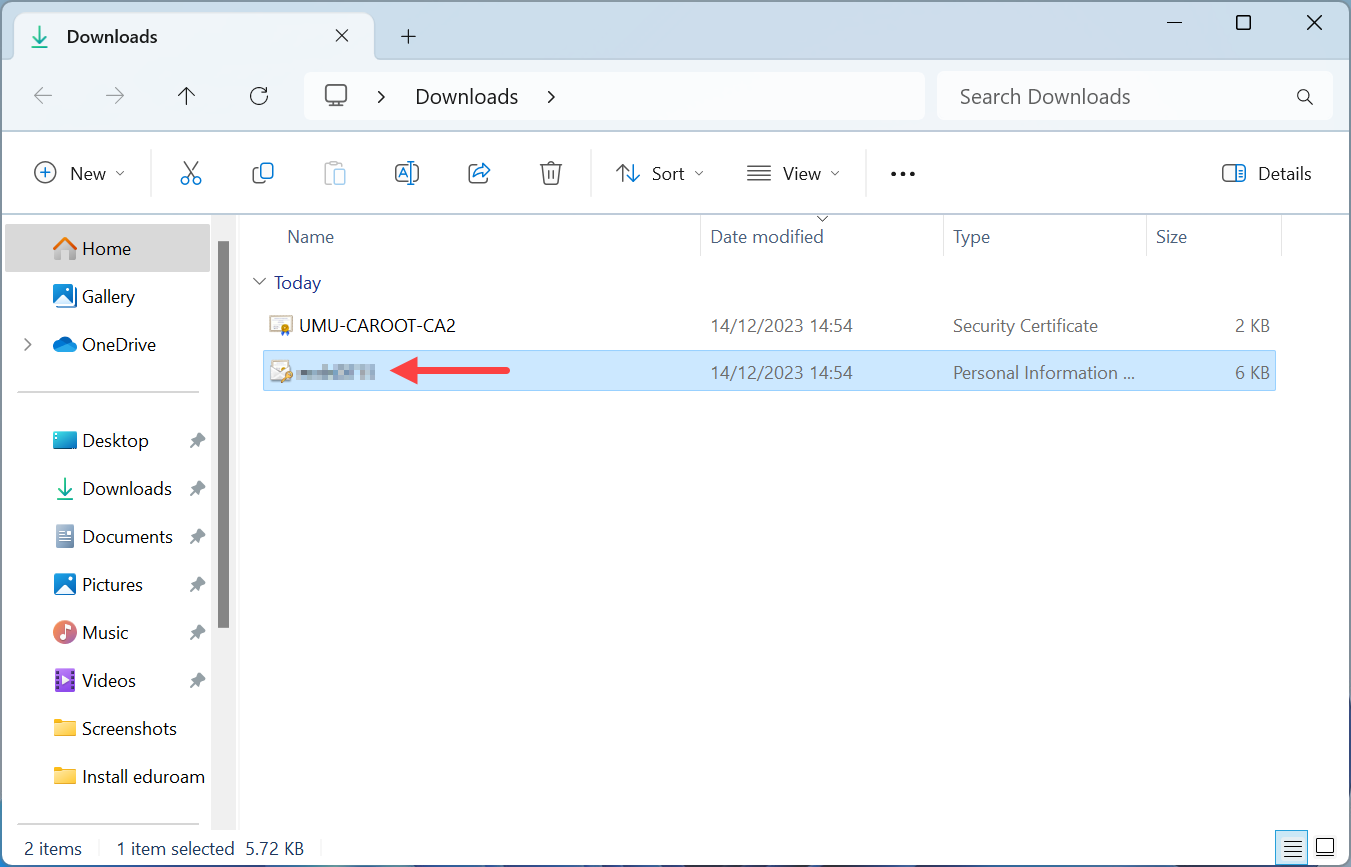
Open the Downloads folder in Windows Explorer. Double-click on the root certificate named UMU-CAROOT-CA2.
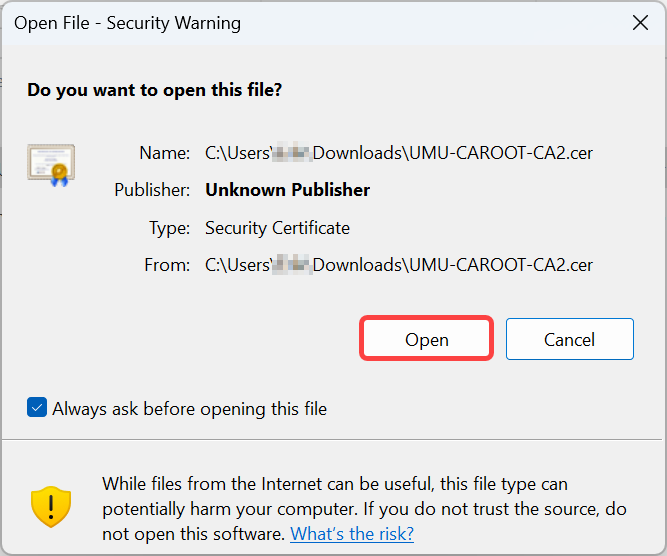
Click on Open if met by this Security Warning.
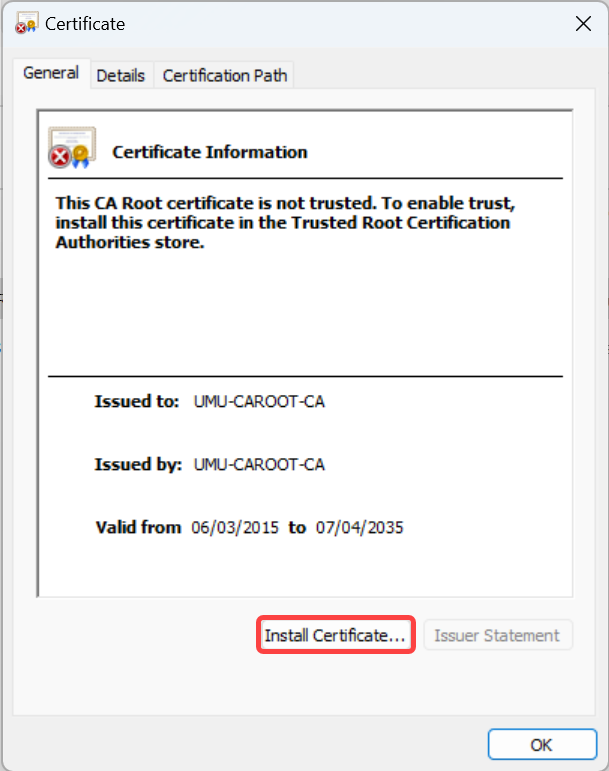
Click on Install Certificate…
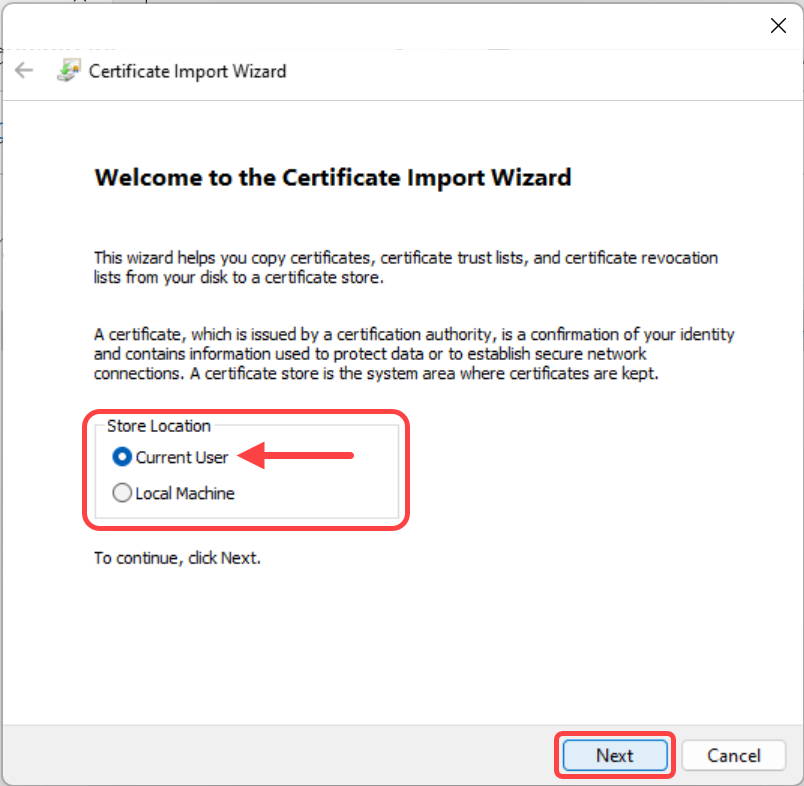
Under Store Location change it to Local Machine och click Next. You will also most likely get a warning from User Account Control that is making sure you are an administrator on the computer your are installing on, click on Yes.

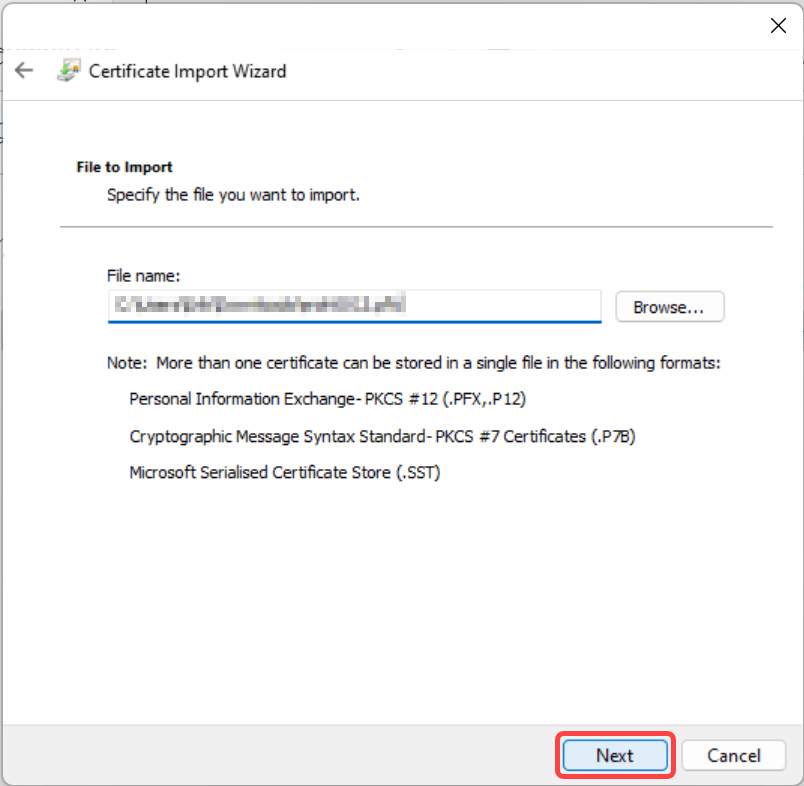
Specify the location for the certificate as Place all certificates in the following store and then click Browse…
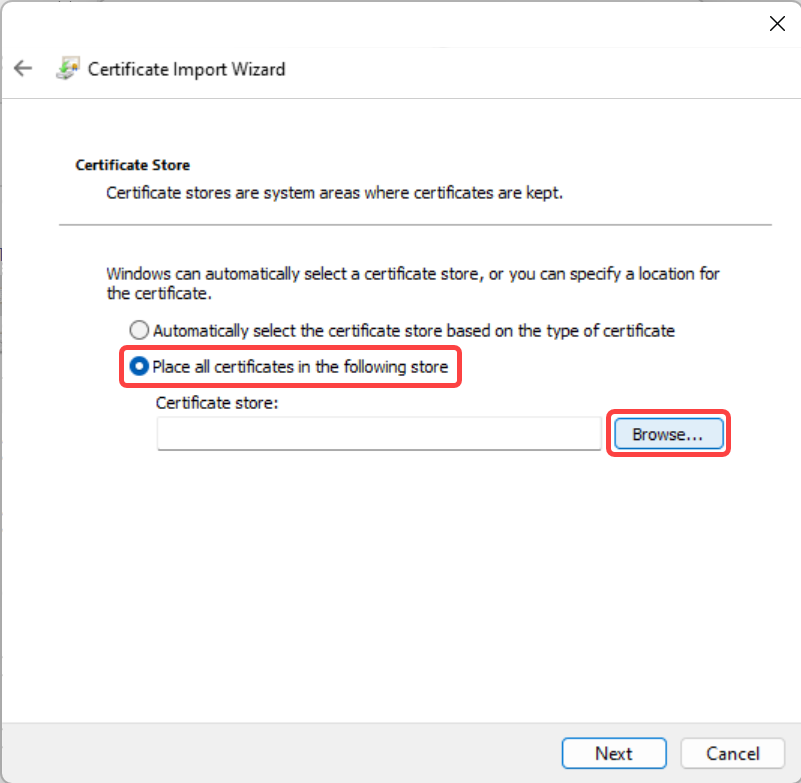
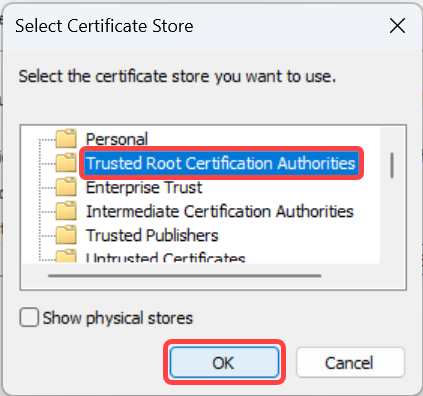
Mark the folder Trusted Root Certification Authorities and click OK.
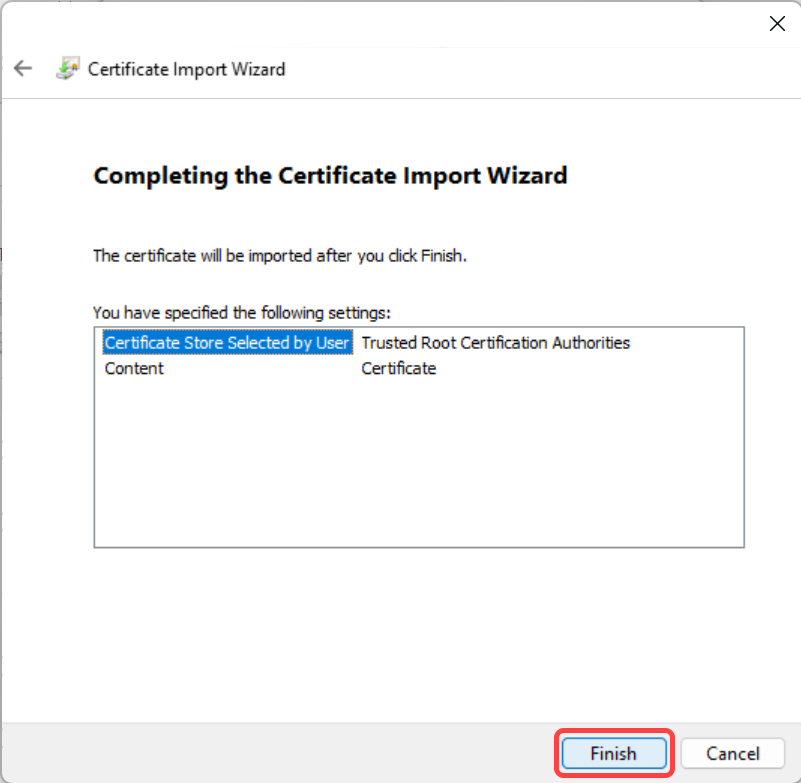
Click Next.

Click Finish.
Click OK.

Click OK.
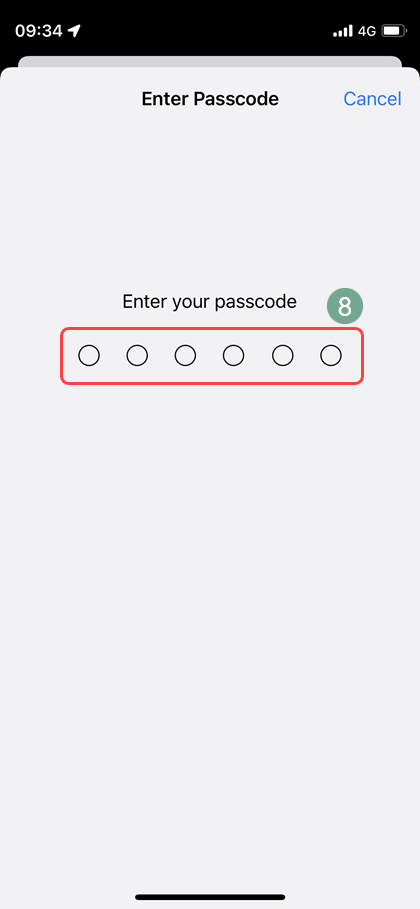
Step 6 – Install Personal Certificate
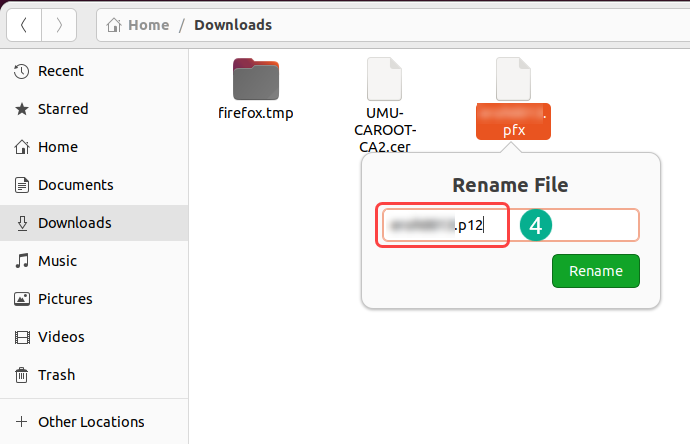
To install the personal certificate double-click on the file named your Umu-id.
Keep the Store Location as Current User and click Next.
Click Next.
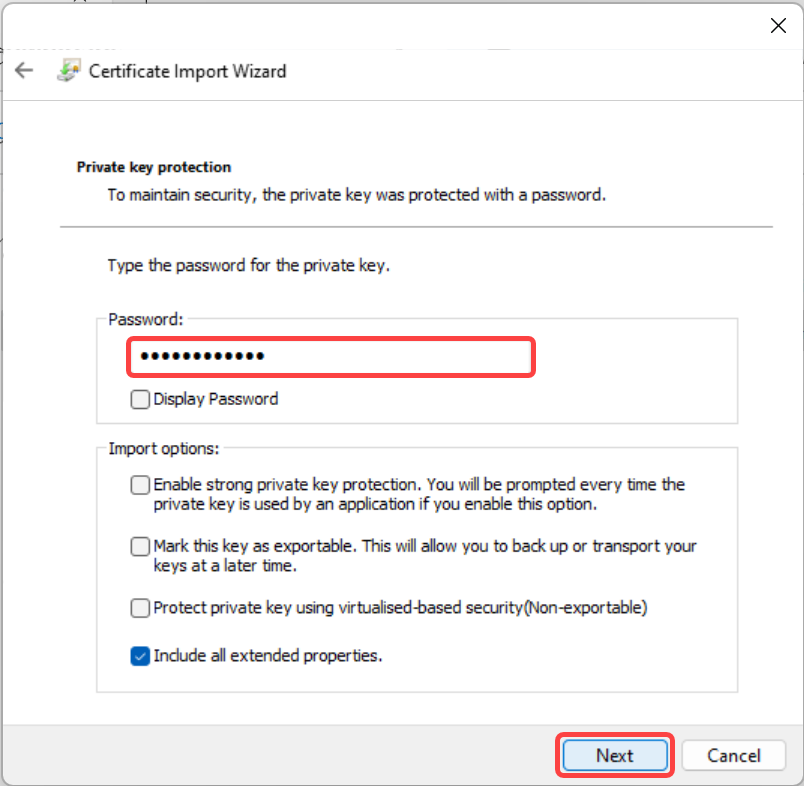
Paste the password you received and copied in Step 4 and click Next.
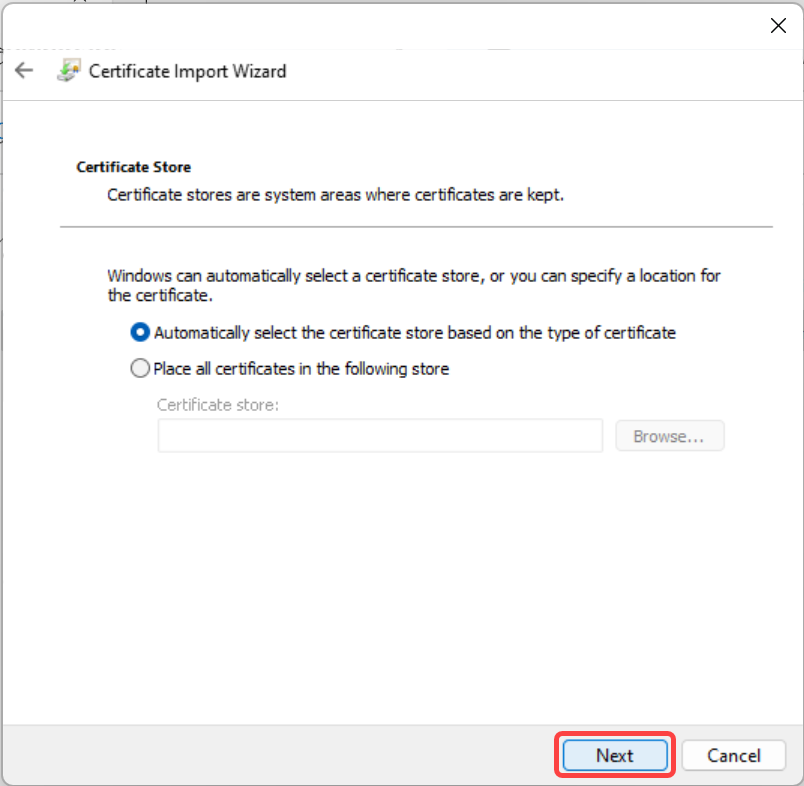
Leave as selected and click Next.
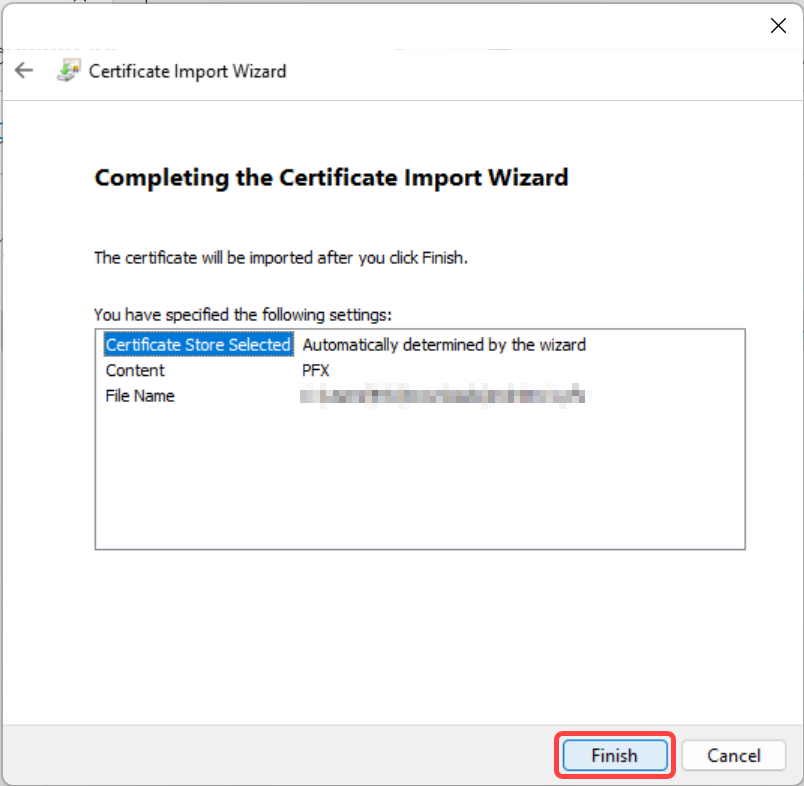
Click Finish.
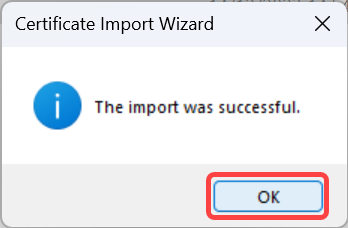
Click OK.
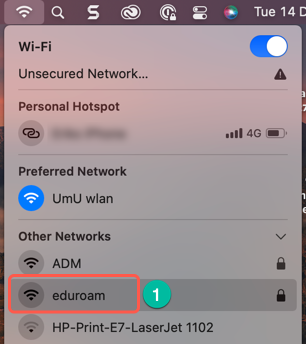
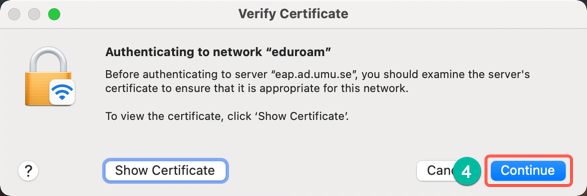
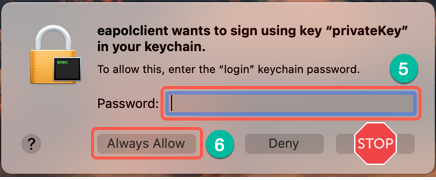
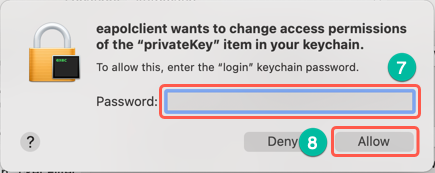
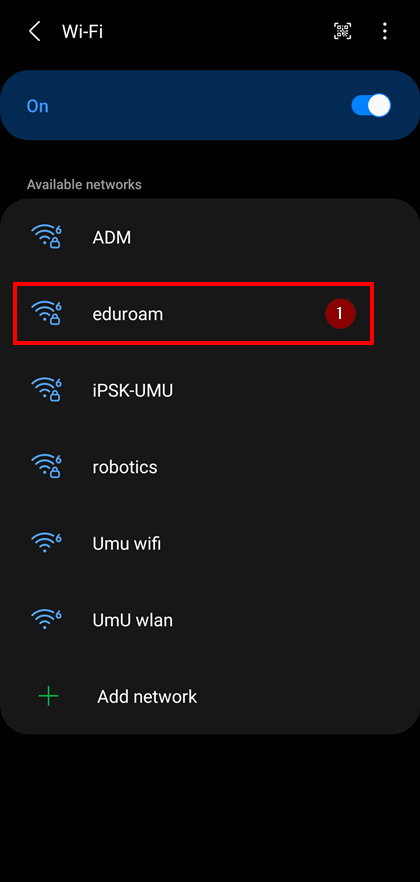
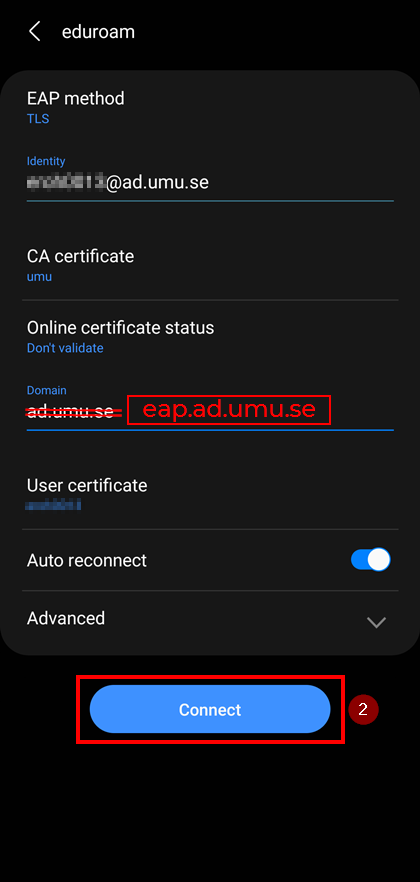
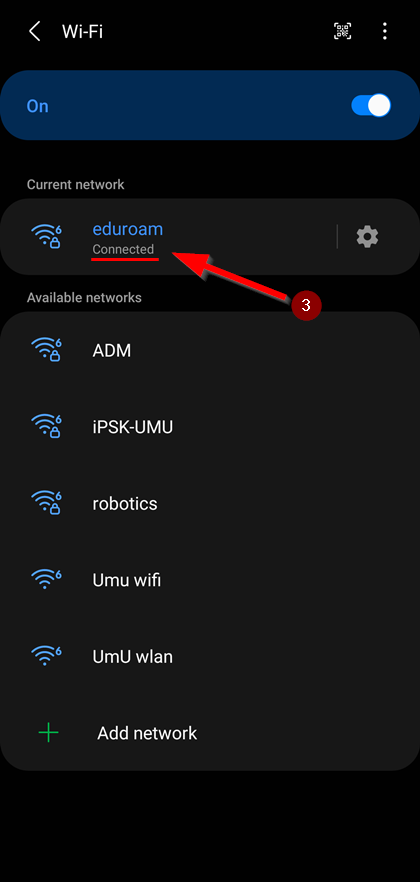
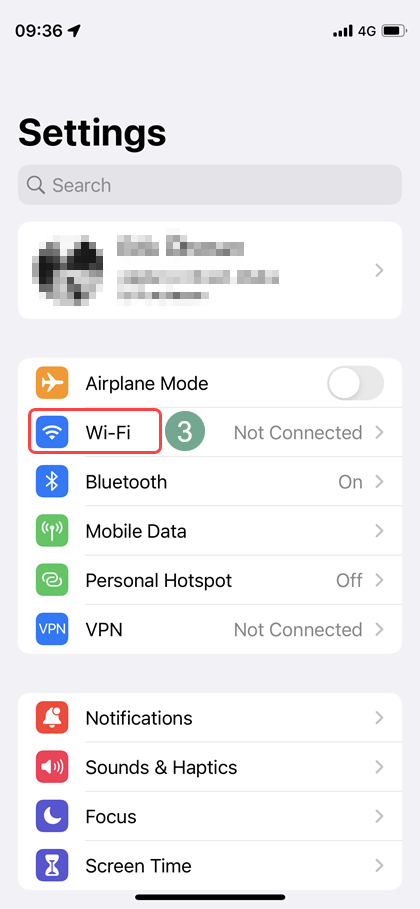
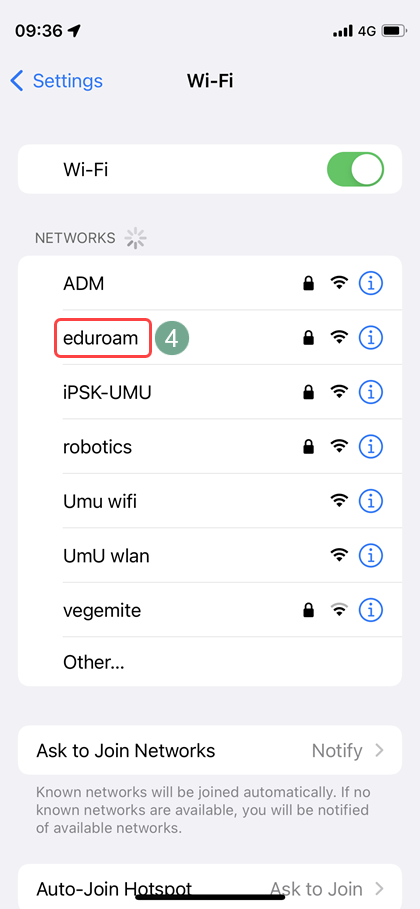
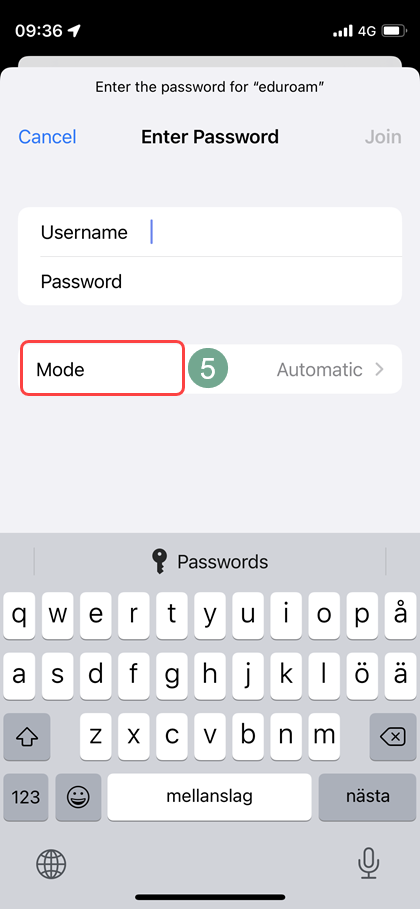
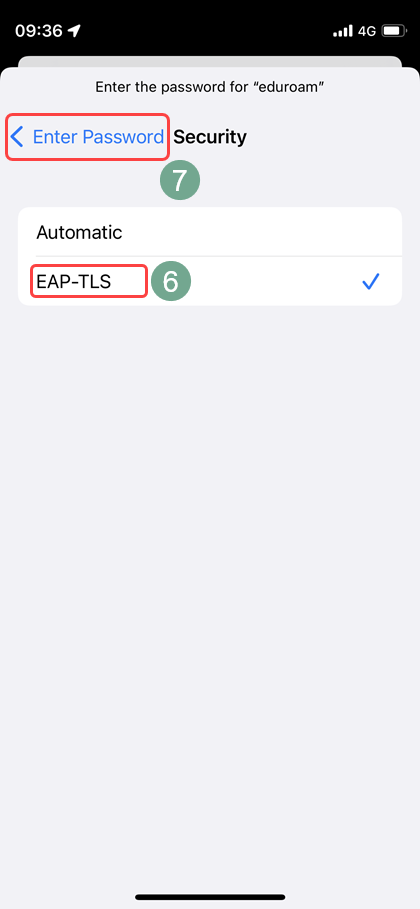
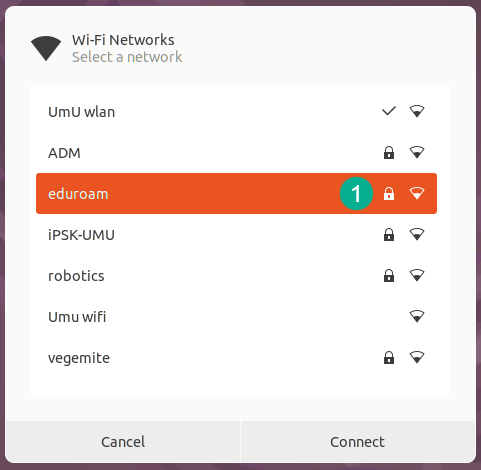
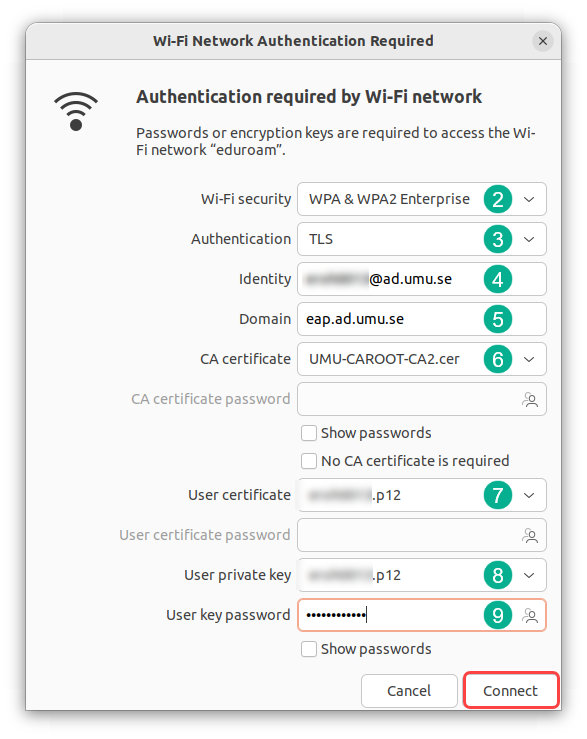
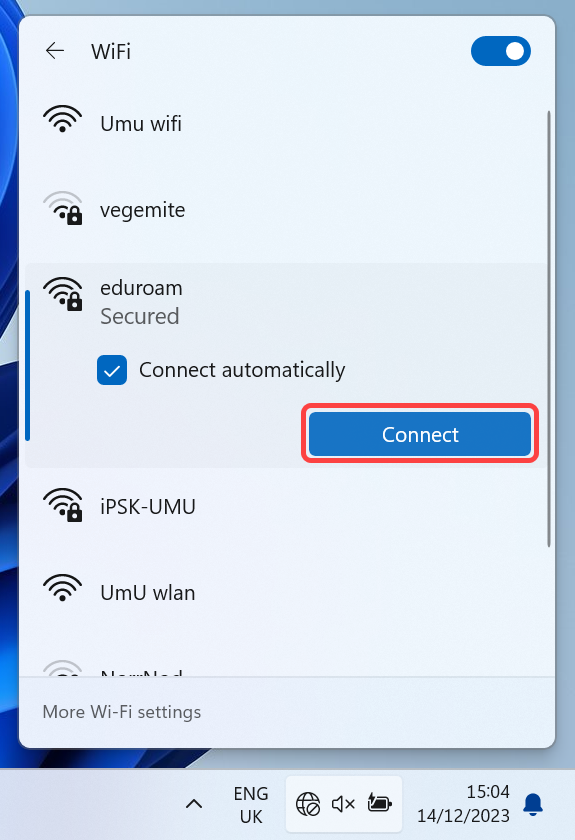
Step 7 – Connect to eduroam
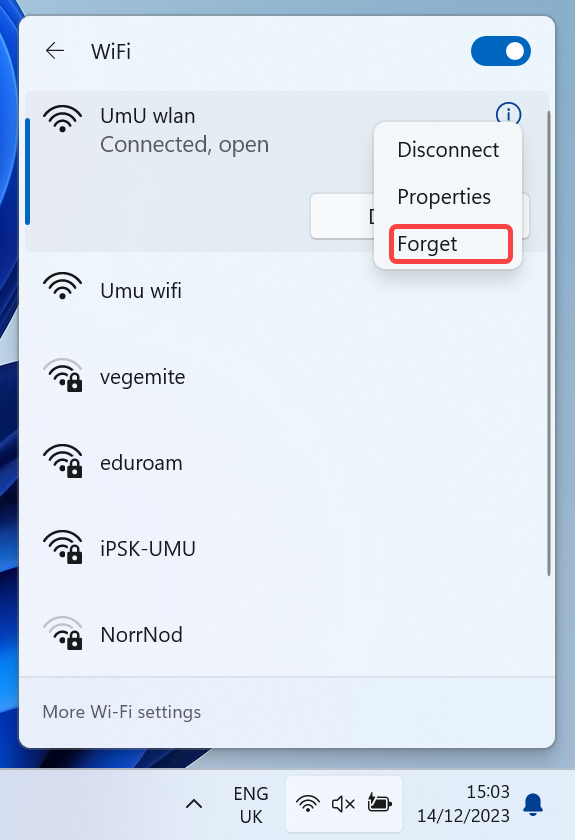
Open the list of available networks again and right-click on UmU wlan and click Forget.
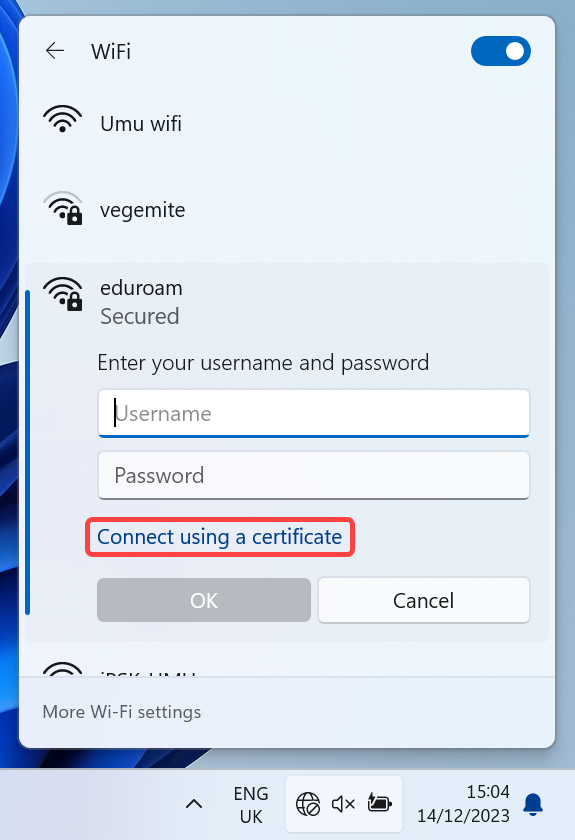
Click on the eduroam network and click Connect, then click Connect using a certificate and Connect once more.
NOTE! If you have previously had eduroam, you usually need to forget the network before you can connect again.
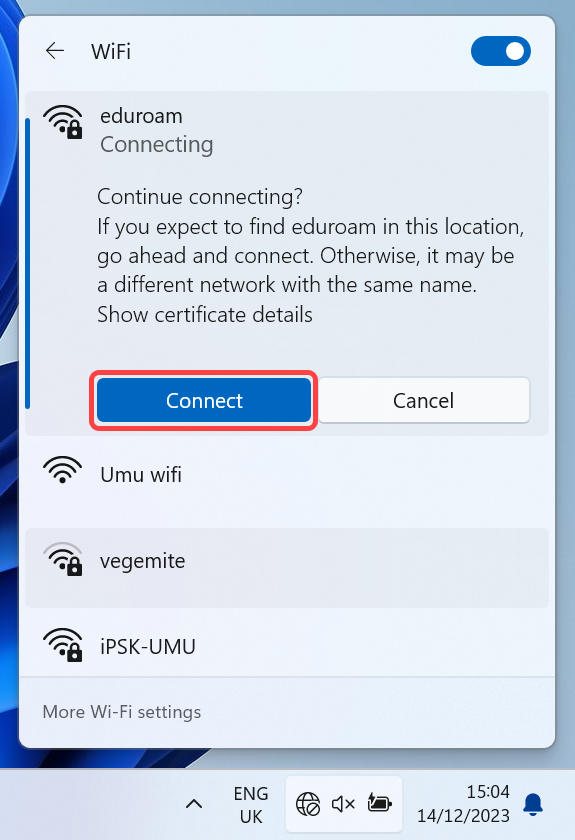
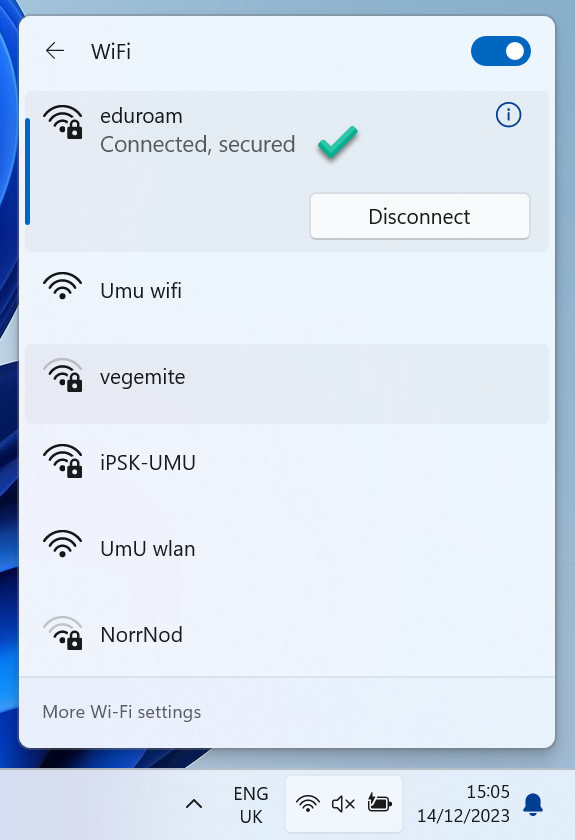
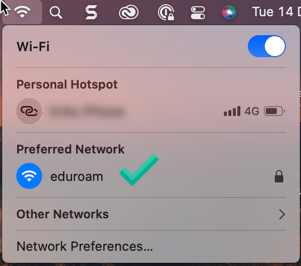
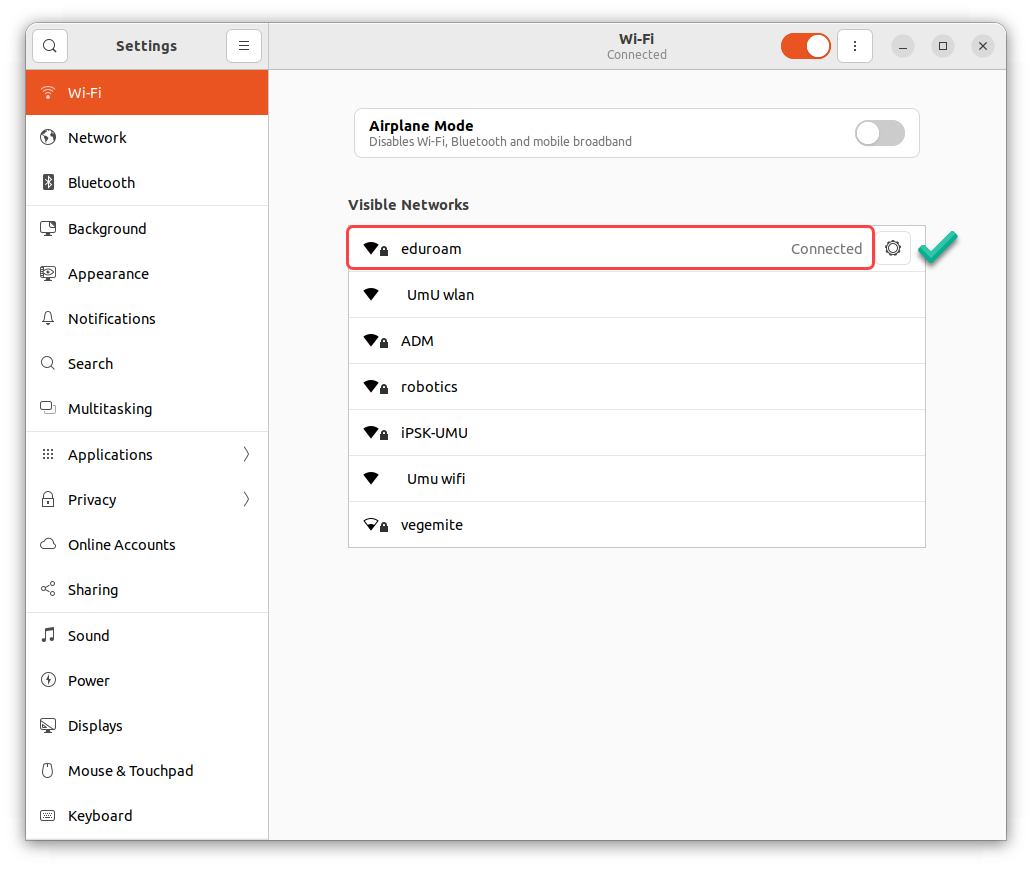
You should now be Connected, secured.