Manual

Manual
  • Svenska
  • Menu Menu

Step by step – This happens when a computer becomes client-managed

2026-03-27/in Okategoriserade

When a computer becomes client-managed, a number of basic components are installed to ensure it can be managed properly and kept secure. The computer receives:

  • Central management: A “management framework” that increases security and allows the device to receive the correct settings, policies, and applications.
  • Security certificates: Used to ensure secure communication between the computer and our IT systems.
  • Company Portal: An app that shows whether the computer meets security requirements and allows you, as a user, to install approved applications and software.

Differences between client management on Windows and Mac computers

On Windows computers, much of the management takes place automatically in the background using built-in Windows features. More settings can be centrally controlled (Start menu, applications, Windows Update, firewall, etc.) because Windows is deeply integrated with the client management system Intune.

On Mac computers, the user needs to manually approve the installation of a management profile. The client management system Intune can control many aspects, but not quite as extensively as on Windows.

Microsoft Defender – why we use it

Both Apple and Windows already include basic built-in protection, but Microsoft Defender adds stronger, more comprehensive security that is essential in an organizational environment. Microsoft Defender provides the following on both Mac and Windows computers:

  • Improved protection against viruses and malware: Detects more threats than built-in protections alone.
  • Protection against malicious websites (phishing): Blocks harmful links and fraudulent websites before you click.
  • Continuous monitoring: Detects suspicious activity in real time.
  • IT gains an overall view of all computers: Enables detection of deviations, alerts, and faster protection of the organization.
  • Consistent protection across platforms: Computers receive the same level of security regardless of whether they run Windows or Mac.
https://manual.umu.se/wp-content/uploads/2018/02/manual-loggo.png 0 0 Sofia Westerlund https://manual.umu.se/wp-content/uploads/2018/02/manual-loggo.png Sofia Westerlund2026-03-27 10:21:052026-03-27 10:21:05Step by step – This happens when a computer becomes client-managed
2026-02-12/in Okategoriserade

This manual describes the steps you need to take in order to create an account and gain access to the certificate service from Harica.

The certificate service from Harica offers the possibility to obtain certain types of certificates free of charge; these are marked as “free”. We recommend using only the types that are procured through Sunet/Geant (server certificates and email certificates).


Create an account and gain access to the service

To gain access to the service, approval from your manager/head of department is required, as well as a list of the domains for which you should be able to issue certificates. Certificates may only be issued for the institution you belong to (for example, an employee at institution X may only issue certificates for x.umu.se). If certificates need to be issued for other institutions, approval from the head of that institution is required. Approval is handled by placing an order via the ITS Servicedesk.

  1. If you do not already have a user account, create one by going to:
    Harica CertManager – Register (https://cm.harica.gr/Register)
  2. Fill in the fields. Note that the fields for first name and last name may not contain å/ä/ö or other special characters. Replace these characters with other letters.
  3. The email field must contain an @umu.se address.
  4. Then log in to the portal at: https://cm.harica.gr/

We do not provide support for certificate types that are obtained by paying for them with a credit card. More information about the service is available here: Sunet TCS 2025- Information for administrators – Sunet Wiki

https://manual.umu.se/wp-content/uploads/2018/02/manual-loggo.png 0 0 Sofia Westerlund https://manual.umu.se/wp-content/uploads/2018/02/manual-loggo.png Sofia Westerlund2026-02-12 11:33:212026-02-12 11:33:21

REDCap closing and archiving

2026-02-03/in Okategoriserade

How to proceed when closing and archiving a REDCap project

When you are finished with your project, it is recommended that you complete the following steps:

  1. Change the project status to “Analysis/Cleanup” in the “Other functionality” menu.
  2. Export data for archiving: Download/export and save the following files:Menu: Project Home
    • Click the download icon for “Current users” to download a file containing all users and their names.

    Menu: Project Home → Other Functionality

    • XML file (metadata)
    • XML file (metadata and data)

    Menu: Project Home → Project Setup

    • Project events and arms (if applicable)

    Menu: Codebook

    • Codebook

    Menu: Logging

    • Click “All logging”

    Menu: User rights Download the following three files:

    • users
    • user roles
    • user role assignments
    • List of users’ full names and UmU IDs
    • Data Access Groups (if applicable)

    Menu: Project Dashboard

    • Data Resolution Dashboard (if applicable)

    Menu: Alerts and notifications (if applicable)

    • Download Alerts
  3. Download the log: Entire logMenu: Data export, reports
    • Data export in desired format
    • PDF of all forms with saved data (Data Exports/Other Export Options)
    • ZIP file containing the project’s other uploaded files (Data Exports/Other Export Options)
  4. Change the project status to “Completed” under “Other functionality.”
  5. Submit a ticket via ServiceDesk informing them that you have closed your REDCap project. The project name must be included in the ticket.
https://manual.umu.se/wp-content/uploads/2018/02/manual-loggo.png 0 0 Sofia Westerlund https://manual.umu.se/wp-content/uploads/2018/02/manual-loggo.png Sofia Westerlund2026-02-03 11:24:342026-02-03 11:24:34REDCap closing and archiving

Activate Umu-id account with Freja+

2025-11-06/in Okategoriserade, Umu-id

This manual describe how to get Freja eID without Swedish personal identification number.

If you have Swedish personnummer or samordningsnummer you should use a Swedish identifikation, read more at frejaeid.com.

To use Freja eID, you must:

  • Have a biometric passport, and
  • Be a citizen of one of the countries supported by Freja (currently 167 countries).
    You can check the list of supported countries here:
    🔗 frejaeid.com/en/freja-supported-countries


Step 1: Download and Register in Freja eID

Go to:
🔗 frejaeid.com/en/get-freja-eid

Follow the instructions to:

  1. Download the Freja eID app to your mobile phone.
  2. Register and verify your identity using your biometric passport.


Step 2: Activate Your UMU Account with Freja

After you have registered in Freja eID, go to:
🔗 https://administrationsverktyg.umu.se/kontoaktivering

Choose to activate your UMU account using Freja eID.
Once your UMU account is activated, a Freja identifier will be saved for you.


Step 3: Reset Passwords or MFA Later (If Needed)

After activation, you can later reset your password or multi-factor authentication (MFA) through Freja eID:
🔗 https://administrationsverktyg.umu.se/Settings/

Important:

  • This option only works if you have already activated your UMU account with Freja, so that your Freja identifier is saved. You can reactivate your account to add the Freja identifier to your account.


https://manual.umu.se/wp-content/uploads/2018/02/manual-loggo.png 0 0 Patrik Lindahl https://manual.umu.se/wp-content/uploads/2018/02/manual-loggo.png Patrik Lindahl2025-11-06 09:29:242026-03-16 08:24:46Activate Umu-id account with Freja+

Change your application for recommended study support

2025-10-15/in Okategoriserade

This manual describes how you change your application for study support in Ladok for students. In order to change your application, the registration period for the exam must still be open.

  1. Go to Ladok for students, www.student.ladok.se, and use your UMU-id to log in.
  2. On the Home page, you will see the exams/tests you are registered for. To change your application for support, click on “Show more.”
  3. Scroll down until you see the button “Change application for study support.”
  4. Here you can see the study support that you have already applied for, and you can add more support types. You can also remove support types that you have applied for earlier.
  5. Then click on “Confirm change of application for study support.”
  6. You will receive confirmation that your application has been changed and will also see that the status of the examination is “Application for support has been sent.” Once the department have processed your application, you will be notified of the outcome via Ladok for students. You will receive a notification (email) when there is new information about your application in Ladok for students.
https://manual.umu.se/wp-content/uploads/2018/02/manual-loggo.png 0 0 Maria Bek https://manual.umu.se/wp-content/uploads/2018/02/manual-loggo.png Maria Bek2025-10-15 12:51:012025-10-15 13:45:50Change your application for recommended study support

Apply to use your recommended study support

2025-08-15/in Okategoriserade

This manual is intended for students who have a NAIS certificate off recommended study support during on campus-examinations (including Inspera examinations). The recommended study support may include, for example, extended writing time or sitting in a separate room.

When you register for an on campus-examination in Ladok for students, you simultaneously apply to use your recommended study support. This manual describes how to do this.

Apply to use your educational support during an on campus examination, step by step:

  1. Log in to Ladok for students with your UMU ID and password: www.student.ladok.se
  2. Your home page will show whether there are any examinations open for registration. Click on the link “You have x examination open for sign up” to continue.

  1. Click on “Sign up” for the examination you want to register for.

  2. Select the study support you want to apply for during the examination. Check the box in front of each type of support you want to apply for and then click Confirm. This means that you are both registering for the exam and applying to use your selected study support.

  3. On the start page, you will see that you are registered for the examination and that your application for study support has been submitted. You can also click on “Examination” in the menu on the right to see the examinations you are registered for.

    If you have any questions about your application before it has been decided and finalized (see point 6), contact the person at your department who is the contact person for students with disabilities. Contact details can be found on this page: Contact person for students with disabilities (umu.se)

  4. Once your application has been decided and finalized, you will receive a notification via email. In Ladok for students, you can read more about which study supports have been granted or not, as well as any notifications. Click on “Show more” to view the information.

https://manual.umu.se/wp-content/uploads/2018/02/manual-loggo.png 0 0 Maria Bek https://manual.umu.se/wp-content/uploads/2018/02/manual-loggo.png Maria Bek2025-08-15 12:58:422025-08-15 12:58:42Apply to use your recommended study support

Identification at Umeå University

2025-06-27/in Okategoriserade

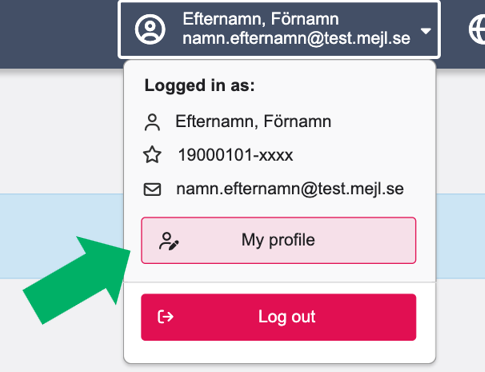
Identification is required for account activation, password changes, trust level elevation (AL level), and resetting Multi-Factor Authentication (MFA).

AccessLevel (AL) 2 is currently required for individuals with a Swedish personal identity number when logging into Ladok.

The following functions can be used for identification: account activation, password change, trust level elevation (AL level), and reset of Multi-Factor Authentication (MFA).

Option 1: Electronic ID

You identify yourself using a Swedish e-identification.

We support Bank-ID and FrejaID+.

Freja eid is also possible to use for citizens in 167 countries, see this manual Activate Umu-id account with Freja+ – Manual

Applicable for:

  • Account activation
  • Password change
  • Trust level elevation (AL level)
  • Resetting Multi-Factor Authentication (MFA)

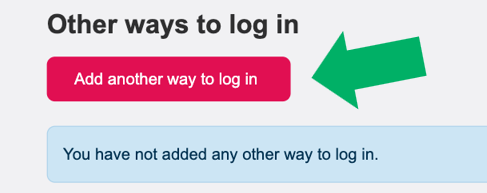
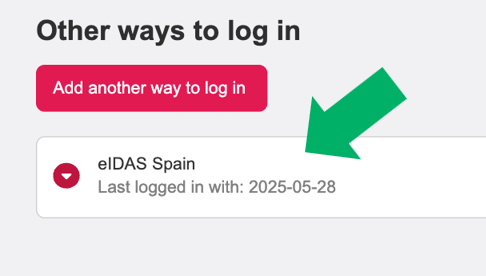
Option 2: Foreign Electronic ID (eIDAS)

You identify yourself using a foreign e-ID.

This works for the following countries: Belgium, Cyprus, Estonia, France, Italy, Croatia, Latvia, Liechtenstein, Lithuania, Luxembourg, Malta, Netherlands, Poland, Portugal, Slovakia, Slovenia, Spain, Czech Republic, Germany, and Austria. (more countries will be added)

You use the respective country’s e-ID; some countries offer multiple e-ID options.

Applicable for:

  • Account activation
  • Password change
  • Resetting Multi-Factor Authentication (MFA)

Option 3: Visit the Service Desk

Visit the service desk and present valid identification.

We accept the following IDs: Swedish passport, Swedish national ID card, Swedish driver’s license, Swedish SIS-marked ID card, ID card for residents registered in Sweden, National ID card from the EU, International passport.

Applicable for:

  • Account activation
  • Password change
  • Trust level elevation (AL level)
  • Resetting Multi-Factor Authentication (MFA)

Option 4: Two-Party Call (Students Only)

Identification is done through a two-party call with a service desk employee.

A case is created via https://umu.se/servicedesk.

A high-resolution copy of a valid passport must be attached to the case.

The service desk will schedule the call.

During the call, the same ID must be shown and readable.

Applicable for:

  • Account activation
  • Password change
  • Resetting Multi-Factor Authentication (MFA)

Note: This method lowers the trust level to level 1.

Option 5: Three-Party Call (Employees Only)

Identification is done through a three-party call with a service desk employee and a trusted party at the university.

The trusted party must be a university employee with trust level 2 and have personal knowledge of the user.

A case is created via https://umu.se/servicedesk.

A high-resolution copy of the user’s valid passport must be attached.

The user identifies a trusted party and informs them.

The service desk schedules the call.

During the call, the same ID must be shown and readable.

The trusted party is identified remotely via a code sent by the service desk and confirmed at https://administrationsverktyg.umu.se/Konto/LoginVerification.

The trusted party’s UMU ID is registered and confirmed in account administration.

Applicable for:

  • Account activation
  • Password change
  • Trust level elevation (AL level)
  • Resetting Multi-Factor Authentication (MFA)

Option 6: Utility Bill (Students Only)

Identification is done by confirming your address through a utility bill that matches the address in our system.

Examples: electricity bill, water bill, gas bill.

A case is created via https://umu.se/servicedesk.

A copy of the utility bill must be attached.

Applicable for:

  • Account activation
  • Password change
  • Trust level elevation (AL level)
  • Resetting Multi-Factor Authentication (MFA)

Option 7: Activation Code by Mail (Students Only)

Identification is done by confirming your email against the one previously registered in our system.

An activation code is sent to the registered email.

Note: This method lowers the trust level to level 1.

Applicable for:

  • Account activation
  • Password change
https://manual.umu.se/wp-content/uploads/2018/02/manual-loggo.png 0 0 Patrik Lindahl https://manual.umu.se/wp-content/uploads/2018/02/manual-loggo.png Patrik Lindahl2025-06-27 11:25:042025-11-14 08:34:52Identification at Umeå University

Reset computer to factory settings

2024-09-20/in Employee, Okategoriserade

Detta är en kort sammanfattning för återställning av dator innan den skickas till återbruk.

Read more
https://manual.umu.se/wp-content/uploads/2018/02/manual-loggo.png 0 0 Linus Marcusson https://manual.umu.se/wp-content/uploads/2018/02/manual-loggo.png Linus Marcusson2024-09-20 15:09:282025-12-10 08:44:02Reset computer to factory settings

Send and collect responses with your form in Forms

2024-08-06/in English, Okategoriserade

Send and collect responses

When you are done with the form and ready to collect responses, do this.

  1. Click Collect Responses
  2. Start by choosing who should be able to respond to your form. (For more settings see: Adjusting the settings in Forms). There are three different options:
    * Everyone Can Answer – use if you want everyone to be able to answer your form/test. This option ensures that all participants are anonymous and does not require a login.
    * Only people in Umeå University can reply – use if you want everyone with an Umu ID to be able to reply. This includes both students and employees.
    * Specific people in Umeå University can answer – use if you want to select some specific people or a group to answer. Umu ID is required for this option.

Select distribution method

Step 2 is about choosing how you want to share your form. You can share your form in three different ways. Via invitation to a team or email, QR code and embed code.

Share with link

  1. Click the Invitation to share via link. (default setting). With this you can directly write a message that is sent out together with the link either to a team or via e-mail.
  2. You can also choose to copy the link and paste it where you want the respondents to be able to access the form.

Share with QR code

  1. Click the QR icon to share via QR code.
  2. Click Download to download the QR code as an image. (e.g. paste into PowerPoint).

Share with embed code

  1. Click the embed icon to share forms by embedding on a website (eg Canvas).
  2. Click Copy to copy the embed code.
https://manual.umu.se/wp-content/uploads/2018/02/manual-loggo.png 0 0 Elin Sköld https://manual.umu.se/wp-content/uploads/2018/02/manual-loggo.png Elin Sköld2024-08-06 13:28:512025-08-14 16:13:57Send and collect responses with your form in Forms

Size of email attachments

2024-08-06/in Email, Employee, Okategoriserade

Information on how big files you can send via email.

Read more
https://manual.umu.se/wp-content/uploads/2018/02/manual-loggo.png 0 0 Erik Öhman https://manual.umu.se/wp-content/uploads/2018/02/manual-loggo.png Erik Öhman2024-08-06 13:20:002025-11-03 08:13:15Size of email attachments
Page 1 of 41234

Contact ITS Service Desk

Create a support ticket at www.umu.se/servicedesk, call 090-786 63 00 or visit us next to Infocenter.

Kategorier

Scroll to top Scroll to top Scroll to top