
Programfolder in the template tool
This page explains what is important to consider when creating a programme folder in the template tool, as well as how to use the template step by step. The template is called “Programfolder” in the template tool. The template is designed to create a physical printed programme folder that presents and promotes the programme to prospective students. You do not need any special permissions to use the template.
About the Folder
Format: The printed folder becomes an A4 sheet folded twice. Content is printed on both front and back. In the step-by-step guide below, each page’s function and suggested content are described.
Number of pages: The folder has a total of 6 pages with different types of content.
About the content: The content should resemble the structure and tone of the programme page on the education website. It should be simple, credible, and motivating for the target group: prospective students. The content should inspire them to read more about the programme online. Read more about content guidelines here: https://umeauniversity.sharepoint.com/sites/webbredaktor/SitePages/Inneh%C3%A5llsguide-f%C3%B6r-utbildningswebben.aspx
Find the template: Log in here (link: https://umu.bmc.nu/System/) and open the document template “Programfolder” in the template tool. Choose english as your language under “My user account”.
Front
This page becomes the folder’s front cover. It displays the programme name, structure, and a suitable image.
Step by Step
- Select language, organisation, and background color in the top module. Depending on the organisation you choose, the logo will change.
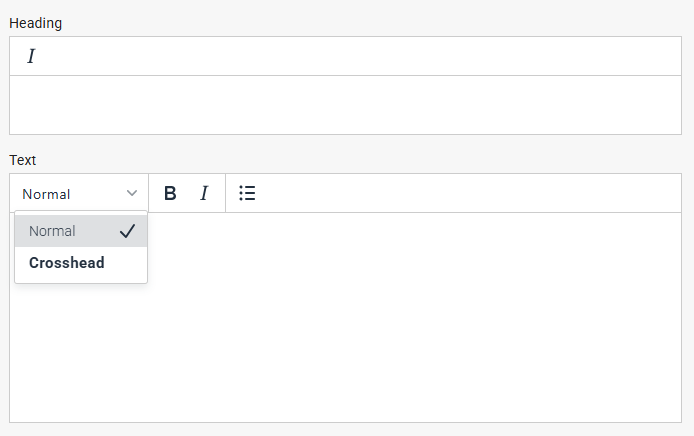
- Enter the name of the programme in the heading field.
- Keep the heading short.
- In the subheading, you can add a specialization or a natural continuation of the name.
- Example:
- Heading: Bachelor’s Programme in Sports Science
- Subheading: with a specialization in strategic leadership and development
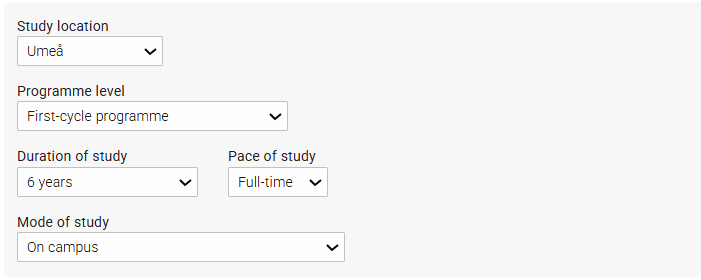
- Select study location, duration of study, and pace of study. (Note that the number of credits is affected by both duration of studies and pace of studies.)
- Select programme level and mode of studies.
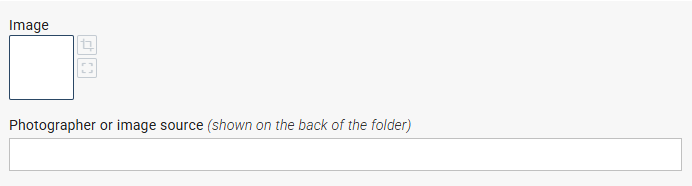
- Insert an image (fills the page below the top module). Read more about inserting images: https://manual.umu.se/en/insert-an-image-in-the-graphic-design-tool/
- Considerations for image selection: Our Visual Language
- Click the image field to choose an image from the Media Bank.
- Crop if needed (the image has fixed dimensions, but you can adjust which part is visible).
- Specify photographer or image source (appears on the back page).
Fold-in flap
This page is visible when the folder is first opened. It consists of an image at the top and 1–3 modules with strengths and/or quotes. When fully unfolded, this page is placed on the far right of the back side. The purpose is to quickly give a positive impression of the programme and highlight its main qualities.
What is a “strength”?
It can be opportunities for internships, work during studies, hands-on learning, study abroad options, elective courses — anything that creates value for the target group. Highlighting 1–3 selected strengths helps prospective students quickly understand the program’s profile and advantages. These should not be perceived as a complete description, but rather as a selection of the program’s most attractive or unique qualities. Read more about strengths here: Styrkor med programmet
The quote serves as a validation that the strengths presented are true in practice.
Step by Step
- Select number of module rows (max three). Each row can have one wide module or two smaller ones.
- Select a module row and edit it.
- Choose number of modules per row (1 or 2).
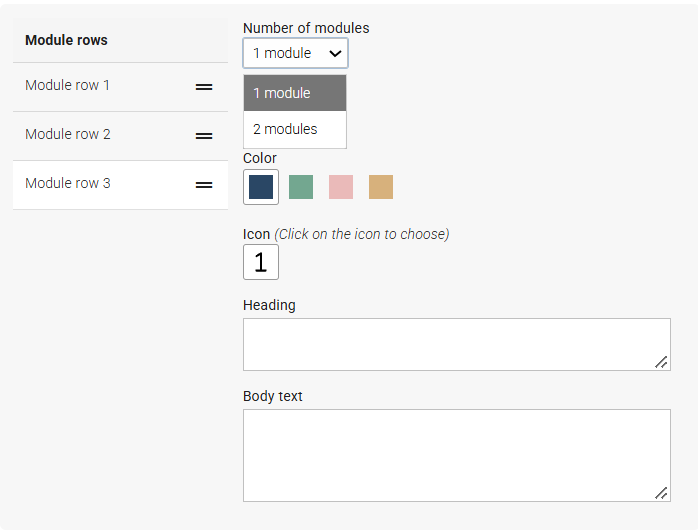
- If two modules: edit the first in the top field and the second further down.
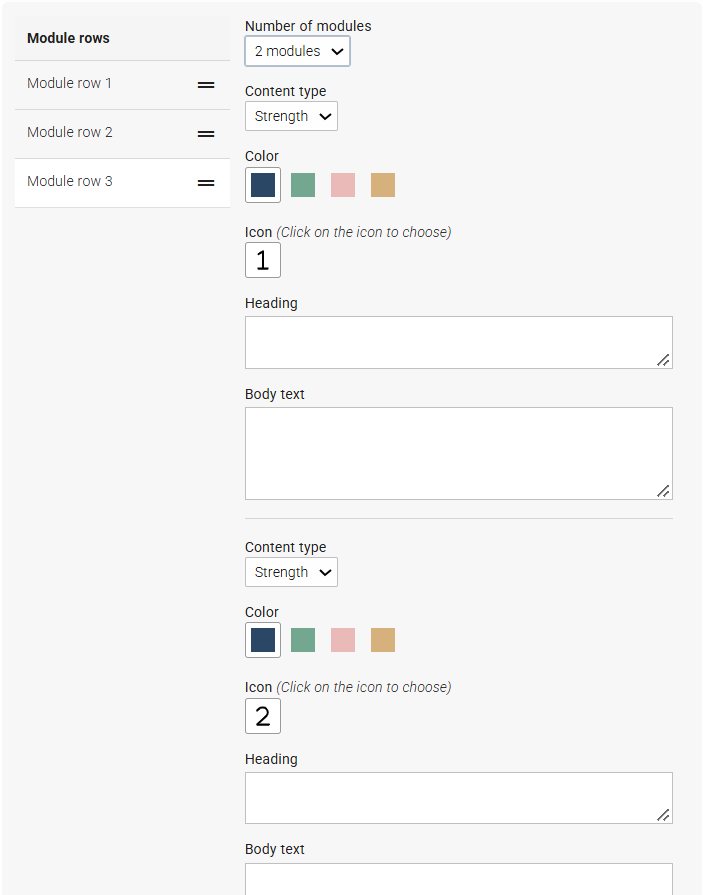
- Choose content type: strength or quote.
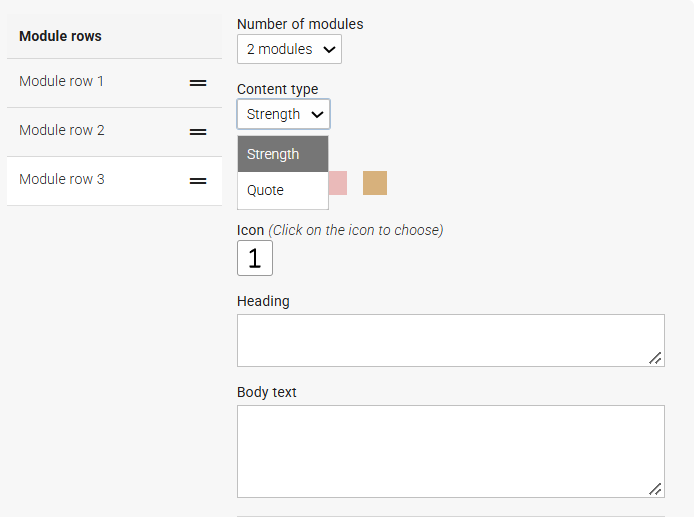
- Strength
- Choose color (module background color)
- Choose icon
- Write a short and concise heading
- Add a short and concise body text (optional)
- Quote
- Choose color (module background color)
- Write the quote (text becomes italic with quotation marks automatically)
- Specify quote source (name, role, or both)
- Image
- Click the image field to choose an image from the Media Bank
- Crop if needed
- Specify photographer or image source
- Write heading and body text (text appears on the image)
- Gradient behind text can be turned off. Consider readability.
Edit all your modules according to the instructions above. Updates appear in real time in the preview.
Inside Left & Center
These two pages together present the program’s content, structure, and opportunities. Keep the layout airy with paragraphs, subheadings, and elements that break up the text. The spread has two columns in total, one column per page.
Consider answering:
- How does one study in the programme?
- What careers can graduates pursue? How does the programme connect to real-world roles?
- What makes the programme special or particularly interesting? Exchange opportunities? Extensive practical components?
Step by Step
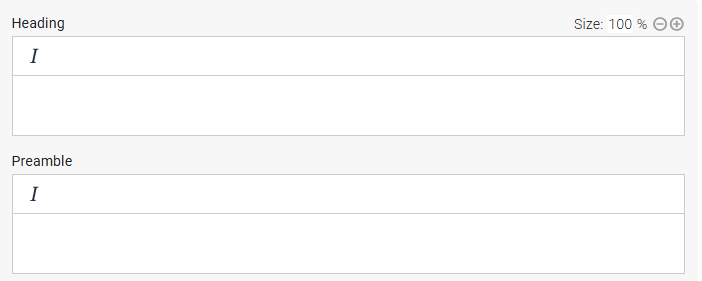
- Write the main heading (appears across both pages). You may draw inspiration from the programme page online.
- Write a short preamble. The text is slightly larger than body text. You can use italics if you like.
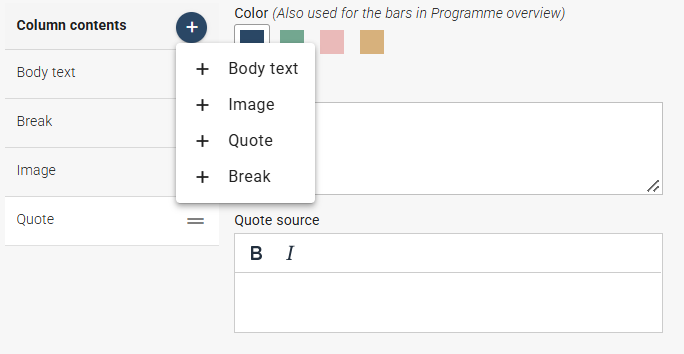
- Insert all your content. A column with body text is included by default. If you add more text than fits in one column, it flows into the next. Under the plus sign in the blue box, you can add different column content types. They appear in a list where you can reorder them by dragging the two lines on the right.
Column content types available:
- Body text
- Image
- Quote
- Break
Body Text
To place an image or quote at the correct position, you may need to divide text into different column content blocks. In this block för body text, you can write a crosshead, body text (normal), and bullet lists.
- Write crosshead
- Write body text (normal)
- Add bullet list if needed
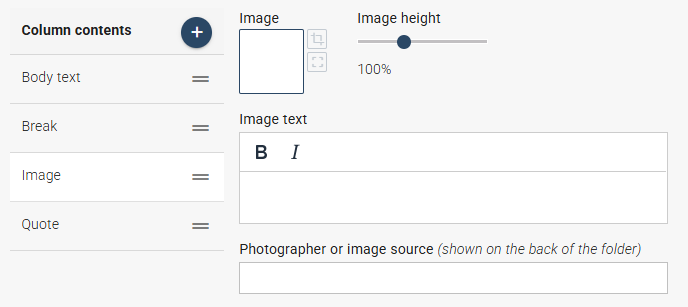
Image
- Click the image field to choose an image from the Media Bank
- Crop and adjust height if needed (image width is standardized)
- Write image text (appears as smaller text below the image)
- Specify photographer or image source
Quote
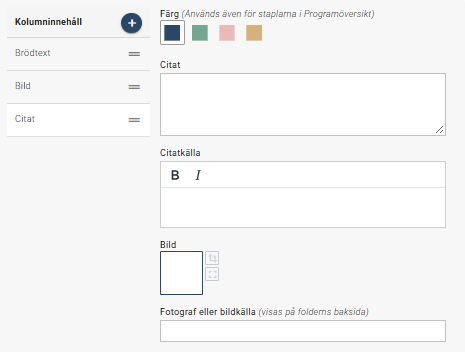
This block allows you to insert a quote that visually breaks up the page. Choose a quote from a current student or alumnus that reinforces the content.
- Choose text color
- Write the quote (italic + quotation marks automatically)
- Specify quote source (e.g., Name Surname, student/alumnus)
- Would you like to include a photo of the person quoted? Click the image field to select an image from the Media Bank. Then enter the photographer’s name or image source. The image will be displayed in a smaller, circular crop alongside the quote.
Column Break
You can manually force text to continue in the next column using the column break module.
Inside Right
Here you choose between two page types:
- Programme overview (horizontal percentage bars)
- Image panel (full-page image with headline and short text)
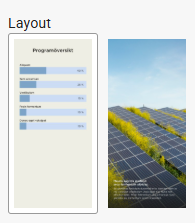
If you have a programme overview on the website, you can use it here. Note that if the overview has few bars, the page may look empty.
Programme Overview
Provides a quick overview of the program’s content.
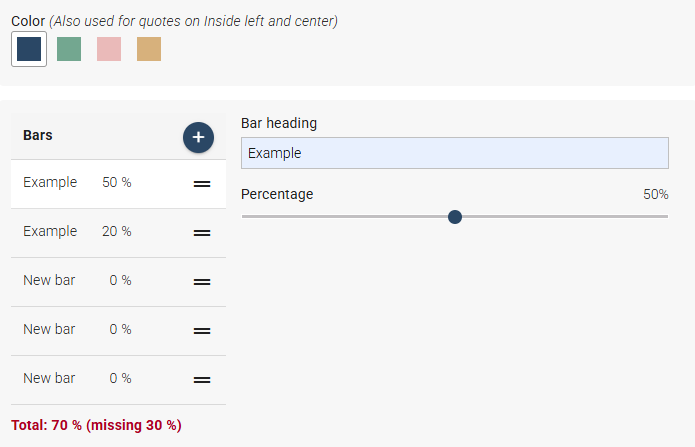
- Choose bar color
- Add number of bars (max 10)
- Specify bar heading and percentage for each bar.
A red text indicates if the total exceeds or falls below 100%.
- Below the programme overview, you have the option to add body text, an image, and a quote. This can be useful if the programme content needs further clarification regarding elective courses, specialisations, or similar topics. If the programme overview is relatively brief, you can also use this content to make the page more visually appealing. Please note that the content below the programme overview should relate specifically to the programme content, as the overall heading of this page is Programme Overview.
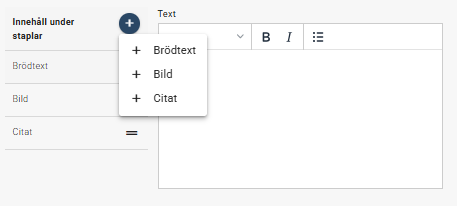
Image panel
This page type uses an image, headline, and short text to convey a strong sense of the program.
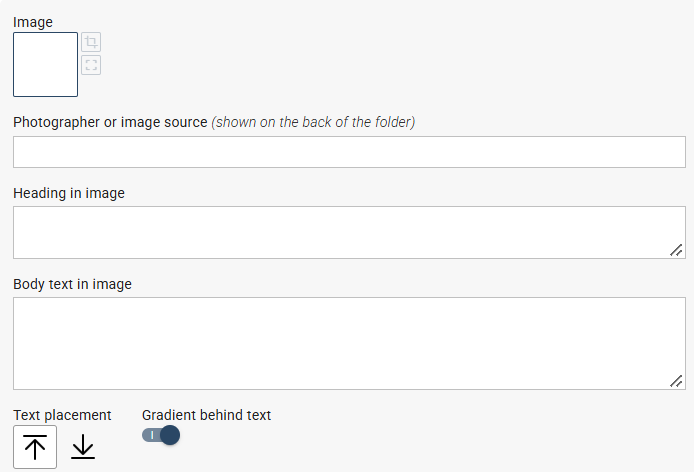
- Click the image field to choose an image from the Media Bank (preferably portrait format)
- Specify photographer or image source
- Write heading (appears on the image)
- Write short body text (3–4 lines, appears on the image)
- Adjust text placement with arrows if needed
- Gradient behind text can be turned off. Consider readability.
Back
This is the folder’s back cover when folded. Highlight briefly why one should choose the programme.
Step by Step
- Write heading (e.g., Why should I choose Programme X?)
- Add a bullet list with the program’s main advantages
- Add short text if needed
- Finish with contact information
- Subheading: Contact
- Body text: role, programme, email and/or phone number
A QR code linking to umu.se/utbildning is placed on the back. It cannot be changed or removed.
Sign in to a computer managed by Intune
Denna manual beskriver processen att logga in på en Windows-dator som är klienthanterad med Intune.
Subscribe to a TimeEdit schedule
There are two different methods to bring bookings from TimeEdit into your calendar application: subscription and import.
- Subscription means that bookings in your calendar are updated when they are updated in TimeEdit, and past bookings are removed.
- Importing a static schedule means you will no longer receive updates, but the bookings become part of your calendar and are not removed.
Login to TimeEdit
From June 24th, you will log in to TimeEdit with your UMU-id for both Core and Exam. Exam will also have a new web address.
- Direct link to Viewer/Reserve (regular TimeEdit): https://cloud.timeedit.net/umu/web
Direct link to Core: https://core.timeedit.net/umu
Direct link to Exam (new address): https://exam.timeedit.net/umu
Common link for all TimeEdit modules: https://www.timeedit.net/umu - Choose Sign in with UMU-id

- After logging in, you will see all profiles linked to your user. Choose the profile you want to use:

- “Användare” = User
Provides access to Viewer (schedule viewing) and Reserve (room booking and simplified scheduling). - “Avancerad användare = Advanced user
Provides access to Core (scheduling client), if you have completed the training, and also Viewer and Reserve. - “Tentamensbeställare” = Exam requester
Provides access to Exam for requesting written exams. - “Tentamensvärd” = Exam supervisor
Provides access to Exam as an exam supervisor.
- “Användare” = User
- If you use a direct link, you will go directly to the module. If you use the common link, you will be taken to a page where you can choose which module to open. If the profile only has access to one module, you will be taken directly to it.

Register scholarly publication in DiVA
This is a manual for registering a publication in Umeå university’s publication database (DiVA).
Import publications
If your publication is indexed in a database you can import it to DiVA instead of registering the information manually. See separete instructions:
Register in DiVA
Is the publication already registered?
Please start by searching DiVA on the publication title. If the publication is already registered, you can edit or add information to the record. If you can’t access the record, contact the DiVA administrator at your department or the library.
Begin to register
To register a new publication in DiVA, do the following:
- Sign in to DiVA with your UMU ID.
- Choose the entry “Add publication / Upload files”.
- Select publication type.
Mandatory fields are marked with a red asterisk (*). Some fields have a red question mark – if you hover over the question mark, you will see a help text for that field.
Remember that you can always pause and save an incomplete registration to pick it up later, by clicking “Cancel / Save draft”. Your saved drafts can be found under “My drafts”.
How to register an article
If the article has a DOI, you can easily fetch the information needed by entering the DOI in the field “Get information with DOI-number” on the top of the page.
Check/edit the information in DiVA:
Subcategory
Specify a subcategory if the article is an Editorial, Letter, Meeting abstract, or News item.
Author
Fill in all author names, in the same order as in the article.
Click on “Connect authority record” for each author – if the author has an authority record in DiVA, information such as organisation, email, ORCID, and year of birth will be filled out automatically. If the author does not have an authority record, you can fill out the name, UMU ID and organisation and select “Create authority record”.
Click the button “Another author” to register more than one author. The Other contributor option can be used if there is an UMU-affiliated collaborator/contributor in the publication.
Organisation
The affiliation in the article is the affiliation(s) you select as department, unit, or program. If an UMU-author has multiple affiliations in the article, they should also be stated in the record. If an UMU-affiliated author also has an affiliation to another organisation, you state that in the field “Other organisation”. Authors not affiliated to UMU do not require stated affiliation in the record.
Title
Enter the title and any subtitle and select the language of the title.
Content type
Select the content type of your work:
- refereed
- other academic
- other (popular science, discussion, etc.).
Status
Select the status of your work (“published” is preselected):
- published
- accepted
- epub ahead of print
- in press
- submitted.
Part of journal/conference
Begin by entering the title or the ISSN of the journal in Part of journal and select from the list displayed. The journal selected is then displayed under the box. If the journal is not in the list, fill in all the details under “Other journal”.
If you are registering a Meeting abstract – fill out the Conference Title, Place and Country/other, Date, Year.
Fill out the year, volume, number, article-id/pages under “Other information”.
Identifiers
The DOI should (if available) be stated in the DOI field, where it links to the article. If the link leads to a free full text, you tick the box “Free full-text”.
If there is no DOI, you can use the URL field to link to the article. In this case, write the URL in the URL label field. If the link leads to a free full text, you tick the box “Free full-text”.
National subject category
The national subject categories in DiVA correspond to those in the national reference database Swepub and increase the search- and findability of a publication. Please choose a category as specific as possible – the above category in the subject tree will automatically follow.
If you are unsure about the subject category, you can use the function “Suggestion for national subject category”. Then you can copy the suggested subject category and select it under “Choose national subject category”.
Research subject
Research subject is mainly used for doctoral theses.
Keywords, project, and abstract
Allocating keywords and abstract helps others find your publication. Please note, that keywords are to be separated by commas.
If the publication is a part of a project, enter the name of the project in the field “Part of project”.
Research funder
If the publication is a part of a research project that is supported by a research funder with an open access policy, select the funder from the list and enter the project number.
How to register other publication types
The fields used when registering an article are the same that are found when registering other publication types. There are, however, some other fields to consider in addition to those previously covered:
Artistic output
Fill in information about
- contributor (one or more) – also state role (artist, photographer, editor, etc.)
- alternative title (for example in another language)
- type of resource (image, audio, text, etc.)
- description (time, place, context, etc.).
Book
Fill in information about
- edition
- number of pages
- series, and number in series
- publisher
- ISBN or other identifiers.
When registering a book, there are a number of options for Other contributor (photographer, illustrator, etc.). If the series is not available in the list, enter the title, ISSN, and number in the series under “Other series”.
Chapter in book
Fill in information about
- part of book
- edition
- pages
- series, and number in series
- publisher
- ISBN or other identifiers.
When registering a book, there are a number of options for Other contributor (photographer, illustrator, etc.). If the series is not available in the list, enter the title, ISSN, and number in the series under “Other series”.
Collection (editor)
Fill in information about
- editor
- edition
- number of pages
- series, and number in series
- publisher
- ISBN or other identifiers.
When registering a book, there are a number of options for Other contributor (photographer, illustrator, etc.). If the series is not available in the list, enter the title, ISSN, and number in the series under “Other series”.
Conference paper
If the conference contribution has been published as an abstract in a journal, please choose publication type Article with the subcategory Meeting abstract.
Published papers, oral presentations, and abstracts not published in a journal are to be registered as the type Conference paper.
Always fill out Conference title, Place and Country/other, Date, and Year.
If the contribution is published, also fill out
- part of proceedings
- pages
- series, and number in series
- ISBN, if published as a book/collection
- DOI or URL, if applicable.
If the series is not available in the list, enter the title, ISSN, and number in the series under “Other series”.
Manuscript
Usually not to be registered in DiVA. Exceptions are:
- manuscripts that are part of a thesis – only Author, Title, and National Subject Category need to be filled out
- manuscript available in full text in preprint servers, for example, ArXiv.org – in these cases, link to the preprint repository.
You cannot enter the year of publication for a manuscript.
Patent
Fill in information about
- country or patent organisation
- patent number
- date of approval.
Report
Fill in information about
- alternative title (for example in another language)
- number of pages
- series, and number in series
- ISBN
- ISRN.
Working papers are included in this publication type. If the series is not available in the list, enter the title, ISSN, and number in the series under “Other series”.
Student thesis
See separate instructions:
Register student thesis in DiVA (for students)
Administer student theses and degree projects in DiVA (for administrators)
Thesis
See separate instructions:
Uploading files
If you don’t want to upload a file, but merely register details about the publication, choose “Continue”.
If you want to make the publication available in full text in DiVA: please check that the publication has a CC-licence or that the publisher has granted full text publication in DiVA. If you only want to archive the full text, select the option “Only for archiving”.
Which version should be made available in DiVA?
Choose the correct version of the file – Submitted, Accepted, or Published.
When should the file be made available?
If you don’t choose a date for publication, the full text will be available in DiVA as soon as the library has reviewed the record.
Some publications can only be made available after a certain period of time (embargo). In that case, you can select the option “Make freely available later” and choose the date.
Type of file
Articles are to be uploaded as pdf.
Other publication types can be uploaded in other formats; image, audio etc.
Upload the file
Click the button “Välj fil” to upload the file.
Accept the publishing conditions
After you have uploaded the file, read through and accept the publishing conditions. If a file is only archived, you don’t need to accept the publishing conditions.
You can also leave a comment if you like us to contact you about something or if you have permission from the publisher to parallel publish the work in full text in DiVA.
Review/Publish
Before submitting your publication in DiVA, please review the registration:
- Check the details you have filled in. If you want to change something, used the link “Edit information” or click on “Back” to return to the form and make the necessary changes.
- When you are satisfied, click on “Submit”.
If you want the publication to be made visible on a specific day, you can set the date for publication in the Available from field before clicking “Submit”.
The registered record will be reviewed by the library. Uploaded files will not appear in DiVA until a librarian has reviewed the record and checked that the full text may be published.
Please note that it may take a day before the record is visible on your staff page.
Contact the library
Contact the library if you have any questions about DiVA. Select “Publishing, theses and research data” as the subject area.
Microsoft Authenticator FAQ
Common questions and answers regarding Microsoft Authenticator