
Insert an image in the graphic design tool
Settings may differ slightly between the different templates in the tool.
The form for the document template looks like this:
- Click the empty white box to select image and the following field will pop up:

- Under “Search”, you can search and select an image from the University’s image database, Mediabanken. The easiest way to search among available images is to go to Mediabanken, find the ID number and paste it in the graphic design tool search field. Always check that you have the right to use the image. You can also choose to upload your own image.
- After selecting an image, there are some settings you can make.
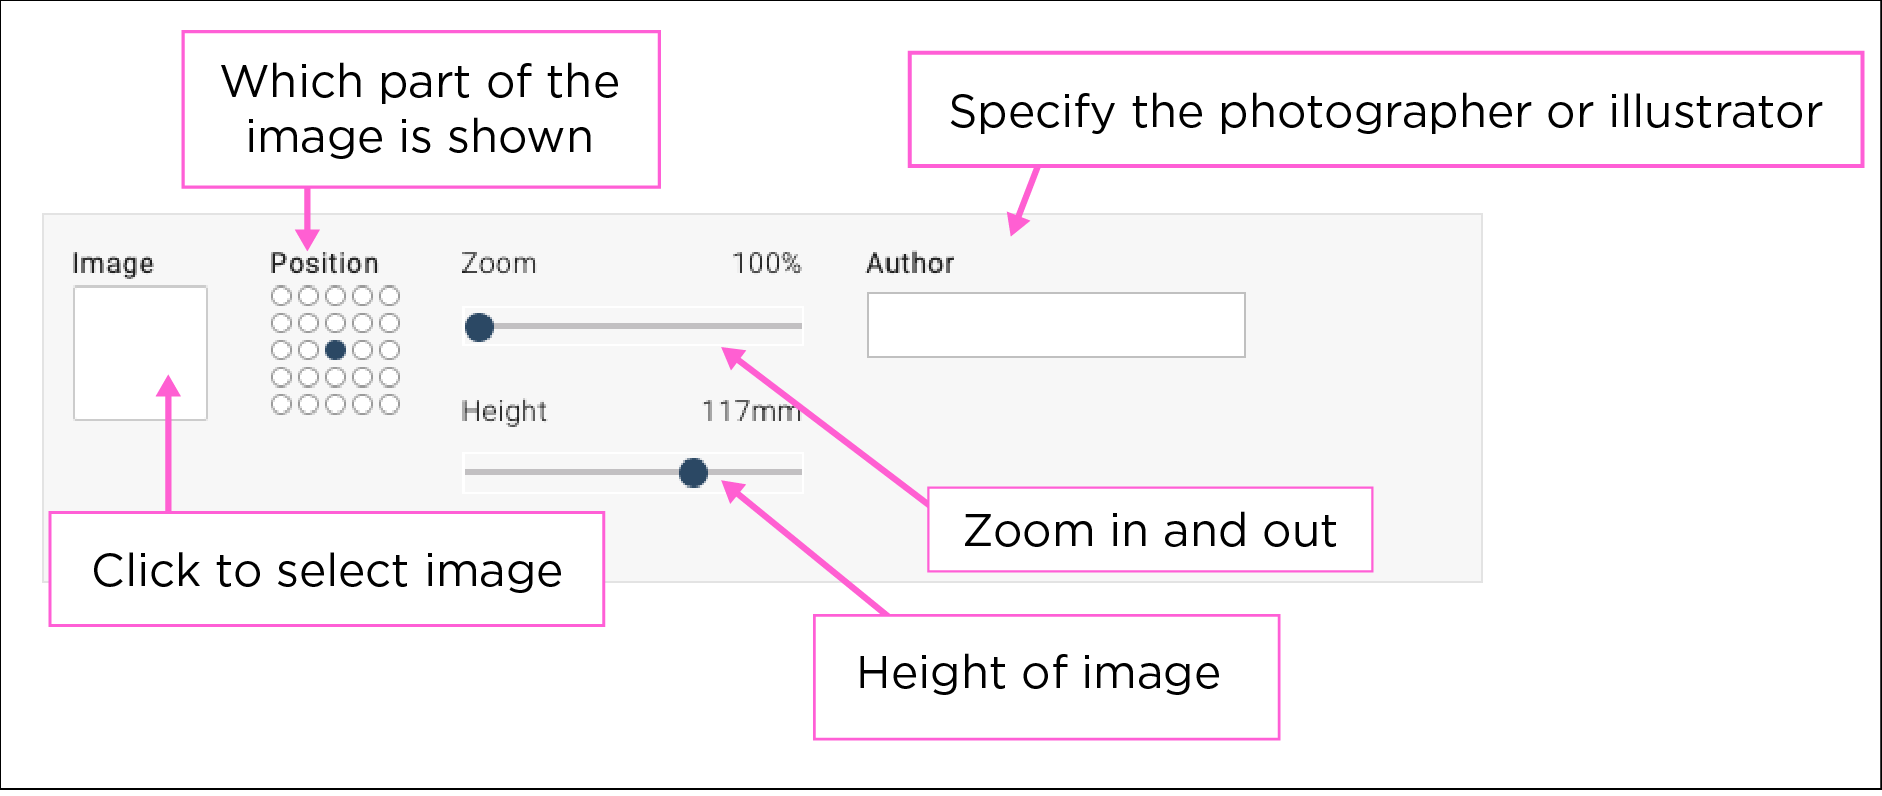
- “Position” determines what part of the image is shown. Try your way forward.
- “Zoom” allows you to zoom in and out of the image within the available area.
- “Height” is available in some templates and allows you to alter the height of the image.
- In the field labelled “Author”, you must specify the photographer or illustrator of the photo or illustration.