Book a group study room in TimeEdit as a student

To be able to log in and book, you must have a UMU-id and be registered for a course at Umeå University.

Log in via https://cloud.timeedit.net/umu/web/ and select Booking for students.

You can also use Mazemap to see what is available right now.

Then select Book group study rooms.

Start by filtering rooms. You can use free text search (1), filter (2) by Campus or Building. Click show filter (3) for additional filters if needed.

Under the search section and above the calendar is the date selector (4). The date range used in the calender is also displayed here. You can page backwards and forwards with the arrows. Click on the date to open the date selector. To the left you find buttins to switch between week or day view (5). You can also switch to day view by clicking a date in the week view.

Each row (6) in the Booking calendar represents a room and shows the availability for the room. A grey field (7) means that the room is occupied while white (8) means that it is available for bookning.

In the day view move the mouse cursor over the room and time you want to book. I green booking indicator is shown. Click to select the room and time. On mobile you can touch the screen where you want the bookning.

After you have clicked to select the room and time a bookning window opens. Here you can adjust the start and end times.

Select Reserve to complete the bookning.

Your booking is now complete and information about your booking is displayed. Under the heading “Confirmed,” the times between which you need to confirm your booking to keep it are indicated. You can also choose to send the booking via email.

Don’t forget to confirm the booking when it’s time to use the room!

Book a computer for a digital examination

During a digital examination in the writing hall, you have the option to book a computer to borrow.

Inspera – Sign off your submission

When an e-exam is signed off in Inspera, your submission will be removed from the system and cannot be recreated.

VIKTIGT

Make sure to download your submission, comments and marks before you sign off your submission.

Log in to Inspera and click on ”Archive” and then on ”See more details” for the exam that you wish to sign off.

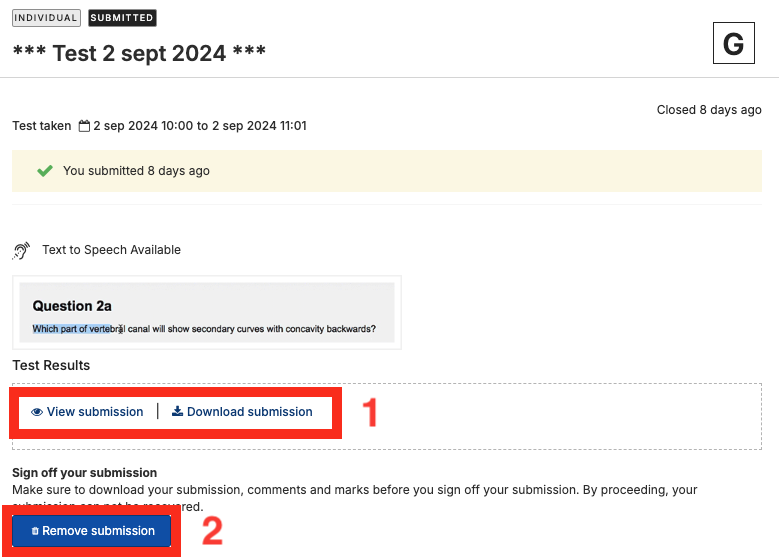
You can view your submission without downloading it by clicking the “View submission” button (1).

Download your submission as a PDF-file by clicking the ”Download as PDF” button (1).

Inspera - Sign off submission

Make sure to download your submission, comments and marks before you sign off your submission.

VIKTIGT

If you need to request a rectifying or reassessment of you exam, you should not sign off your submission.

To sign off your submission and remove it from Inspera. Click on the ”Remove submission” button (2).

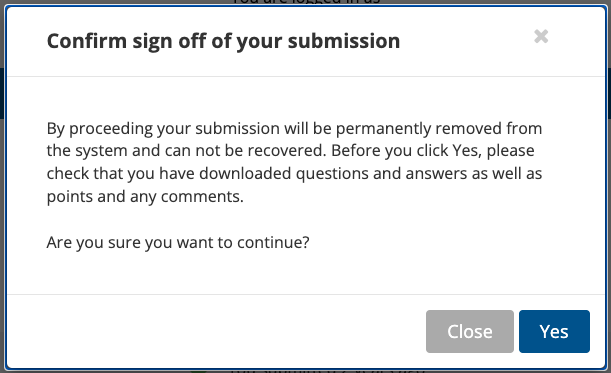
A dialog box will now open where you can confirm that your exam will be removed from the system.
Click “Yes” to confirm the sign off/deletion.

Create a booking site in Bookings

Bookings is a digital booking tool where you can both book other people’s services and create your own pages where people can book your services. For example, it can be tutoring times, counseling, meetings, or other services of your choice. Below you can see a description of how to create your own booking page. 

Go to the portal at o365.umu.se

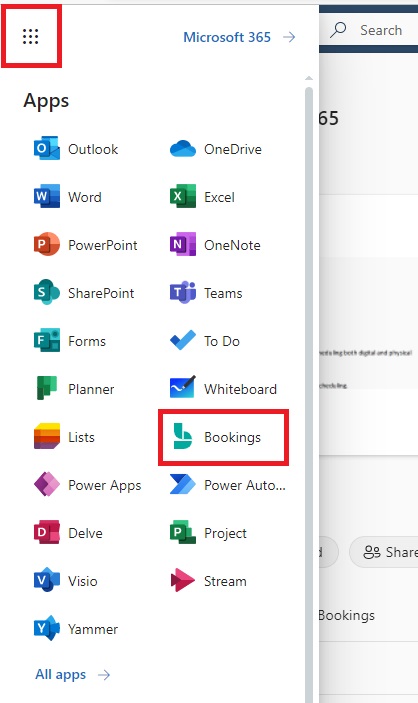
  1. Go to “the waffle” in the top left corner, and then click on Bookings.
    Image showing how to navigate to to Bookings
  2. Now, you are on the Bookings start page. To create a new booking site, click on Create.
    Image showing how where to create your booking site
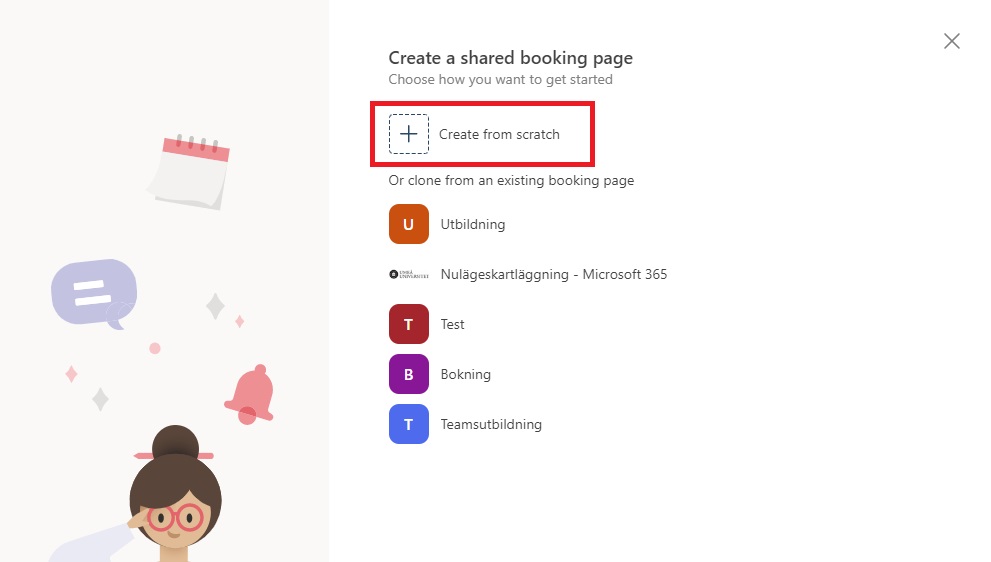
  3. Now you can choose if you want to create a new booking site, or if you want to clone an existing calendar (booking site). To create a new, you click on Create from scratch.
    Image showing how to create a new booking site
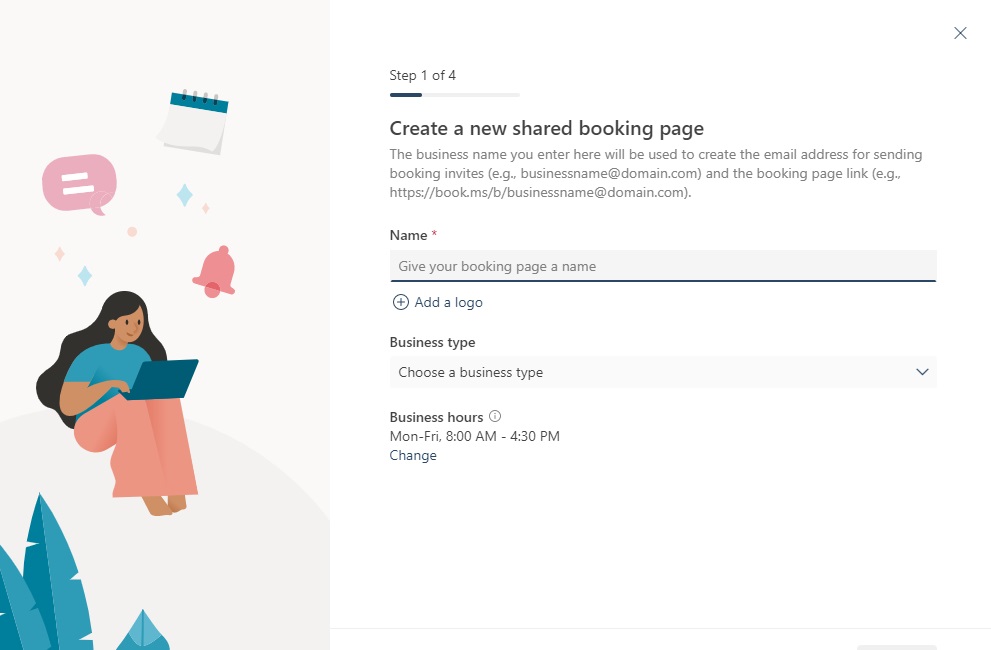
  4. Now you choose a name for your booking site, the display name can be changed afterwards, however, the address name cannot be changed, so remember that if you change the name on your booking site, only the display name changes. You can also add a logo that will be shown on the start page of your booking site. On “Business type” you choose whatever fits your service the most.
    Image showing how you enter the namne for the site
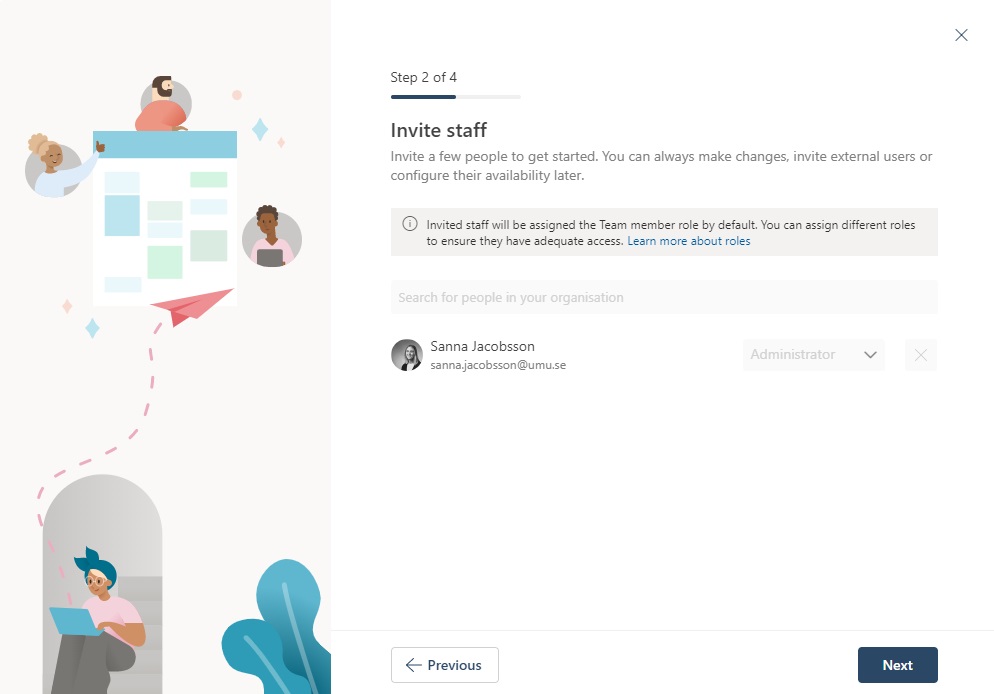
  5. Here you can choose if you want to invite another person to manage your booking site. In the search bar you can search for people in the organization. Afterwards, you can add more people that get access to the booking site. The one that creates the booking page, get the title: “Administrator”, and can manage and edit the site. The people you invite, is “guests”, and do not have the permissions. This can be changed when the site is created. You can also set up room and resources as staff if you want a booking calendar for them.
    Image showing how you can invite staff to your booking site
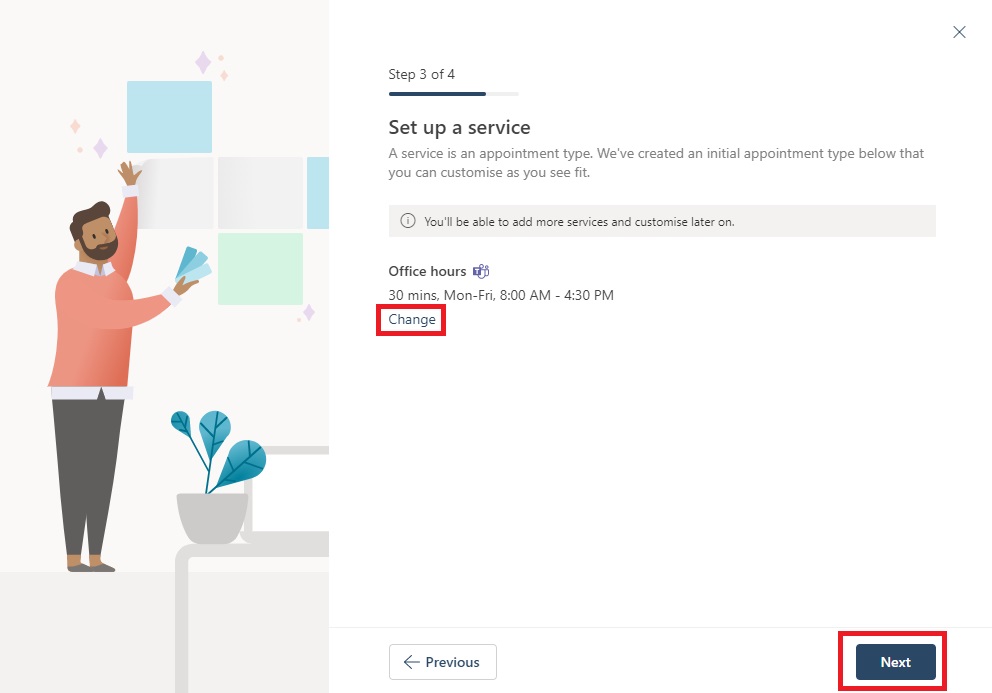
  6. Here you can adjust your times for your service. Click on Change if you want to change the pre set times. This can also be changed once you have created your booking site. Click on Next to continue creating the site.
    Image showing how you set up your times
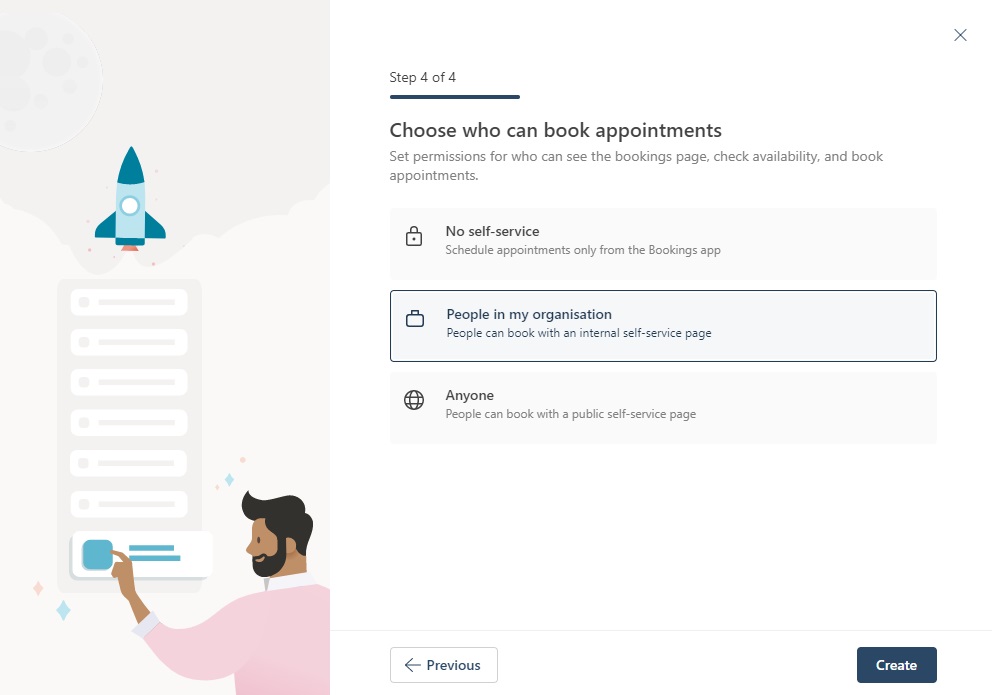
  7. Now you can choose who are going to be able to book your services. When you have chosen, click on Create.
    No self-service: This means that only staff can book appointments.
    People in my organization: This means that a Umu-id is required to be able to book.
    Anyone: This means that anyone can book your services both inside Umea University and externals.
    Image showing the alternatives for who can book
  8. Done! Now your booking site is created.

Show week numbers in Outlook

Manuals showing how to enable week numbers in Outlook.

Configure Outlook with an M365 account

Manuals that describe how to set up email in Outlook on different operating systems/devices.

FAQ Bookings

Add funds to Umu-print

This guide will help you add funds (Umu-print).

Please note: in order to add funds to your UMU-Print account, you must be connected to Eduroam or UmU-wlan


Follow the steps below:

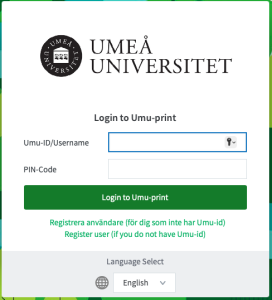
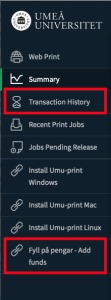
  1. Log in to https://print.umu.se:9192/app and click on “Add funds”.
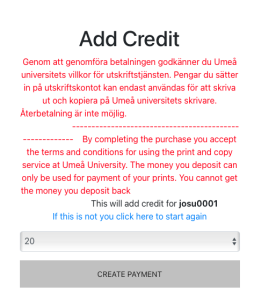
  2. Select the amount you want to deposit into your account.
  3. Fill in name and personal details.
  4. Fill in the card details and click “Pay”.
  5. Your transfer will appear as a balance in the printing system under “Transaction History”.
  6. Here you can see how much you topped up, current balance and your previous transaction history.

Create and edit authority records in DiVA

When registering a publication in DiVA, you can easily retrieve information about an author at Umeå University by searching for the author’s authority record and linking it to the publication. Since the authority record contains information such as name, UMU ID, ORCID and organisation, you don’t need to enter this information manually each time.

Edit your authority record

Log in to DiVA with your UMU ID. You can edit your authority record via the “My authority record” entry on the first page of the DiVA administration interface.

In your own authority record, you can add or change

  • year of birth
  • e-mail address
  • academic title
  • biography
  • links (e.g. to your website or blog).

You can also set whether you want your authority record to be hidden from public view. By default, the authority record is active and public. If you don’t want your record to be public, click on the small box next to “This record is searchable in the public search interface” at the top of the page under “Public authority record”.

You cannot change names or add names/alternative names. Contact the library if you, for example, change your surname.

Update the authority record from the registration form

When you register a new publication or modify an existing record, you can update your personal record directly in the edit form.

  1. Go to “Add new publication / Upload files” or find an existing record to edit.
  2. Enter your name or UMU ID under author.
  3. Link your authority record to the publication by clicking on “Connect authority record”.
  4. Fill in the information you want to change. The following are possible:
    • add alternative name forms
    • change year of birth
    • add an organisation (by clicking on “Select organisation” and searching or scrolling to the right department or unit)
    • change e-mail address.
  5. Click on “Update authority record”.

Create an authority record

If you don’t have an authority record in DiVA, you can create one when registering a publication. To create an authority record, you need to have either an UMU ID or an ORCID. You create the authority record when you register a new publication and enter your author details.

First, check if you have an authority record by entering your name or UMU ID and then click on “Connect authority record”. If you cannot find an authority record, click on cancel. Remember to fill in all author details before creating the authority record itself.

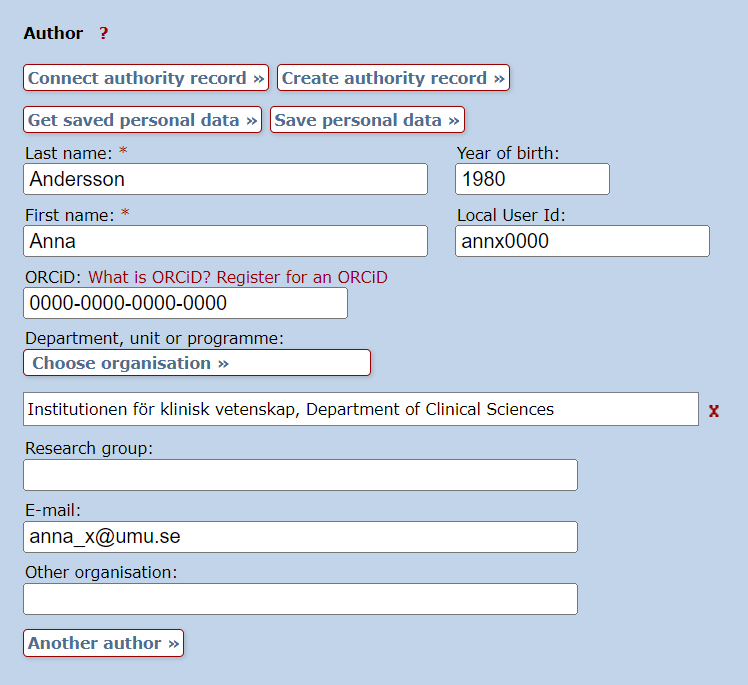
  1. Fill in the following information under author:
    • first name and last name
    • UMU ID
    • ORCID
    • e-mail address
    • organisation (choose from the list of organisations).
  2. Click on “Create authority record”.

Pre-filled information about an author in DiVA. The button Create authority record is above the fields.

You can edit your authority record according to the instructions above if you want to add information afterwards. Please note that you will need to log out and then log back in to edit your authority record via the “My authority record” entry on the home page.

ORCID

An ORCID is a persistent identifier (PID) linked to your person and distinguishes you from other researchers. Read more about ORCID and other identifiers for researchers:

Use an author ID

Contact the library

Contact the library if you need help making changes to your authority record and cannot edit it yourself. Select Publishing, theses and research data as the subject area.

Contact the library